
Contents
Sensor names and their associated alarm symbols and values are shown in different colourscolorsin the Live View window to indicate the current Sensor status:
Sensor Names
•A Sensor Name in light blue shows that the Sensor is In Service.
•A Sensor Name in dark blue shows that the Sensor is Out of Service.
•Letting the mouse pointer hover over a Sensor Name in the Live View Table (regardless of the alarm state of the Sensor) displays information in a popup window relating to the selected Sensor regarding Location, Channel Alarms, Date and Time, Serial Number, Battery, Sensor Status etc. See Figure 1057 below:
Figure 1057
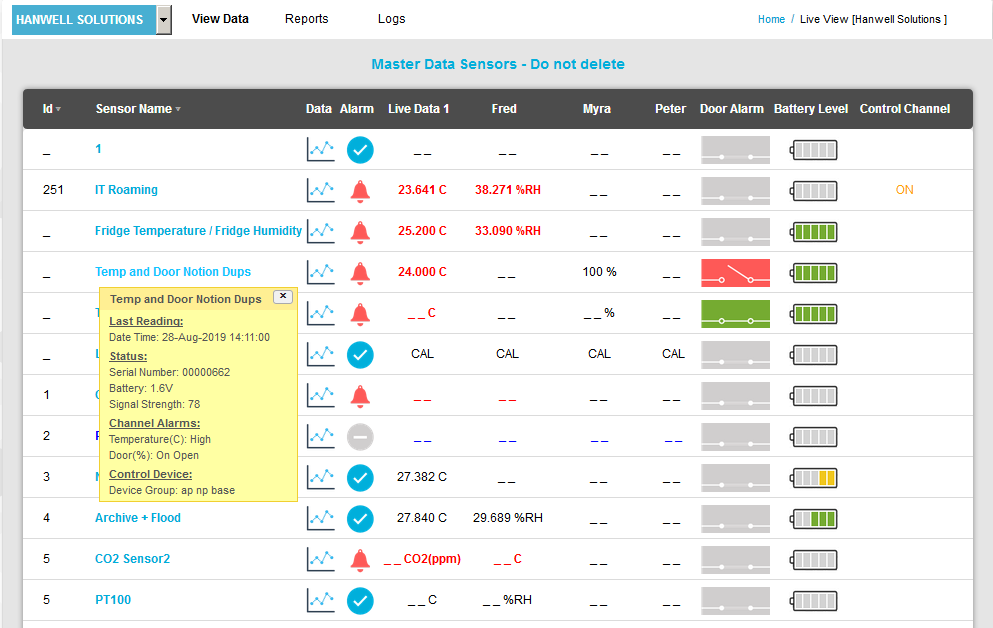
•Click on the x or move the mouse pointer away from the Sensor's Name to close the popup window.
Alarm Symbols
|
Sensor Out of Service. |
|
Sensor in Alarm state |
|
No alarms registering for Sensor |
|
Sensor in Alarm Acknowledged state |


If the Sensor is in an Alarm State:
Clicking once on the Sensor in Alarm State symbol on the Live View table displays the Acknowledged Alarm for [Sensor name] window. See Figure 1058 below:
Figure 1058
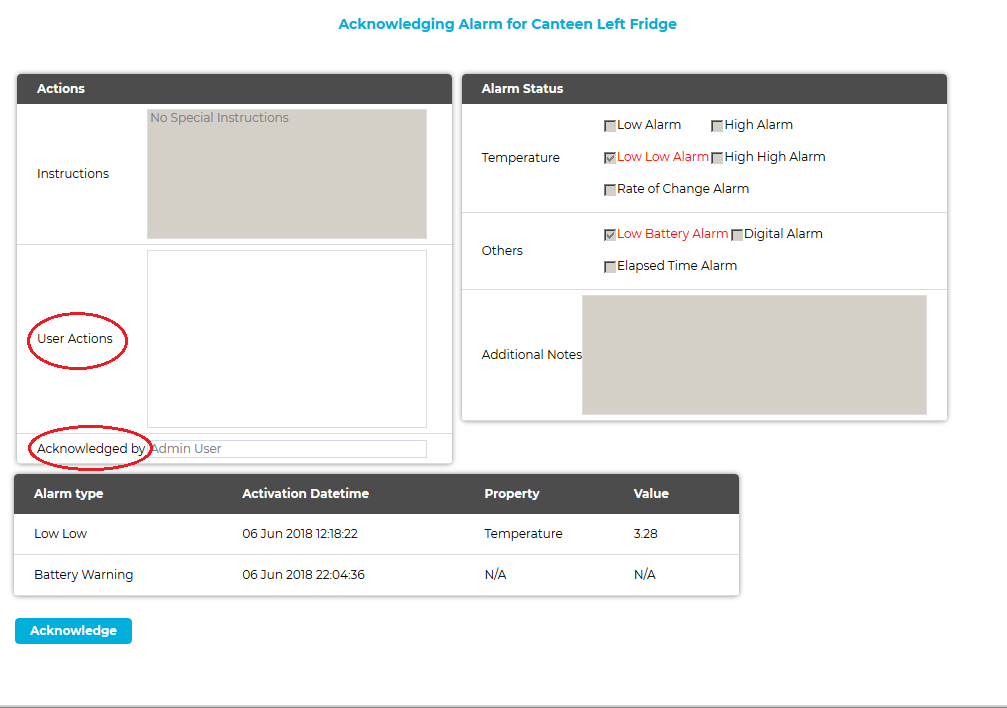
From this window, you can acknowledge the Sensor's alarm as follows:
1.Fill out the User Actions and Acknowledged by fields. See Figure 1058 above.
2.Click on the Acknowledge button.
If the Sensor is in an Alarm Acknowledged State:
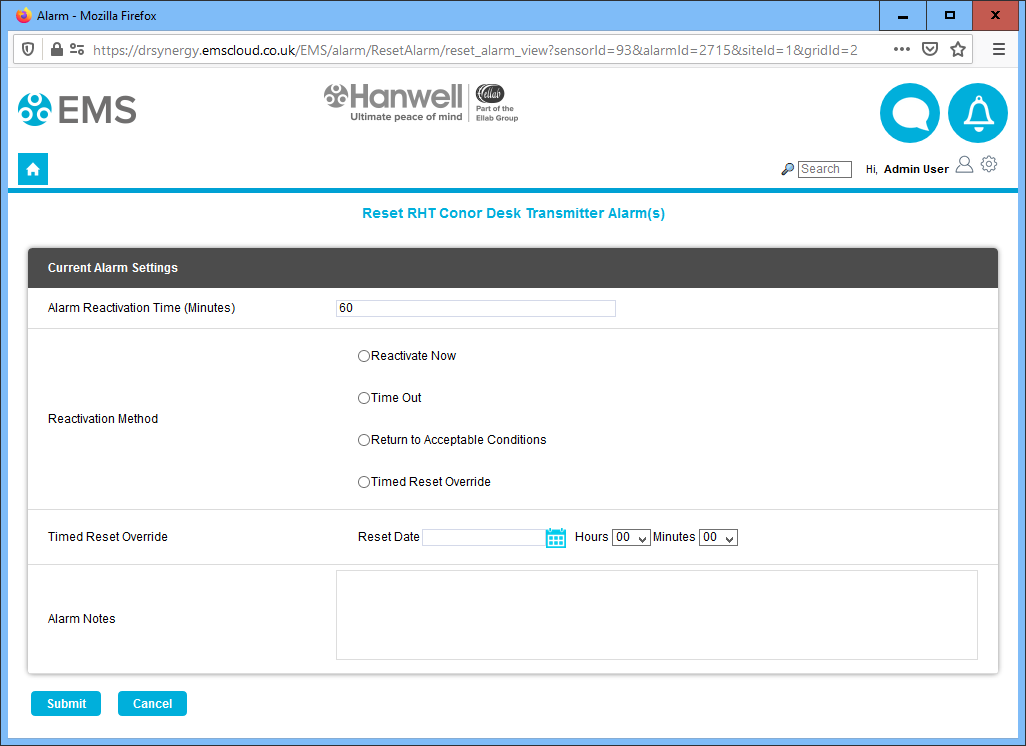
Clicking once on the Sensor's Alarm Acknowledged symbol on the Live View table displays the Reset Alarm for [Sensor name] [Alarm Type: ......] window. See Figure 1059 below:
Figure 1059
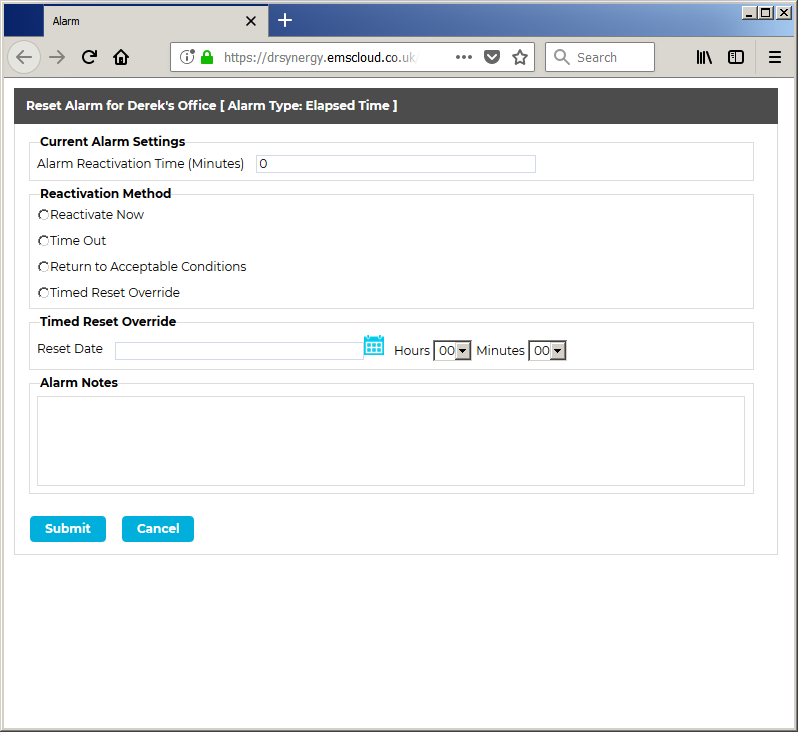
| Note: | If you are using a version of EMS prior to v1.0.12 (2.0.5 Compliant), the displayed window may look slightly different, but will contain the same functionality. See Figure 1060 below: |
Figure 1061
From this window you can reset a Sensor's alarm as follows:
1.Enter the relevant values for the reset into the window's Current Alarm settings and Timed Reset Override fields.
2.Check the appropriate radio button to select the required Reactivation Method.
3.Enter any required Alarm Notes.
4.Click on the Submit button.