
Contents
| Note: | Archived data can only be viewed after it has been restored using the EMSConfig Utility. |
•A User can only view a restored Archived database if they have the Access Archive Database Permission set.
This is a brief summary of the process and assumes a good working knowledge of EMS as outlined in this Online Guide.
There are two ways to assign User Access to the Access Archive Database Permission:
Either:
•Create a Role and assign the required users to the Group.
Or:
•Assign the required Permission to specific Users.
To Create a Role:
Refer to the Manage Roles section of this Guide:
Assigning Archive Access Permission to a Specific User
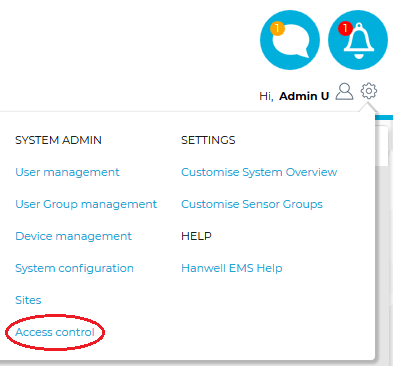
1.Login in to EMS as the Admin User on a browser. 2.From the System menu, select Access control from the SYSTEM ADMIN list. See Figure 1453 below: Figure 1453
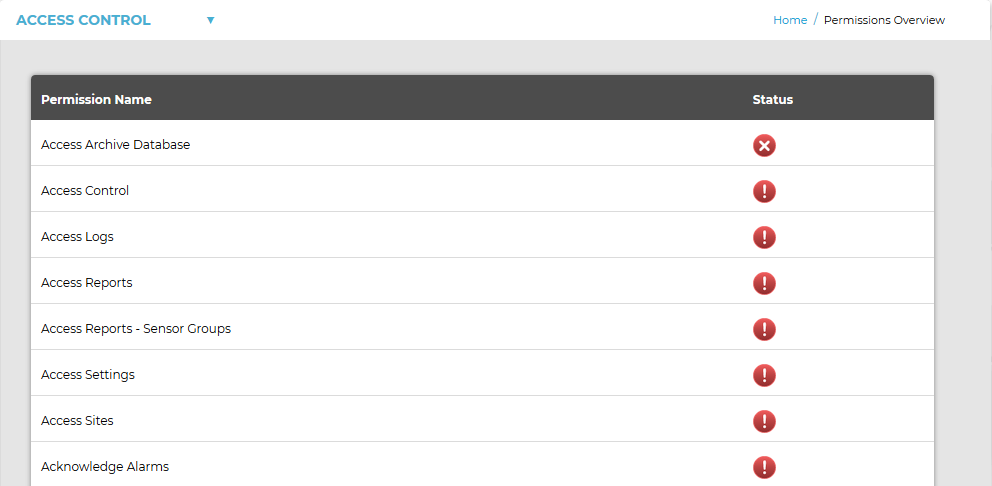
•The Permissions Overview window is displayed displaying a list of all available (Admin User) permissions. See Figure 1454 below: Figure 1454
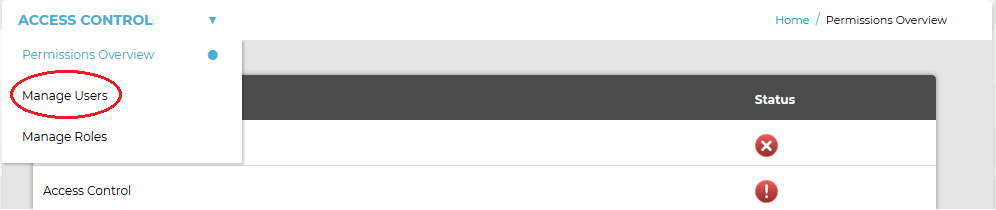
3.From the ACCESS CONTROL drop down menu, select Manage Users. See Figure 1455 below: Figure 1455
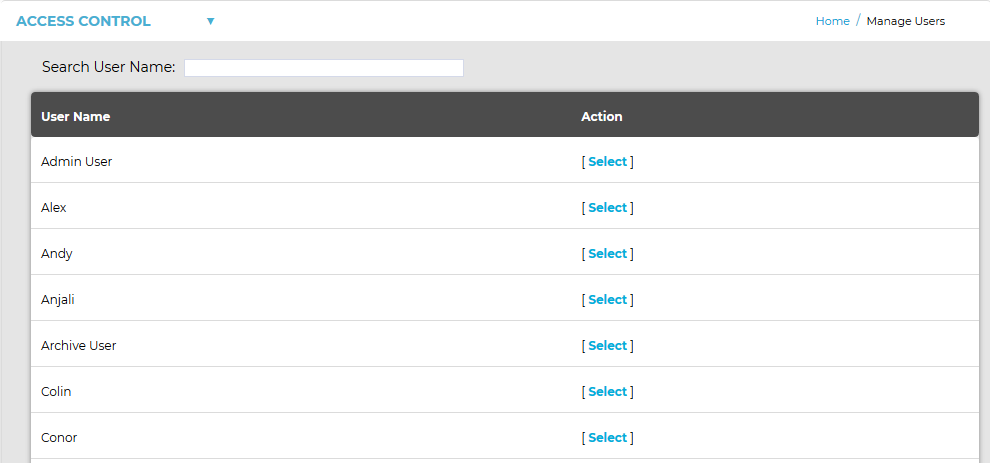
•The Manage Users window is displayed. See Figure 1456 below: Figure 1456
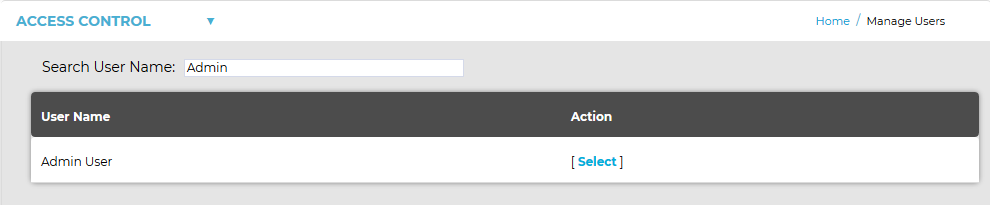
4.In the displayed window - Either: i.Type the name of the User to be managed into the Search User Name: box at the top of the Manage Users window. •A new Manage Users window is displayed, showing the name of the typed User in the User Name column. See Figure 1457 below: Figure 1457
ii.Click on [Select] next to the required User name. Or: Click [Select] in the Action column of the Select a User to Manage window, next to the User that you want to assign a Role or Roles to. See Figure 1457 above. •Using either method displays the Manage Users window for the selected User. See Figure 1458 below: Figure 1458
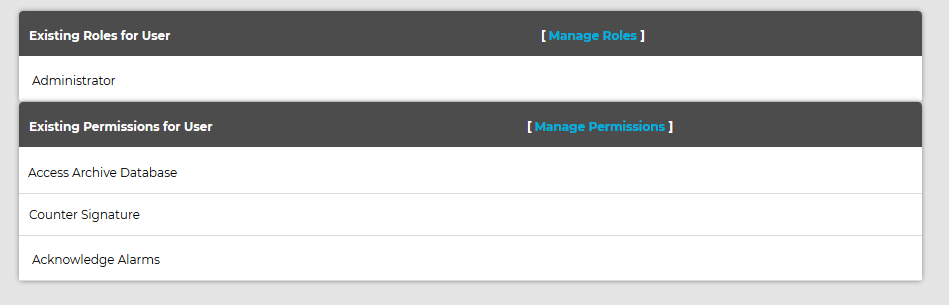
5.Select [Manage Permissions] to display the Manage User (Permissions) window for the selected User. •This window enables a Permission or Permissions to be selected and allocated to the User. See Figure 1459 below: Figure 1459
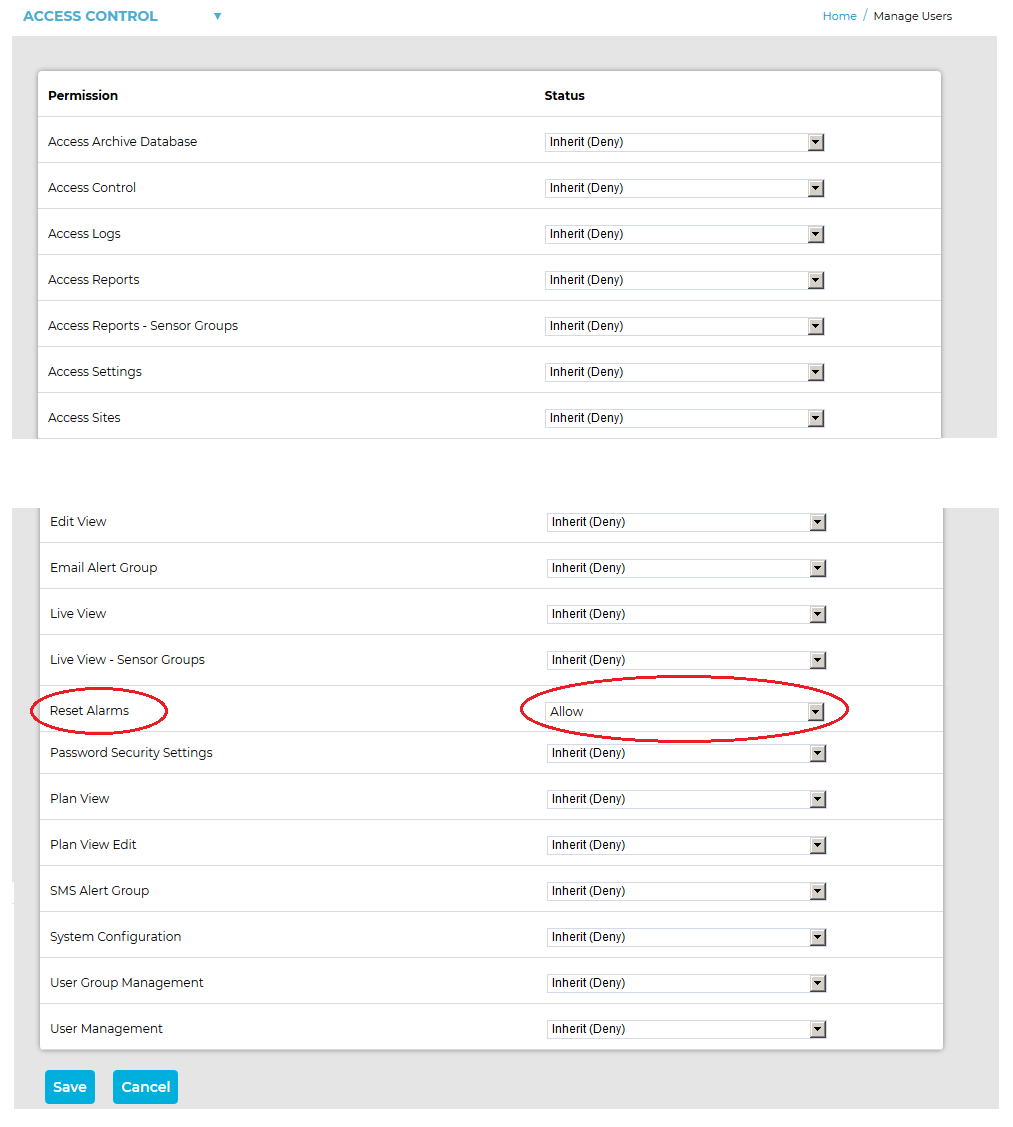
6.Select the drop-down arrow next to the Permission to be changed and select either Allow, Deny or the default: Inherit (Deny). •Allow - Assigns an additional Permission to the selected User. •Deny - Denies a Permission to the selected User. •Inherit (Deny) - Allows the selected User the Permission only if it inherits the Permission from an assigned Role. 7.Click on the Save button to confirm any changes. •You are returned to the Manage Users window for the selected User with any further assigned Permissions, added in the Manage User (Permissions) window above and additional to those inherited from an assigned Role, displayed under Existing Permissions for User. See Figure 1459 above. •The above process can be repeated for other Users and Roles. |
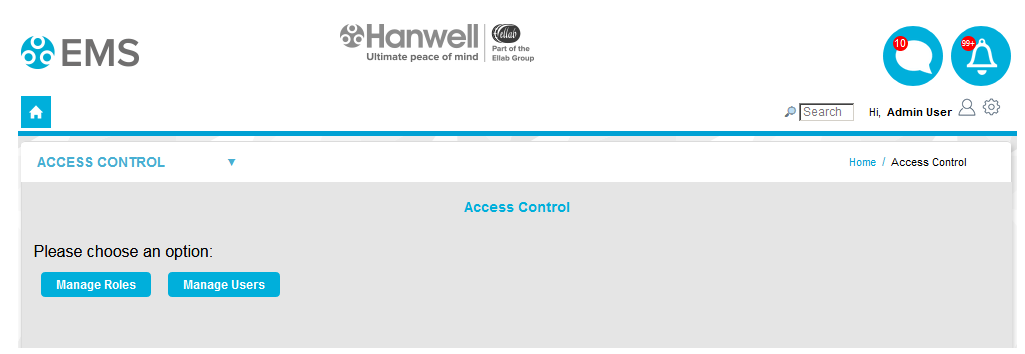
1.Login in to EMS as the Admin User on a browser.
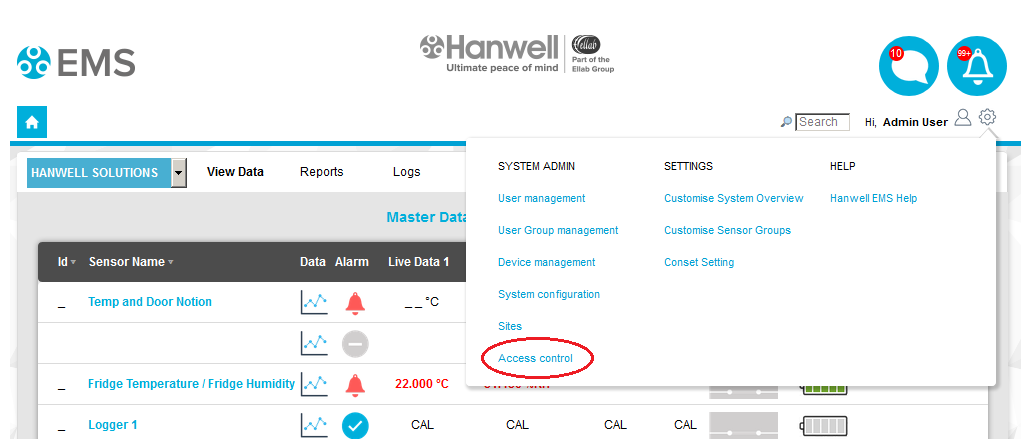
2.From the SYSTEM ADMIN menu, select Access Control. See Figure 1460 below:
Figure 1460
•The Access Control window is displayed. See Figure 1461 below:
Figure 1461
3.In the Access Control window, click on Manage Users.
•A Manage Access Control window is displayed, listing all Users. See Figure 1462 below:
Figure 1462
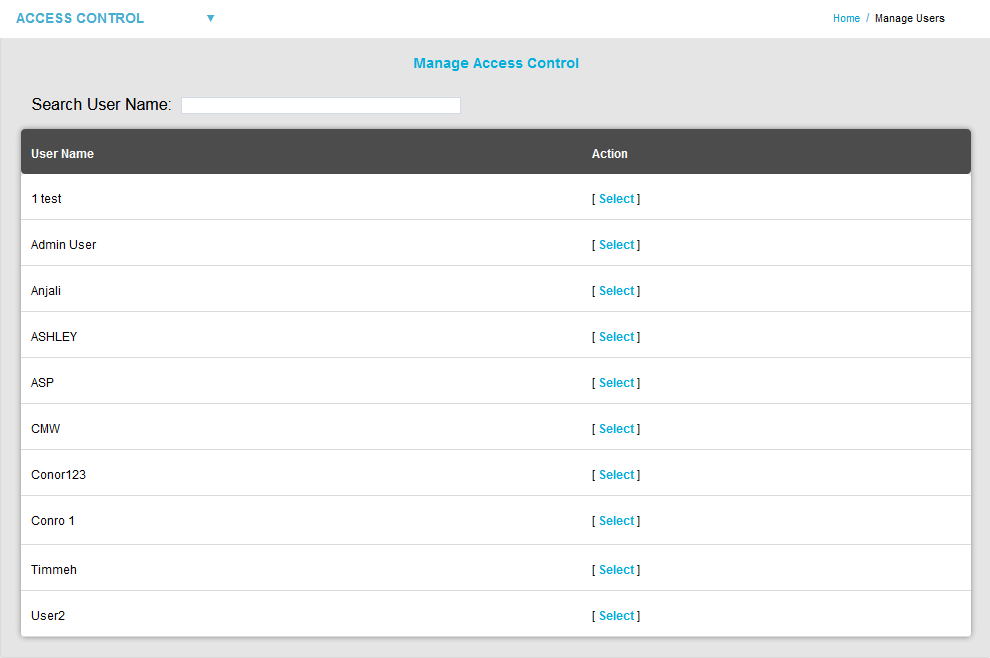
4.Either:
Click on [Select] in the Action column to select the required User.
Or:
i.Type the required User's name into the Search User Name: field.
ii.The list of Users displayed with a decreasing number of Users, consistent with what has been typed, until the required User is displayed.
iii.Click on [Select] in the Action column to select the displayed User.
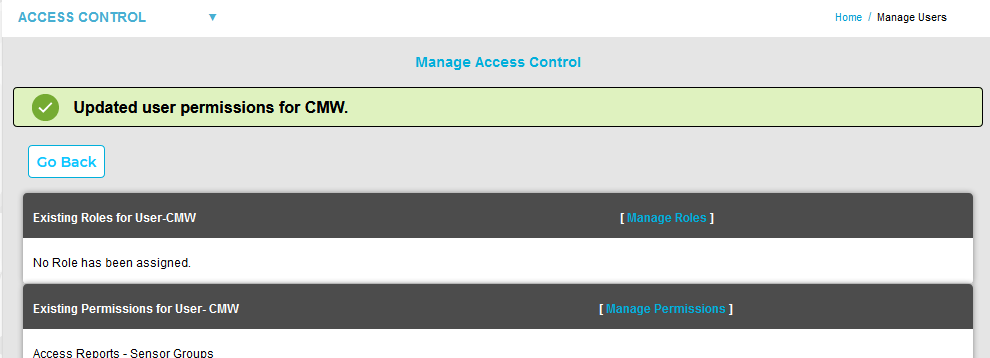
•A further Manage Access Control window is displayed, listing the selected User's Existing Roles and Existing Permissions. See Figure 1463 below:
Figure 1463
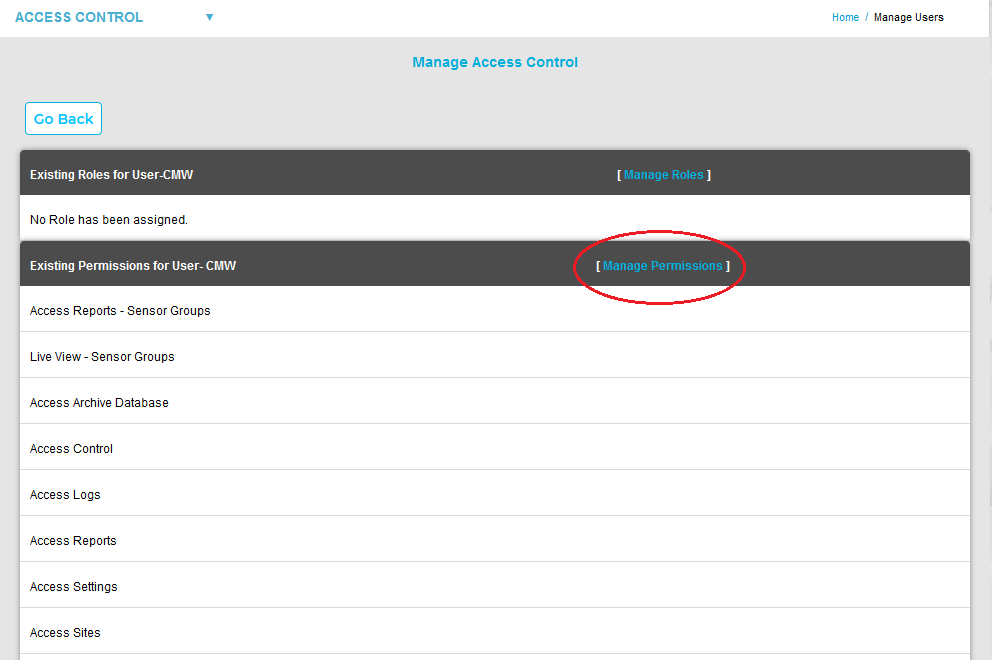
5.Click on [Manage Permissions] in the displayed window. See Figure 1463 above.
•Another Manage Access Control window is displayed, listing all available Permissions in a scrollable list with tick boxes to Allow/Deny each Permission for the User. See Figure 1464 below:
Figure 1464
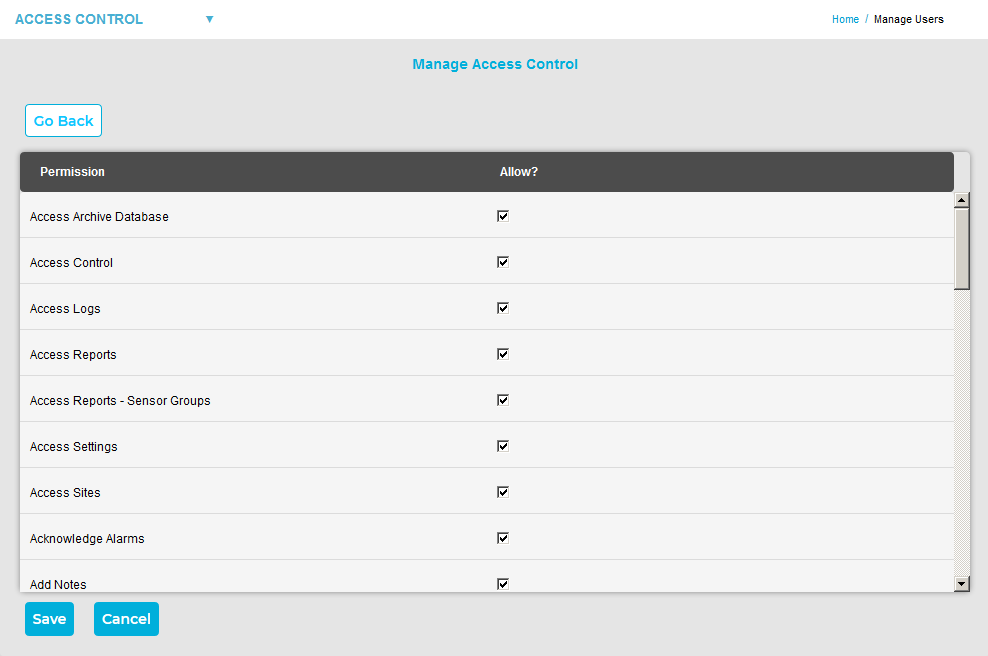
6.In the displayed window, tick or untick the boxes next to the Access Archive Database Permission to Allow or Deny it for the selected User.
7.Click Save.
•You are returned to the previous Manage Access Control window and a green message dialog is displayed confirming that the Permissions for the selected User have been updated. See Figure 1465 below:
Figure 1465
This is a brief summary of the process, and assumes a good working knowledge of EMS as outlined in this Online Guide.
To View an Archive:
1.Login to EMS with an Access Archive Database enabled User Account.
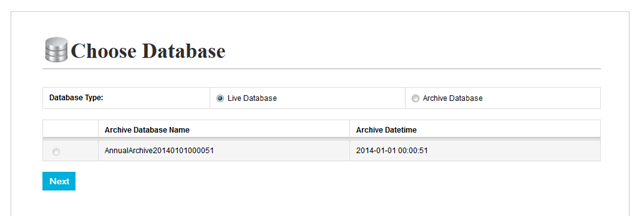
•The Choose Database window is displayed. See Figure 1466 below:
Figure 1466
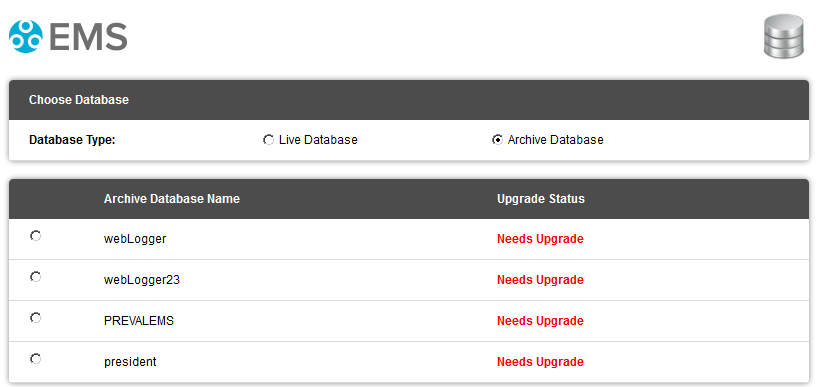
• If you are using a version of EMS prior to Version 1.0.9 / 2.0.3 (Compliant) the Choose Database window will have a slightly different appearance. See Figure 1467 below:
Figure 1467
2.From the Database Type: field, click on the Archive Database Radio button.
•The Radio buttons in the Archive Database Name list are no longer greyed out.
3.Select the required Archive from the Archive Database Name list.
4.Click Next to view the data.
| Note: | Archived data is View Only; Users cannot alter settings and no new data will be recorded in the database. |