Navigation:
System Configuration Sensors > Configuring Sensors > Calibration - General > Calibration - Using EMS >> Calibration Next Due
Calibration Next Due

Contents
This feature allows the next Calibration Due Date to be entered into the System.
A PDF report can be triggered from the Next Calibration Due Date field. This is very useful in a regulated environment where exceeding the stipulated calibration period would cause a non-compliance.
To Enter the Next Calibration Due Date
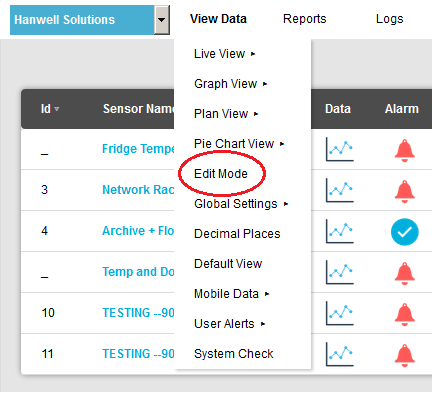
1.From the required Site's Live View window, select Edit Mode from the main View Data menu. See Figure 812 below:
Figure 812
2.In the left-hand menu of the displayed Editing and Configuration window, click on the + symbol next to the Zone containing the Sensors to be accessed. •The selected branch will expand showing all of the available sensors for the selected Zone. See Figure 813 below: Figure 813
3.Click on the + symbol next to the Sensor name to view the properties of the Sensor that is to be Edited. •This will expand the branch again to show the Properties folder for the Sensor. See Figure 814 below: Figure 814
4.Click on the + symbol next to Properties to access the individual Sensor properties. •This will expand the branch again to show the Sensor's configurable Properties. See Figure 815 below: Figure 815
5.Click on the + sign next to the Calibration icon to expand the Calibration property entries. See Figure 816 below: Figure 816
6.Click the on the Next Due icon to display the Next Calibration Due Date window for the selected Sensor/Transmitter. See Figure 817 below: Figure 817
7. To enter the Next Due date, click on the Calendar icon:
•If the Sensor/Transmitter has just been added to the System, you will notice that the default date on the form will be one year from the date that the Sensor/Transmitter was added. •To change the date, select the required date from the calendar. •The normal calibration period is one year. •A good rule of thumb would be 12 months for environments that are either contaminated or have consistently high operating humidities.
8.When you are happy with the new date select Update. |


•The Site's Edit Mode window is displayed. See Figure 818 below:
Figure 818
•By default, the Sensor and Zone editing/configuration window for the Zone at the top of the left-hand menu is displayed.
•To display another Zone's Edit Mode window, click on the entry for the required Zone in the left-hand menu. For an example, see Figure 819 below:
Figure 819

2.Either:
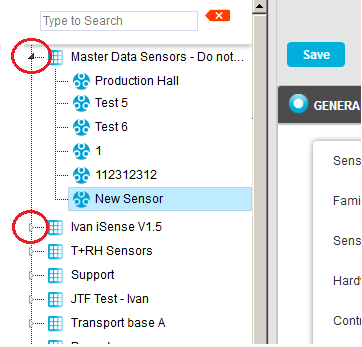
i.In the left-hand list of the Zone's Edit Mode window, click on the small 'arrow' symbol to display a list of the Sensors associated with the Zone. See Figure 820 below:
Figure 820
ii.In the left-hand list, click on the required Sensor's icon ![]() .
.
Or:
In the table in the Zone's Edit Mode window, click on the required Sensor's name in the Sensor Name column. See Figure 821 below:
Figure 821
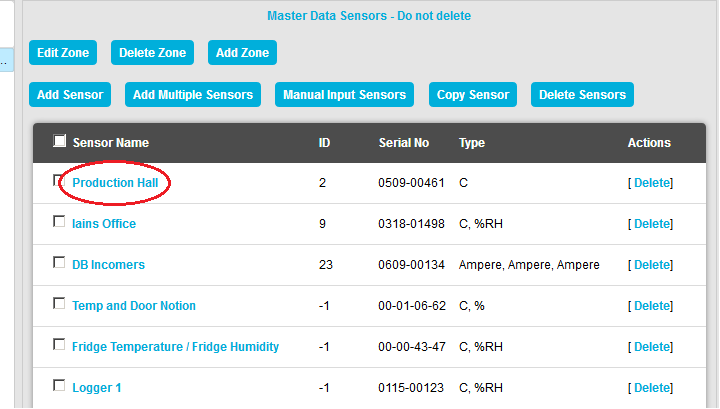
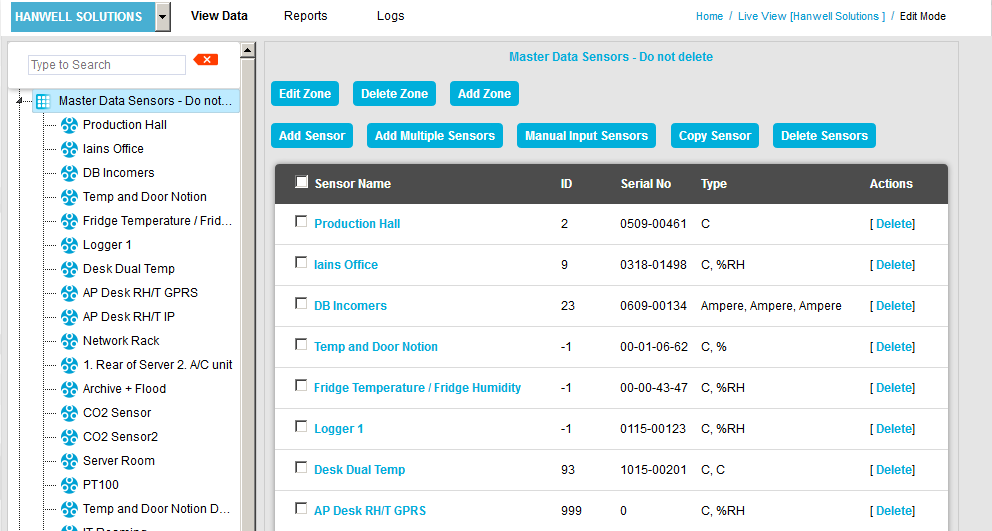
•The Edit Mode window for the selected Sensor is displayed. See Figure 822 below:
Figure 822
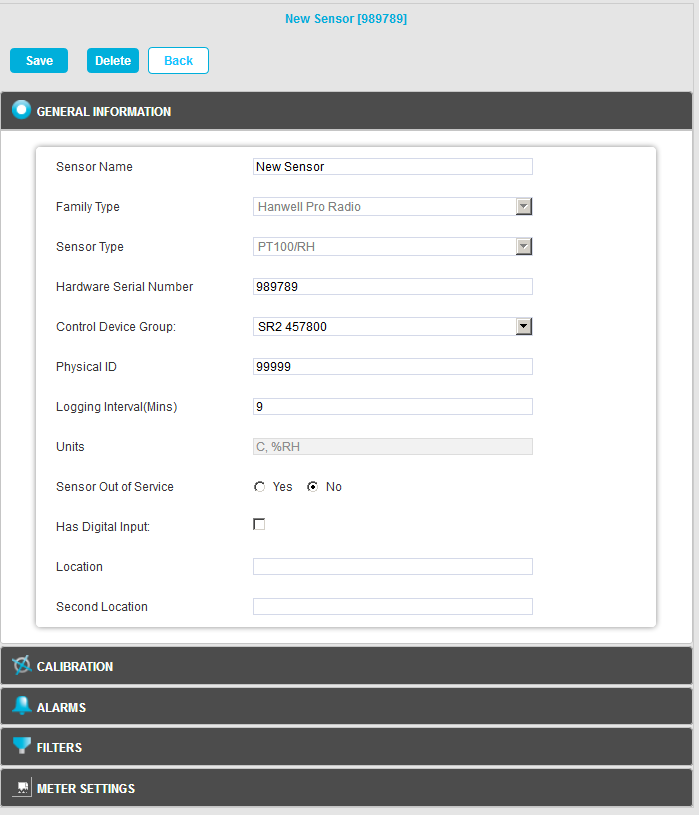
3.Click the on the Calibration field to expand the Calibration pane. See Figure 823 below:
Figure 823

| Note: | The Calibration pane will display different entries depending on the Sensor Type selected. |
4.Enter the date that the next Calibration is due into the Next Calibration Due Date field, in the format:
YYYY-MM-DD
•If the Sensor/Transmitter has just been added to the System, you will notice that the default date on the form will be one year from the date that the Sensor/Transmitter was added.
•The normal calibration period is one year.
•A good rule of thumb would be 12 months for environments that are contaminated or the constant operating humidity’s are very high. Where the environments are clean and the averages humidities are mid-range, then every 24 months would be acceptable.
5.When you are happy with the new date select Save.
•Click on the Back button to cancel any changes to the Calibration due date.
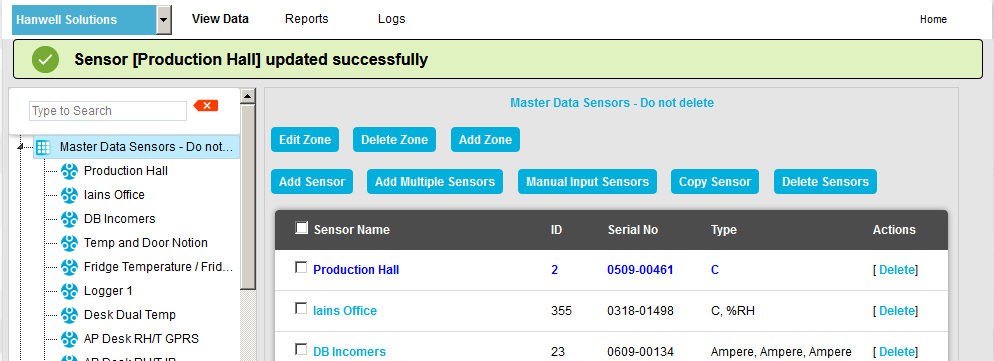
•If the Update has been successful, you will be returned to the Zone's Edit Mode window and the following message will be displayed. See example in 824 below:
Figure 824