Navigation:
System Configuration Sensors > Configuring Sensors > Alarms >> Advance Alarm Settings
Advance Alarm Settings

Contents
•To Edit the Advance Alarm Settings
To Edit the Advance Alarm Settings
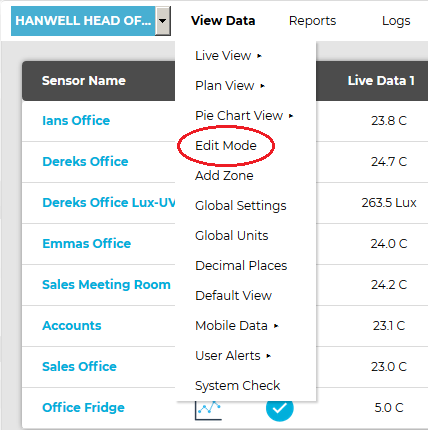
1.From the required Site's Live View window, select Edit Mode from the main View Data menu. See Figure 894 below:
Figure 894
2.In the left-hand menu of the displayed Editing and Configuration window, click on the + symbol next to the Zone containing the Sensors to be accessed. •The selected branch will expand showing all of the available sensors for the selected Zone. See Figure 895 below: Figure 895
3.Click on the + symbol next to the Sensor name to view the properties of the Sensor that is to be Edited. •This will expand the branch again to show the Properties folder for the Sensor. See Figure 896 below: Figure 896
4.Click on the + symbol next to Properties to access the individual Sensor properties. •This will expand the branch again to show the Sensor's configurable Properties. See Figure 897 below: Figure 897
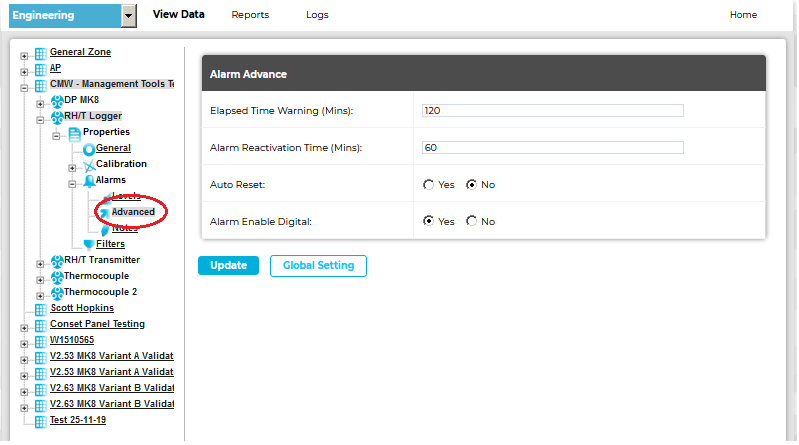
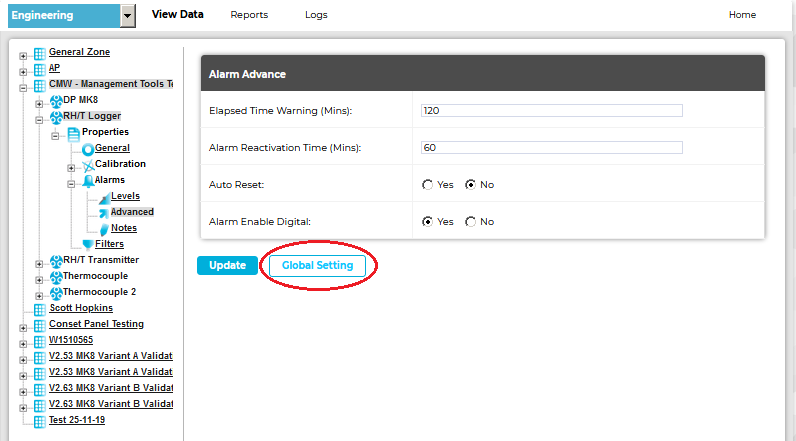
5.Click on the + sign next to the Alarms icon to expand the Alarm property entries for the selected Sensor. 6.Click on the Advanced icon to display the Alarm Advance window for the selected Sensor/Transmitter. See Figure 898 below: Figure 898
7.Enter or edit the required Advance Alarm Settings; details of these are outlined below: •Elapsed Time Warning (Mins): This value sets the time period before the Elapsed Time Warning alarm is activated. ➢To disable the Elapsed Time Warning alarm, set this value to zero. oIf no signal is received from a Sensor/Transmitter, within the predetermined time set here, the Elapsed Time Warning alarm will be activated. ➢The main purpose of the Elapsed Time Warning is to alert the User that a problem has occurred such as a Sensor/Transmitter failing, for example, moving out of radio range or inadvertently having its battery removed. ➢In the default settings, the Elapsed Time Warning is set to 120 minutes. This can be changed to any time up to 999 minutes. ➢It is not recommended that Elapsed Time Warnings are set to very long periods. ➢If there are lots of Elapsed Time Warnings being generated this may be an indication of a more serious problem such as poor radio coverage. ➢There are occasions where all the Sensors in a Zone or Zones that are served by a wireless receiving device go into Elapsed Time Warning at the same time. This would be caused by either a failure in the wireless receiving device or a network problem causing the wireless receiving device to stop communication with the database. If such problems are seen then these need to be investigated. To set the Elapsed Time Warning period, type the required time into the Elapsed Time Warning (Mins): dialog box next. The time should be entered in minutes, in the format: 120 •Alarm Reactivation Time (Mins): When an alarm has been acknowledged, but not reset, the Alarm Reactivation Time is the time the System will wait, after acknowledgement of the alarm condition, before automatically reactivating the alarm, regardless of whether the current sensor reading would trigger an alarm. ➢To disable the Alarm Reactivation Time feature, set this value to zero. ➢If the alarm condition has returned to normal, the alarm status will change from amber (Acknowledged) to green (OK). If, after the Alarm Reactivation Time the alarm condition still exists, the alarm status will return to red (Unacknowledged) and create a new alarm on the System. ➢The default setting is 60 minutes. To change the Alarm Reactivation Time, enter a new value into the Alarm Reactivation Time (Mins): dialog box. The time should be entered in minutes, in the format: 60 •Auto Reset: Auto Reset automatically resets an alarm status to green when an alarm condition returns to normal, regardless of the acknowledgment state.
➢The default is no (N) which means that Auto Reset is switched off and all alarms have to be acknowledged by the User. To change the setting click on the Y or N radio, depending on your choice.
This function enables Digital Input Alarms, allowing a digital status signal to trigger an alarm. ➢Its default setting is No and is, also, automatically set to No when the Global Digital Enable value is set or an alarm is manually reset.
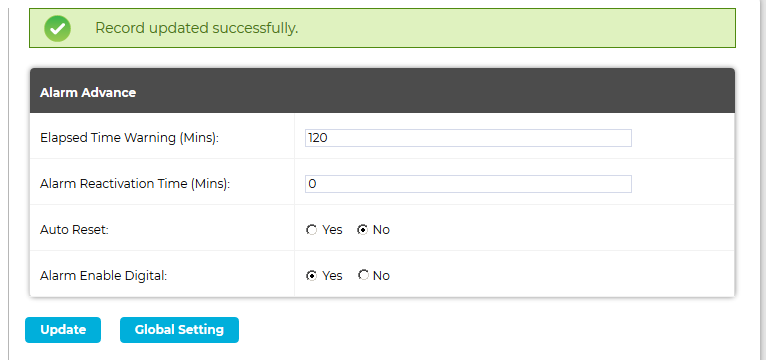
8.Once you are happy with your selections click on Update. •The alarm settings will be saved and the message: Record updated successfully displayed. See Figure 899 below: Figure 899
|


•The Site's Edit Mode window is displayed. See Figure 900 below:
Figure 900
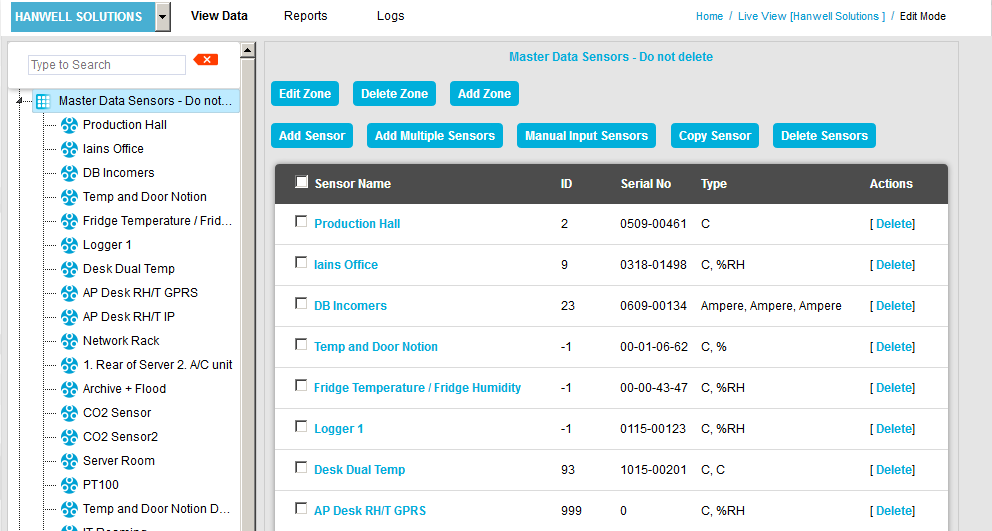
•By default, the Sensor and Zone editing/configuration window for the Zone at the top of the left-hand menu is displayed.
•To display another Zone's Edit Mode window, click on the entry for the required Zone in the left-hand menu. For an example, see Figure 901 below:
Figure 901

2.Either:
i.In the left-hand list of the Zone's Edit Mode window, click on the small 'arrow' symbol to display a list of the Sensors associated with the Zone. See Figure 902 below:
Figure 902
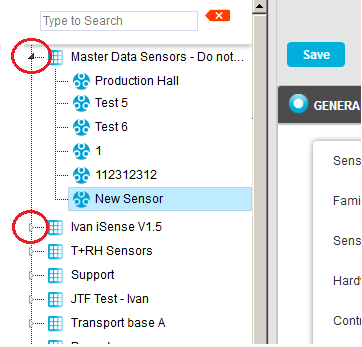
ii.In the left-hand list, click on the required Sensor's icon ![]() .
.
Or:
In table in the Zone's Edit Mode window, click on the required Sensor's name in the Sensor Name column. See Figure 903 below:
Figure 903
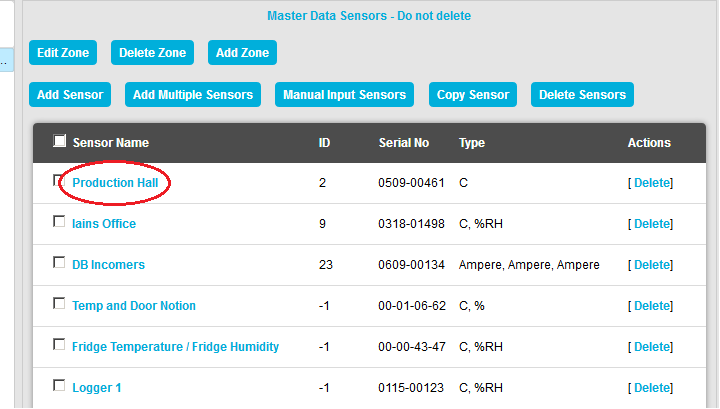
•The Edit Mode window for the selected Sensor is displayed. See Figure 904 below:
Figure 904
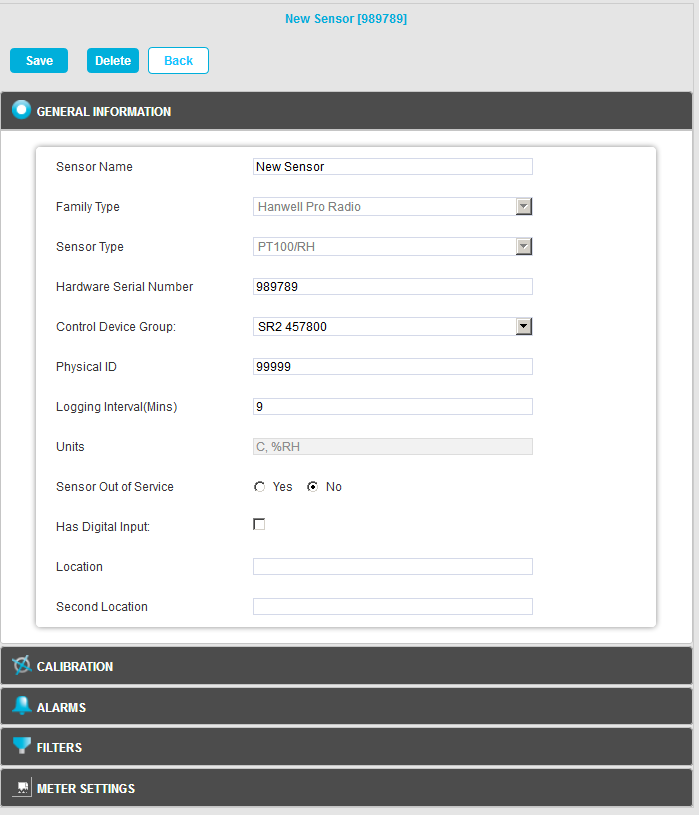
3.Click on the ALARMS pane in the Edit Mode window. See Figure 904 above.
•The ALARMS pane is displayed. See Figure 905 below:
Figure 905
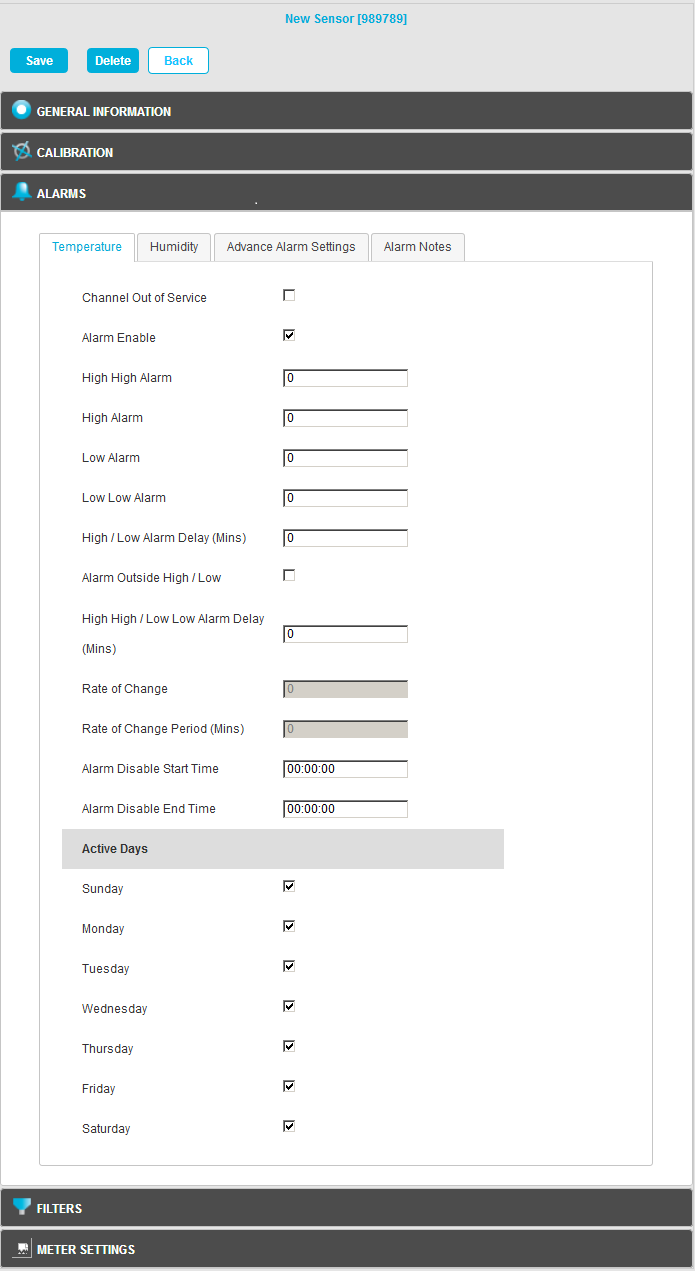
4.Click on the Advance Alarm Settings tab to display the Advanced Alarm Settings pane for the selected Sensor/Transmitter. See Figure 906 below:
Figure 906
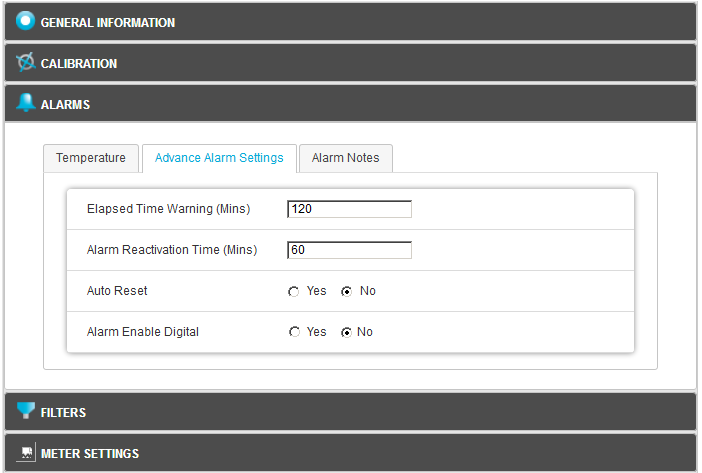
5.Enter or edit the required Advance Alarm Settings; details of these are outlined below:
This value sets the time period before the Elapsed Time Warning alarm is activated.
➢To disable the Elapsed Time Warning alarm, set this value to zero.
oIf no signal is received from a Sensor/Transmitter, within the predetermined time set here, the Elapsed Time Warning alarm will be activated.
➢The main purpose of the Elapsed Time Warning is to alert the User that a problem has occurred such as a Sensor/Transmitter failing, for example, moving out of radio range or inadvertently having its battery removed.
➢In the default settings, the Elapsed Time Warning is set to 120 minutes. This can be changed to any time up to 999 minutes.
➢It is not recommended that Elapsed Time Warnings are set to very long periods.
➢If there are lots of Elapsed Time Warnings being generated this may be an indication of a more serious problem such as poor radio coverage.
➢There are occasions where all the Sensors in a Zone or Zones that are served by a wireless receiving device go into Elapsed Time Warning at the same time. This would be caused by either a failure in the wireless receiving device or a network problem causing the wireless receiving device to stop communication with the database. If such problems are seen then these need to be investigated.
To set the Elapsed Time Warning period, type the required time into the Elapsed Time Warning (Mins): dialog box next. The time should be entered in minutes, in the format: 120
•Alarm Reactivation Time (Mins):
When an alarm has been acknowledged, but not reset, the Alarm Reactivation Time is the time the System will wait, after acknowledgement of the alarm condition, before automatically reactivating the alarm, regardless of whether the current sensor reading would trigger an alarm.
➢To disable the Alarm Reactivation Time feature, set this value to zero.
➢If the alarm condition has returned to normal, the alarm status will change from amber (Acknowledged) to green (OK). If, after the Alarm Reactivation Time the alarm condition still exists, the alarm status will return to red (Unacknowledged) and create a new alarm on the System.
➢The default setting is 60 minutes.
To change the Alarm Reactivation Time, enter a new value into the Alarm Reactivation Time (Mins): dialog box. The time should be entered in minutes, in the format: 60
•Auto Reset:
Auto Reset automatically resets an alarm status to green when an alarm condition returns to normal, regardless of the acknowledgment state.
| Note: | Auto Reset does not affect Rate of Change alarms or legacy Battery alarms. |
➢The default is no (N) which means that Auto Reset is switched off and all alarms have to be acknowledged by the User.
To change the setting click on the Y or N radio, depending on your choice.
| Note: | Be aware that, if Auto Reset is switched on, a Sensor/Transmitter could, for example, go in and out of alarm all night however, when the User checks in the morning, the status could be showing green and giving no indication of the previous night's fault(s) unless the User checks the graphs or alarm logs. |
This function enables Digital Input Alarms, allowing a digital status signal to trigger an alarm.
➢Its default setting is No and will need to be set to Yes to enable Digital Input Alarms; however, it is automatically set to No when the Global Digital Enable value is set or an alarm is manually reset.
| Note: | These Alarms are for Sensors that have a non-recorded digital input; settings on these alarms do not affect Digital Channel Alarms. |
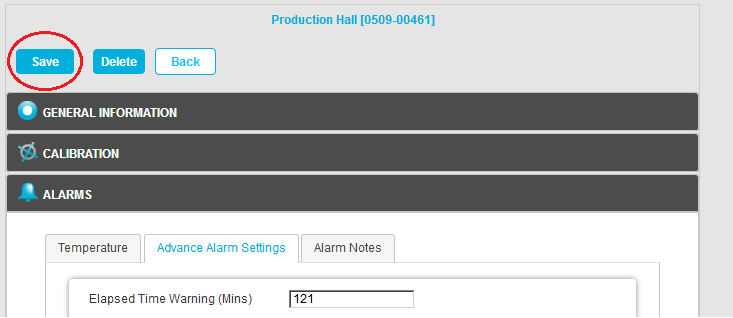
6.Once you are happy with your selections click on Save. See Figure 907 below:
Figure 907
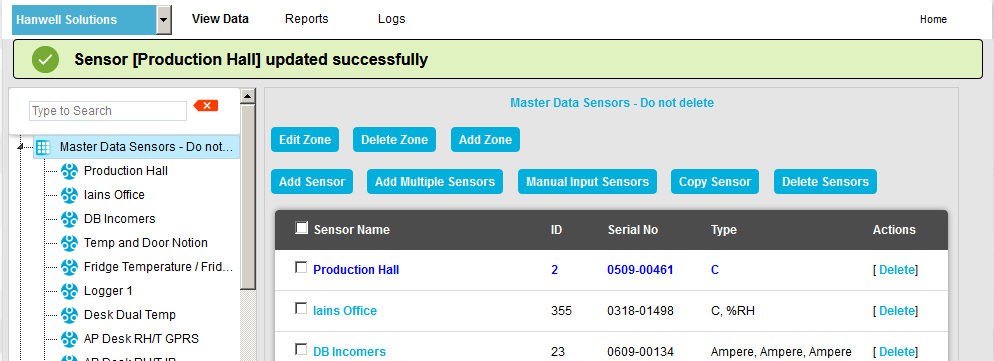
•The Advance Alarm Settings will be saved and, if the Update has been successful, you will be returned to the Zone's Edit Mode window and the following message will be displayed. See 908 below:
Figure 908
If there are many Sensors/Transmitters on the same System doing the same function in different spaces it can be tedious and error-prone to go through all of the Sensors/Transmitters on the System and set Advance Alarm settings for each Sensor/Transmitter individually.
•In such circumstances, the Global Settings function can apply the currently selected Sensor/Transmitter's Advanced Alarm settings to other Sensor/Transmitters.
To Apply Advance Alarm Settings Globally:
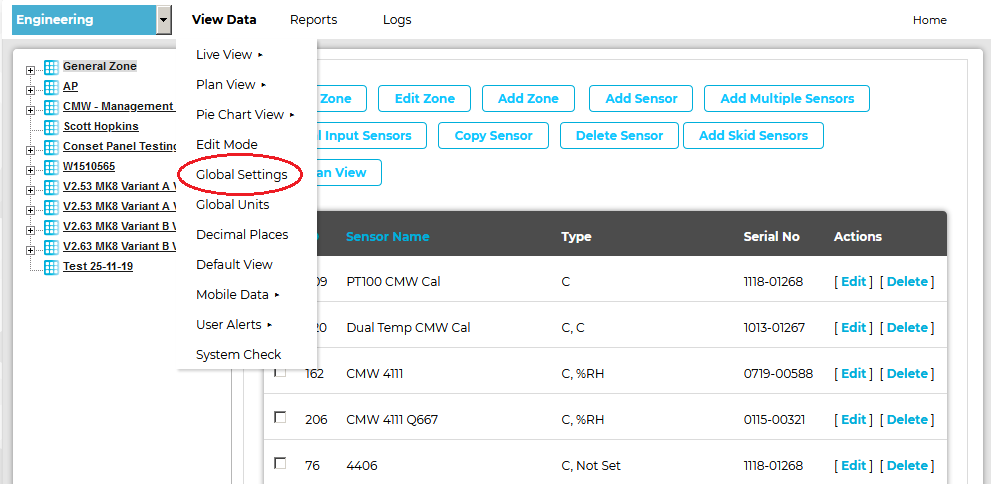
1.With the Advance Alarms tab selected from the ALARMS pane, select Global Settings from the View Data drop-down menu.
2.From the displayed sub-menu, select Alarm Notification. See 909 below:
Figure 909
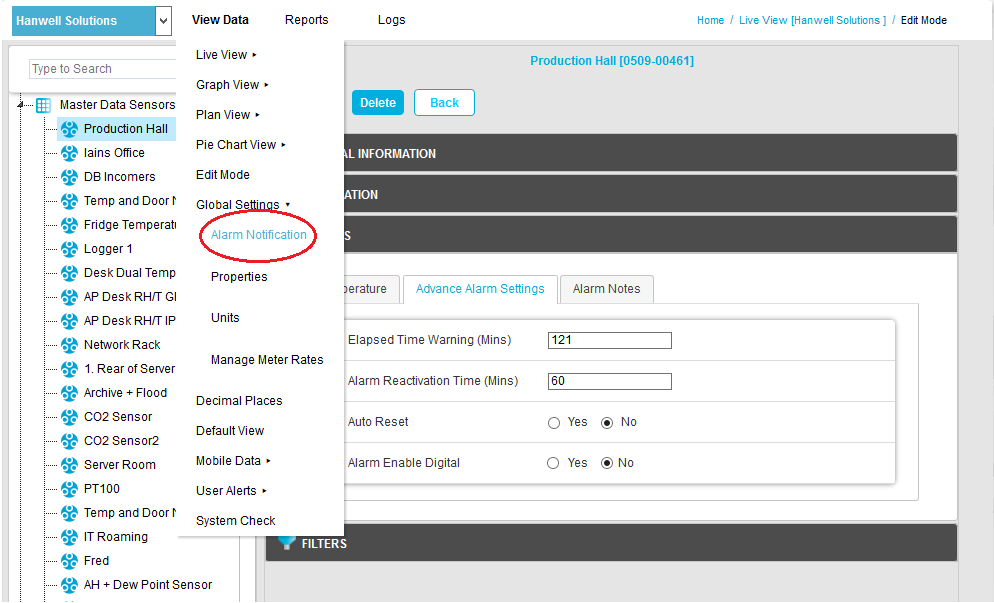
| Note: | For earlier versions of EMS, click on the Global Settings entry in the View Data drop down menu See here . Also, for earlier versions of EMS, the Alarm Enable Digital entry will default to Yes. |
|
•The Global Settings window is displayed. See Figure 910 below:
Figure 910
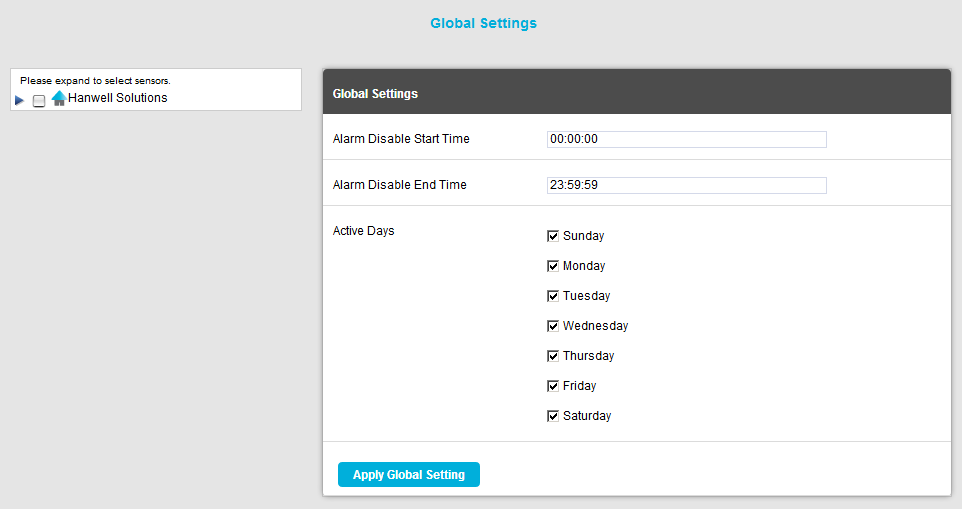
•From this window you can apply the following Alarm settings, globally, to selected Sensors:
➢Alarm Disable Start Time
➢Alarm Disable End Time
➢Active Days
3.Adjust the displayed Alarm settings to the required values.
•These values will be applied globally to the selected Sensors.
| Note: | Times should be entered in the format: HH:MM:SS |
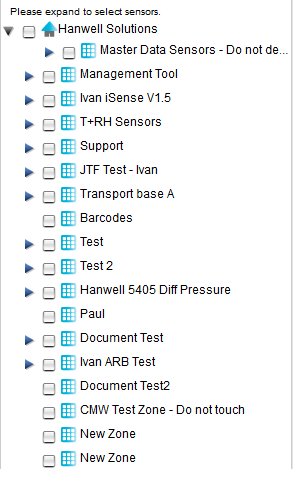
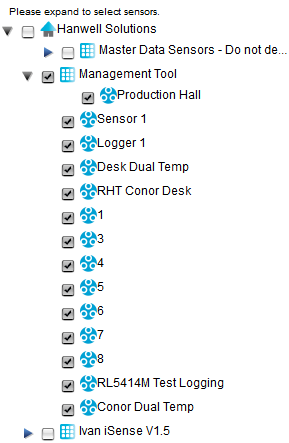
4.In the left-hand 'Please expand to select Sensors' menu, click on the blue arrow to expand the tree and display all Zones associated with the Site by clicking on the blue arrow to the left of the Site name. See Figure 911 below:
Figure 911
5.Show all of the Sensors/Transmitters in the selected Zone by clicking on the blue arrow to the left of the required Zone's name. See Figure 912 below:
Figure 912
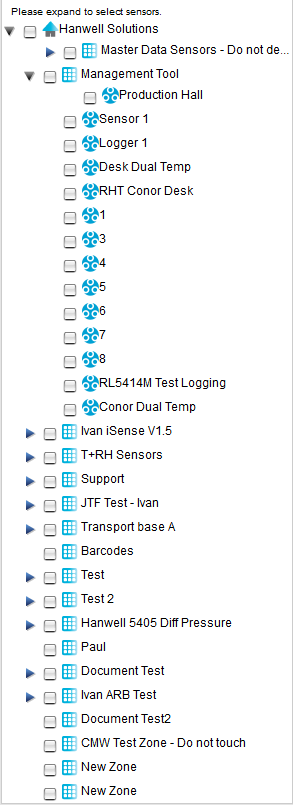
6.To select the Sensors/Transmitters that are to have Global alarm settings applied:
Either
Click in the tick box next to the Zone name which will select all the Sensors in that Zone
Or
Individually select each required Sensor/Transmitter by clicking in the tick box next to the Sensor/Transmitter's name. See Figure 913 below:
Figure 913
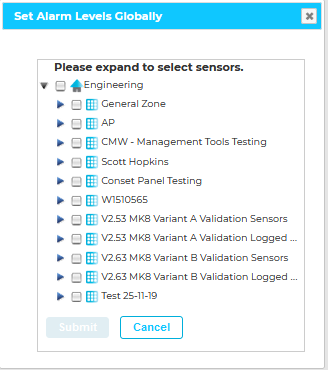
| Note: | In earlier versions of EMS you can also display a separate Set Alarm Levels Globally window, from which you can select the Sensors/Transmitters that are to have Global Alarm settings applied, by clicking on the Global Setting button at the bottom of the Alarm Levels window. See here for an example. |
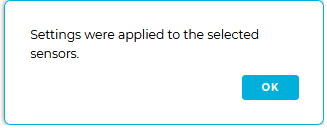
i.Select the Sensor/Transmitters to have Global Alarm settings applied as outlined from Step 4, above, onwards. ➢The Submit button is highlighted. ii.Click on Submit. ➢A dialog box is displayed. See Figure 914 below: Figure 914
iii.Click on OK. |
7.Once you are happy with your Sensor/Transmitter selections, select Apply Global Settings. See Figure 915 below:
Figure 915

•All of the selected Sensor/Transmitters will now be updated with the entered Alarm setting values.
➢This can be checked by going into the Alarm Level properties of one of the updated Sensor/Transmitters.