Navigation:
System Configuration Admin > Sensor Groups >> Adding/Removing Sensor Groups to/from the Dashboard
Adding/Removing Sensor Groups to/from the Dashboard

Contents
•To Add/Remove a Sensor Group to the Dashboard
•To Add an Image to a Sensor Group's Dashboard Icon
To Add/Remove a Sensor Group to/from the Dashboard
1.From within the System menu, select Customise Sensor Groups from the SETTINGS list. See Figure 467 below:
Figure 467

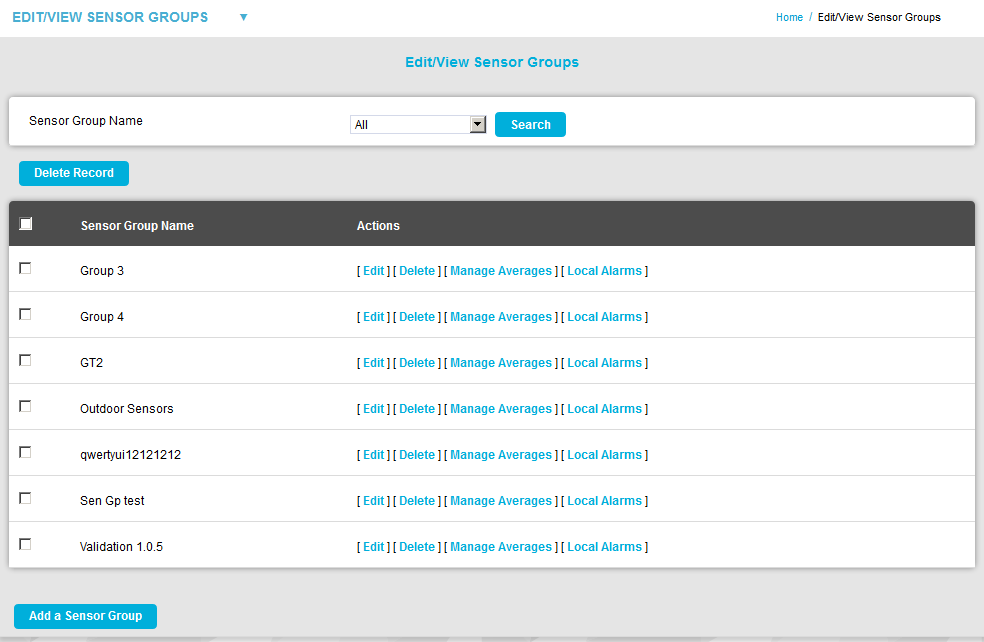
•The Edit View Sensor Groups window is displayed. See Figure 468 below:
Figure 468
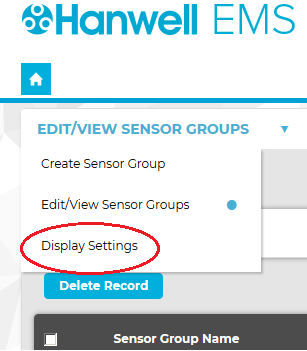
2.From the EDIT/VIEW SENSOR GROUPS drop-down menu on the top left of the Edit/View Sensor Groups window, select Display Settings. See Figure 469 below:
Figure 469
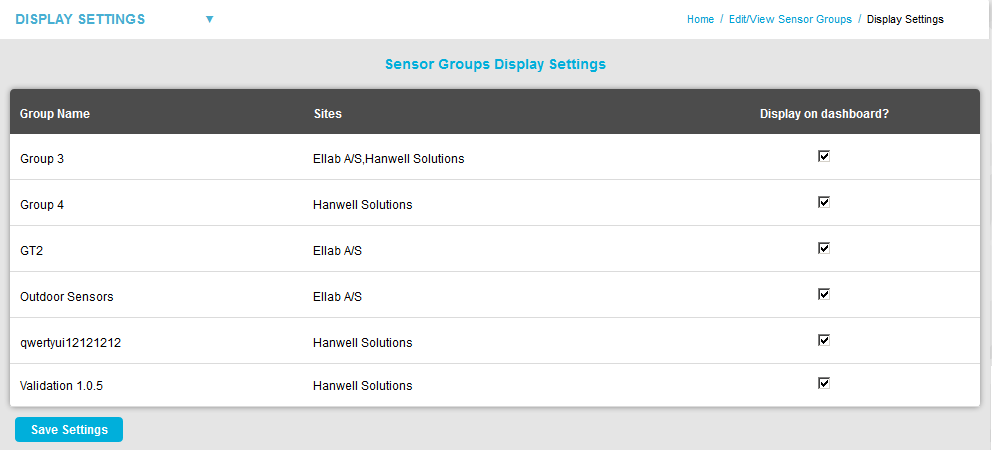
•The Sensor Groups Display Settings window is shown. See Figure 470 below:
Figure 470
3.To Remove a Sensor Group from the Dashboard:
i.Untick the Sensor Group's box in the Display on dashboard? column.
ii.Click on the Save Settings button.
•A warning message is displayed. See Figure 471 below:
Figure 471

iii.Click on Yes to remove the Sensor Group from the Dashboard.
•A message is displayed in the Sensor Groups Display Settings window:
![]()
iv.Click on No to cancel the removal.
To Add a Sensor Group to the Dashboard:
i.Tick the Sensor Group's box in the Display on dashboard? column.
ii.Click on the Save Settings button.
•A warning message is displayed. See Figure 472 below:
Figure 472
iii.Click on Yes to add the Sensor Group from the Dashboard.
•A message is displayed in the Sensor Groups Display Settings window:
![]()
iv.Click on No to cancel the addition.
| Note: | You cannot add more than twelve Sensor Groups to the Dashboard. If you try to add more than 12 Sensor Groups to the Dashboard, a warning message will be displayed telling you how many more Sensor Groups you are able to add. See example in Figure 473 below: |
Figure 473

To add further Sensor Groups once the limit has been reached, you will need to remove enough existing Sensor Groups from the Dashboard to make room for the new Sensor Group(s) to be added.
To Add an Image to a Sensor Group's Dashboard Icon
1.From within the System menu, select Customise Sensor Groups from the SETTINGS list. See Figure 474 below:
Figure 474
•The Edit/View Sensor Groups window is displayed. See Figure 475 below:
Figure 475
2.Click on [Edit] in the Actions column for the required Sensor Group.
•The Edit Sensor Group window is displayed showing the current Group Image. See Figure 476 below:
Figure 476
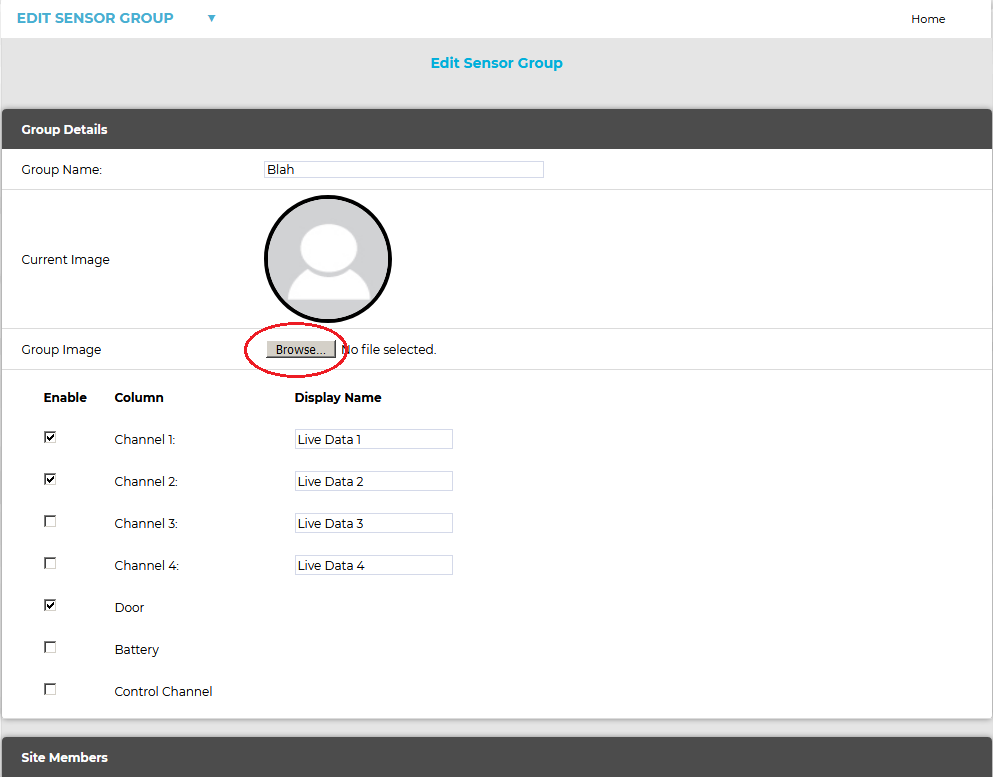
3.In the Group Image: field, click on the Browse button to navigate to the location of the new image via the Windows File Upload window. See Figure 476 above.
4.Click on the required image file.
•The selected image is shown in the Current Image field.
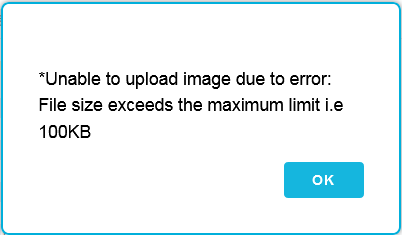
Note: If the size of the selected image file exceeds the 100kB limit, the following warning dialog will be displayed and you should select a smaller image. See Figure 477 below:
Figure 477
5.Click on the Update Group button at the bottom of the window.
•You are returned the Edit/View Sensor Groups window.
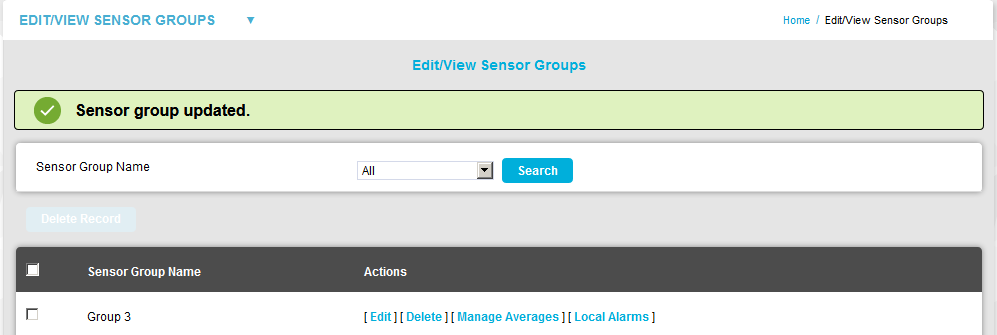
➢A message is displayed if the update has been successful. See Figure 478 below:
Figure 478
➢The selected logo is displayed as part of the Sensor Group's entry on the Sensor Group Dashboard.