Navigation:
Installation, Configuration and Operation of Hardware > Installation and Configuration of Additional Devices > TME HM007 >> Barcodes
Barcodes

Contents
There are a number of websites offering free utilities to convert text into Barcodes.
We recommend using https://www.barcoding.com/resources/barcode-generator/
•This website will give you a step-by-step guide for generating your barcodes. Alternatively, many office products now come with a Barcode font.
The HM7000’s Barcode reader can read the following codes:
•All UPC/EAN/JAN Codes
•EAN28 Codes
•Code 39, Code 128
•Interleave 25
Generate the barcodes, giving each a unique number to enable them to be recognised by EMS.
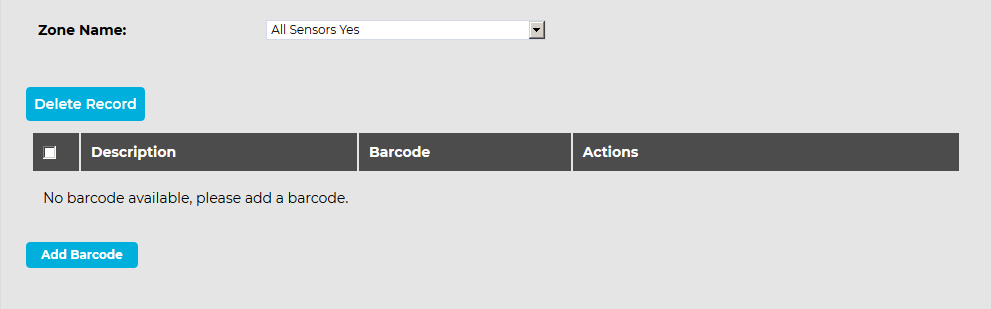
To add a barcode to EMS, enabling uploaded data associated with the barcode to be stored in and retrieved from the EMS database: 1.Select Mobile Data from the main View Data menu. 2.Select Barcodes from the sub-menu. •The View Barcodes window is displayed. See Figure 273 below:
Figure 273
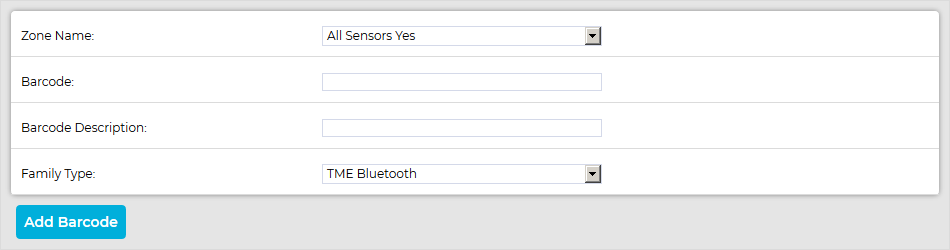
3.Click on the Add Barcode button. •The Barcodes window is displayed. See Figure 274 below:
Figure 274
5.In the displayed window, select or fill out the new barcode's details in the relevant fields. 6.Click on the Add Barcode button. •The new barcode is added and the View Barcodes window is displayed showing the new barcode. See Figure 275 below: Figure 275
•To add further barcodes, click on the Add Barcode button to return to the Barcodes window shown in Figure 274 above. |
To add a barcode to EMS, enabling uploaded data associated with the barcode to be stored in and retrieved from the EMS database:
1.Select Mobile Data from the main View Data menu.
2.Select Barcodes from the sub-menu. See Figure 276 below:
Figure 276

3.Select Barcodes from the sub-menu.
•The View Barcodes window is displayed. See Figure 277 below:
Figure 277
4.Click on the Add Barcode button.
•The Barcodes window is displayed. See Figure 278 below:
Figure 278

5.In the displayed window, select or fill out the new barcode's details in the relevant fields.
6.Click on the Add Barcode button.
Clicking on the Back button will return you to the View Barcodes window.
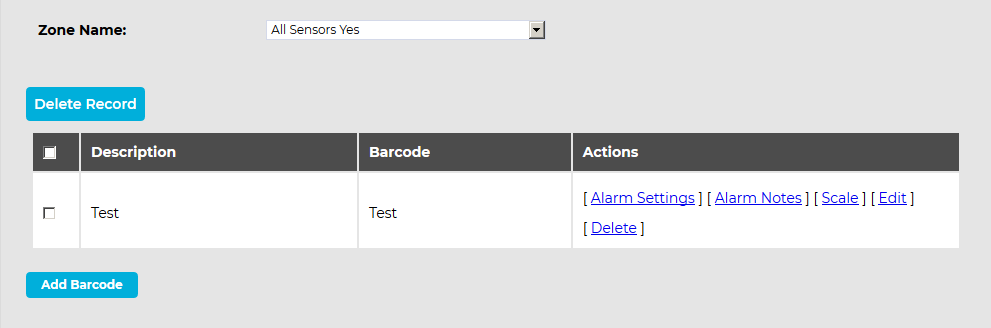
•The new barcode is added and the View Barcodes window is displayed showing the new barcode. See Figure 279 below:
Figure 279
•To add further barcodes, click on the Add Barcode button to return to the Barcodes window shown in Figure 278 above.
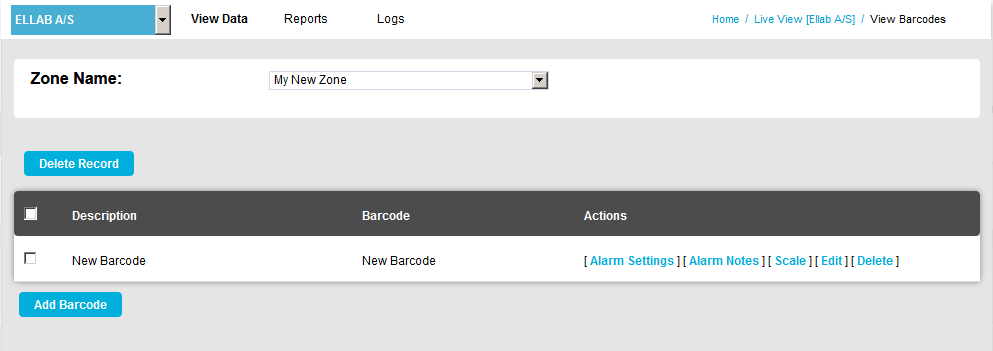
From the View Barcodes window (see Figure 279 above), you can:
•Edit Barcodes
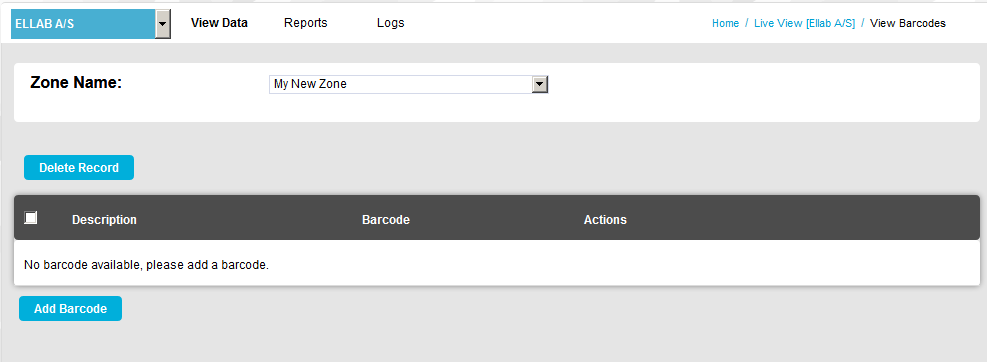
To filter barcode entries according to the Zone they are associated with:
Select the Zone containing the required barcode(s) from the Zone Name: drop-down list.
•All barcodes associated with the selected Zone are then displayed in the table.
To delete barcode entries:
Either:
Highlight entries by checking the individual boxes adjacent to their entries and either, click on [Delete] in the Actions column entry for the barcode to be deleted or click on the Delete Record button.
Or:
Select all barcode entries by checking the box in the table's header and click on the Delete Record button.
Edit Barcodes
To edit Alarm Settings associated with the barcode: 1.Click on [Alarm Settings] in the Actions column to display the Barcode Alarm Settings [barcode name] window. See Figure 280 below: Figure 280
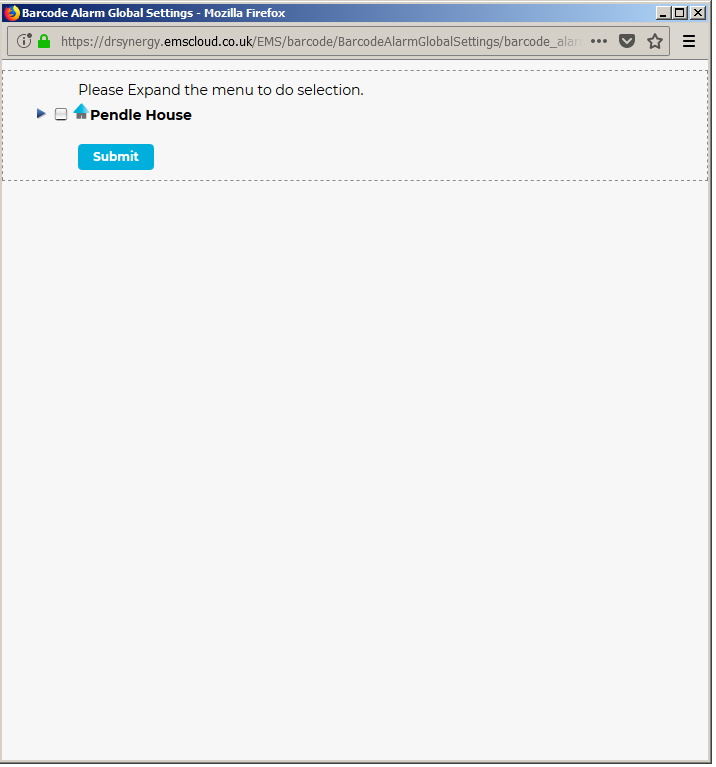
2.Enable or disable the Alarm by checking the relevant Yes/No button. 3.Enter or edit existing values for the High and Low Alarm in the High Alarm: and Low Alarm: boxes. 4.Either: Click on the Update button to enable/update the Alarm Settings. Or: To apply the settings Globally: i.Click on the Global Setting button to display the following window. See See Figure 281 below: Figure 281
ii.Expand the menu if necessary. iii.Check the boxes to the left of the sensors you wish to apply the Alarm Settings, defined in 1. above, to. iv.Click on the Submit button. |
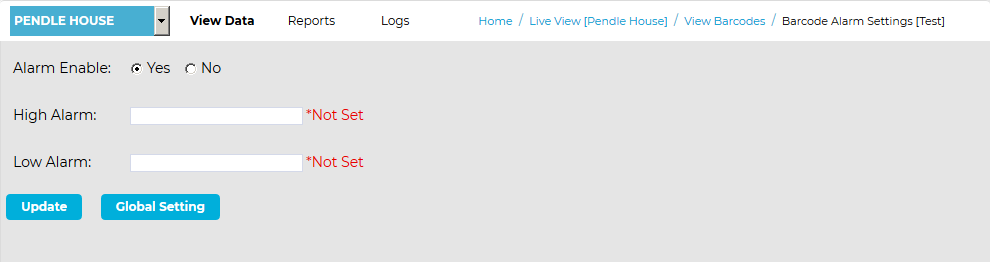
To edit Alarm Settings associated with the barcode:
1.In the View Barcodes window, click on [Alarm Settings] in the Actions column to display the Barcode Alarm Settings [barcode name] window. See Figure 282 below:
Figure 282
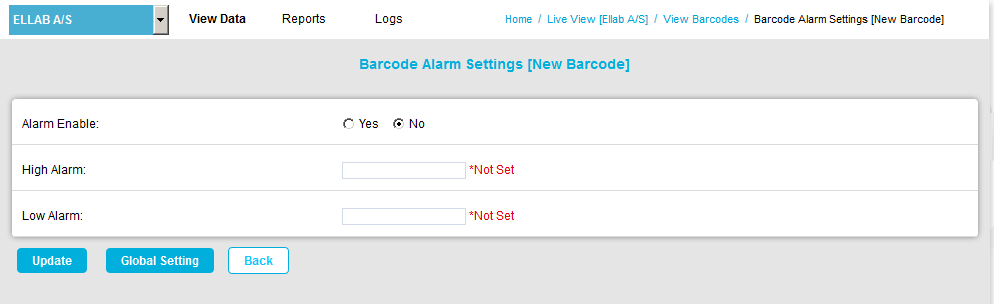
2.Enable or disable the Alarm by checking the relevant Yes/No button.
3.Enter or edit existing values for the High and Low Alarm in the High Alarm: and Low Alarm: boxes.
4.Either:
Click on the Update button to enable/update the Alarm Settings.
•To cancel applying settings, click on the Back button.
➢You are returned to the View Barcodes window without the settings being applied. See Figure 281 above.
Or:
To Apply the Settings Globally:
i.Click on the Global Setting button to display the following window. See See Figure 283 below:
Figure 283
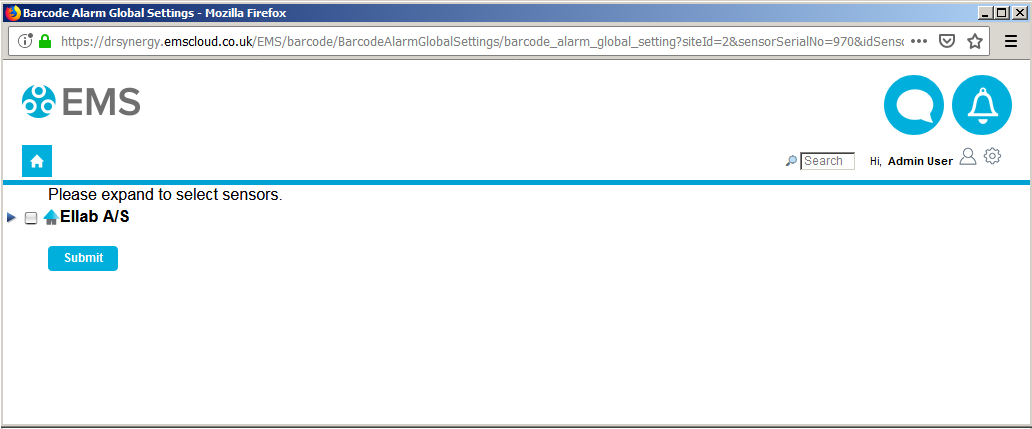
ii.Expand the menu if necessary. See Figure 284 below:
Figure 284
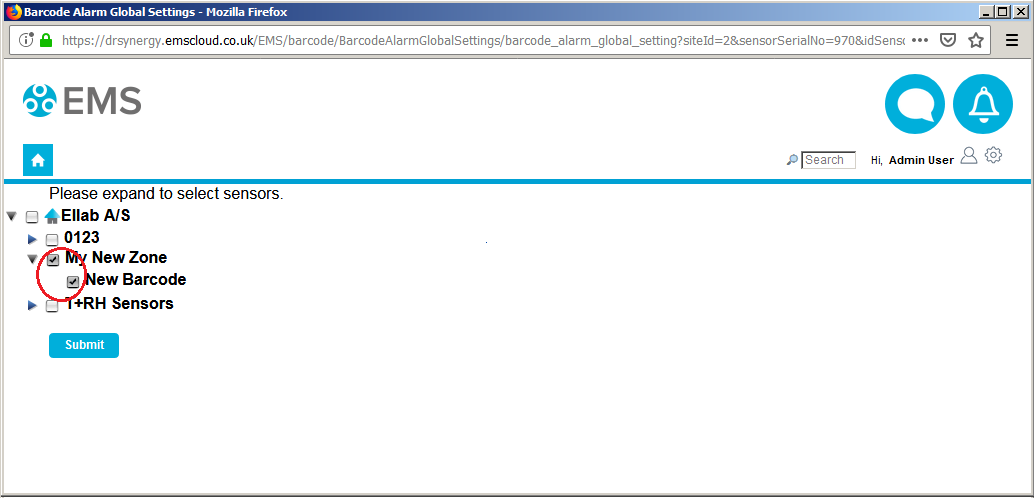
iii.Check the boxes to the left of the Sensors you wish to apply the Alarm Settings to (Alarm Settings defined in Step 1). See Figure 284 above.
•Checking the box to the left of a Zone's entry in the menu will select all of the Sensors in that Zone.
iv.Click on the Submit button.
Or:
To cancel applying settings globally, click on the Back button.
•You are returned to the View Barcodes window without the settings being applied globally. See Figure 282 above.
To add or edit Alarm Notes for Alarms associated with the barcode: 1.Click on [Alarm Notes] in the Actions column to display the Barcode Alarm Notes [barcode name] window. See Figure 285 below: Figure 285
2.Add a new Note for the Alarm or edit an existing Note. 3.Click on the Add button. |
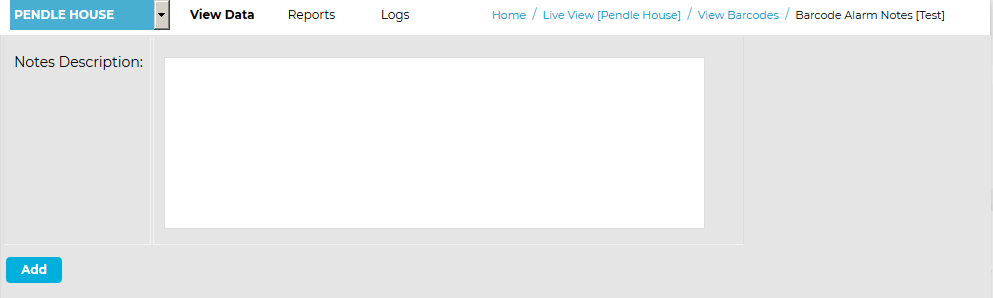
To add or edit Alarm Notes for Alarms associated with the barcode:
1.Click on [Alarm Notes] in the Actions column to display the Barcode Alarm Notes [barcode name] window. See Figure 286 below:
Figure 286
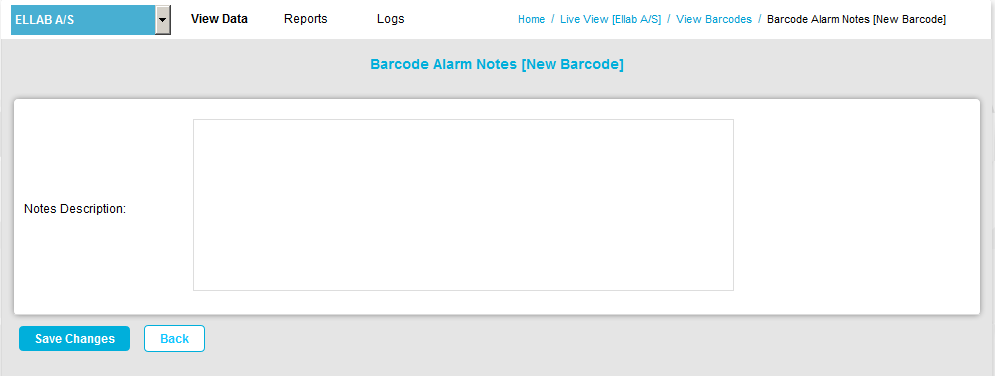
2.Add a new Note for the Alarm or edit an existing Note.
3.Click on the Save Changes button.
•The Alarm Note is added and you are returned to the View Barcodes window.
•To cancel adding an Alarm Note, click on the Back button.
➢You are returned to the View Barcodes window without an Alarm Note being added. See Figure 283 above.
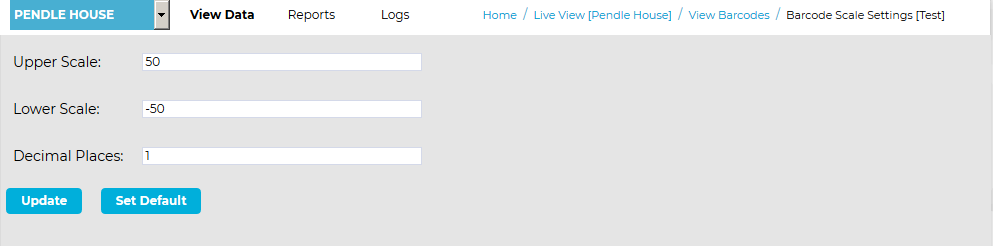
To enter or edit values for displayed data's Scale: 1.Click on [Scale] in the Actions column to display the Barcode Scale Settings [barcode name] window. See Figure 287 below: Figure 287
2.Define or edit the range of the data to be displayed by entering upper and lower values into the Upper Scale: and Lower Scale: boxes. 3.Enter or edit the required number of decimal places the data is to be displayed to. 4.Either: Click on the Update button to apply the Scale values. Or: i.Click on the Set Default button to populate the boxes with the default values. ii.Click on Update to apply the default Scale values. |
To enter or edit values for displayed data's Scale:
1.Click on [Scale] in the Actions column to display the Barcode Scale Settings [barcode name] window. See Figure 288 below:
Figure 288
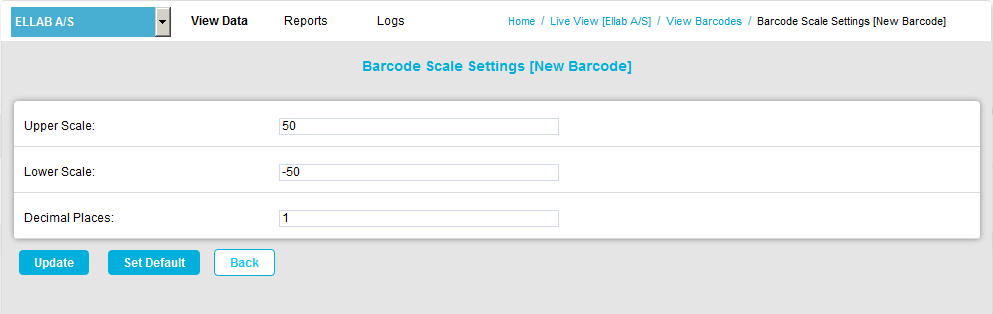
2.Define or edit the range of the data to be displayed by entering upper and lower values into the Upper Scale: and Lower Scale: boxes.
3.Enter or edit the required number of decimal places the data is to be displayed to.
4.Either:
Click on the Update button to apply the Scale values.
Or:
i.Click on the Set Default button to populate the boxes with the default values.
ii.Click on Update to apply the default Scale values.
Or:
To cancel adding or editing Scale values, click on the Back button.
•You are returned to the View Barcodes window without Scale values being added or edited. See Figure 284 above.
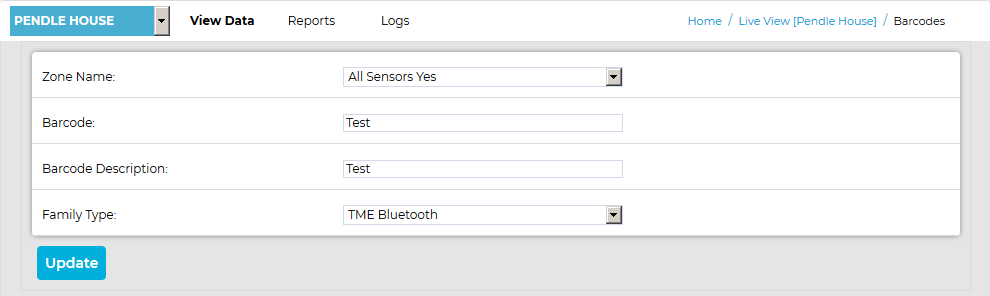
To edit a barcode's details: 1.Click on [Edit] in the Actions column to display the Barcodes window. See Figure 289 below: Figure 289
2.Select the Zone to associate the barcode with from the Zone Name: drop-down list. 3.Enter a name and description for the barcode in the Barcode: and Barcode Description: boxes. 4.Select the barcode's Family Type from the Family Type: drop-down list. 5.Click on the Update button to apply the details. |
To edit a barcode's details:
1.Click on [Edit] in the Actions column to display the Edit Barcodes window. See Figure 290 below:
Figure 290
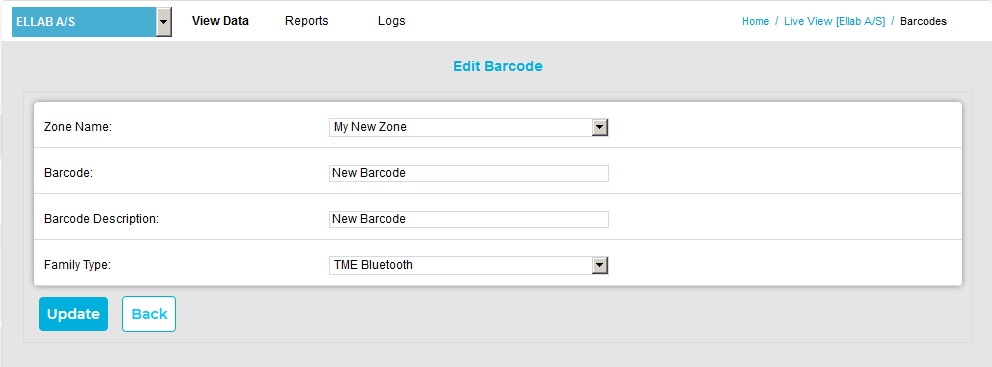
2.Select the Zone to associate the barcode with from the Zone Name: drop-down list.
3.Enter a name and description for the barcode in the Barcode: and Barcode Description: boxes.
4.Select the barcode's Family Type from the Family Type: drop-down list.
5.Either:
Click on the Update button to apply the details.
Or:
To cancel adding or editing a barcode's details, click on the Back button.
•You are returned to the View Barcodes window the barcode's details being edited. See Figure 285 above.