Navigation:
System Configuration Sensors > Sensors >> Copying Sensors Between Zones
Copying Sensors Between Zones

Contents
Sensors can be copied from on Zone to another, thus duplicating them.
There are several scenarios where you may want to have the same Sensor duplicated in different Zones:
Example 1
When a Site has an Outdoor Sensor, it may be desirable to have this Sensor available in every Zone; this way, the data from the Outdoor Sensor can be compared with Sensor data from individual rooms to see if the conditions inside are being driven by the conditions outside.
➢This would be a good indicator of how well a HVAC System (Heating, Ventilating and Air Conditioning) is performing.
Example 2
Rooms that have many enclosed spaces such as fridges in a Hospital or display cases in a Museum can benefit from the facility to compare Sensor data.
| For example: | A gallery with 20 display cases all containing RH/T Sensors could be compared with an RH/T Sensor placed in the open gallery; again, by comparing the data, you could see if the conditions in the open gallery are driving the conditions inside the cases. |
Copying Sensors from One Zone to Another
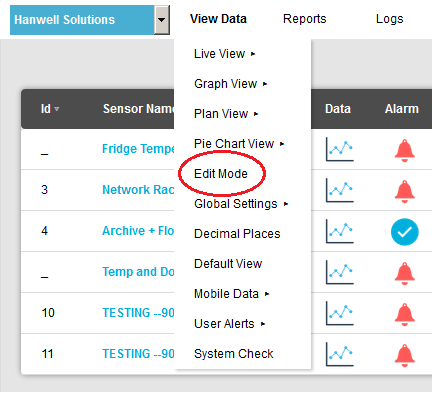
1.From the required Site's Live View window, select Edit Mode from the main View Data menu. See Figure 774 below:
Figure 774
•The Editing and Configuration window is displayed. See Figure 775 below: Figure 775
•By default, the Sensor and Zone editing/configuration window for the Zone at the top of the left-hand menu is displayed. •To display another Zone's Editing and Configuration window, click on the entry for the required Zone in the left-hand menu. For an example, see Figure 776 below: Figure 776
2.Click on the entry for the required Zone in the Zones list/left-hand menu that you want to copy sensors to. 3.From the displayed Zone's Editing and Configuration window, click on the Copy Sensor button to display the Copy Sensors window. See Figure 533 below. •You will notice that the name of the Zone that the sensors are going to be copied to forms part of the window name. See Figure 777 below: Figure 777
4.From the Zone Name (Copy from): drop-down list, select the Zone that you want to copy the sensor(s) from. •The names of the available sensors in that Zone will appear in the left-hand Source List column. 5.Either: •Highlight the sensor(s) you wish to copy, then click on the right-pointing arrow. ➢This will move the highlighted sensor(s) to the right-hand Destination List column. Or: •Click on the double right-pointing arrow. ➢This will move all of the selected Zone's sensors to the right-hand Destination List column. Sensors can be removed from the Destination List by clicking on the left-pointing arrow or double left-pointing arrow as above. •Where a Zone contains a large number of sensors, the Filter: fields can be used to search for the required sensors. Start to type the name of the required sensor and the lists of sensors displayed in the Filter Source List: or Filter Destination List: fields will reduce in length as the filter 'zooms in' on the required sensor. 6.When happy with the details select Submit. •You will be returned to the Zone's Editing and Configuration window. |


•The Edit Mode window for the selected Site is displayed. See Figure 778 below:
Figure 778
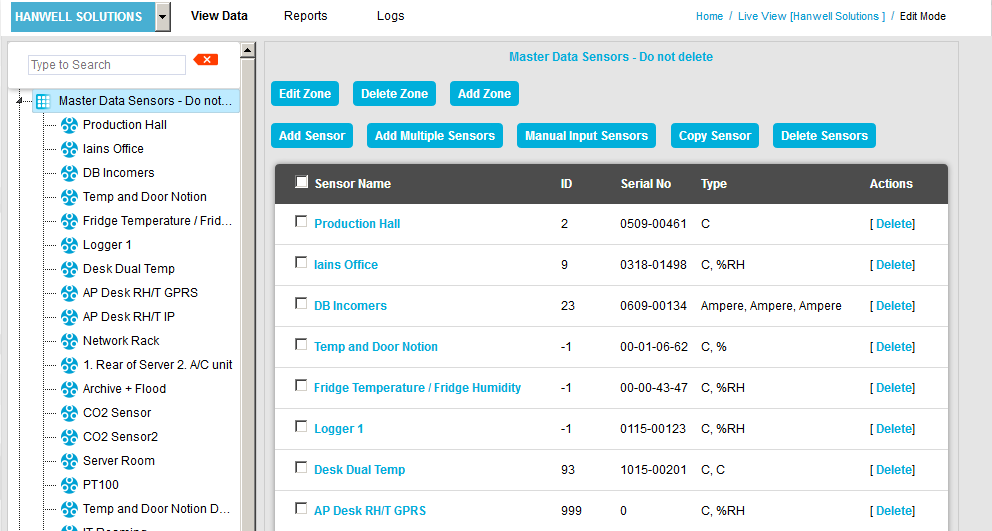
•By default, the Sensor and Zone editing/configuration window for the Zone at the top of the left-hand menu is displayed.
•To display another Zone's Edit Mode window, click on the entry for the required Zone in the left-hand menu. For an example, see Figure 779 below:
Figure 779

2.In the Zones list/left-hand menu, click on the entry for the Zone that you want to copy Sensors to.
3.From the displayed Zone's Edit Mode window, click on the Copy Sensor button to display the Copy Sensors to (Zone Name) window. See Figure 780 below.
•You will notice that the name of the Zone that the Sensors are going to be copied to forms part of the window's name.
Figure 780
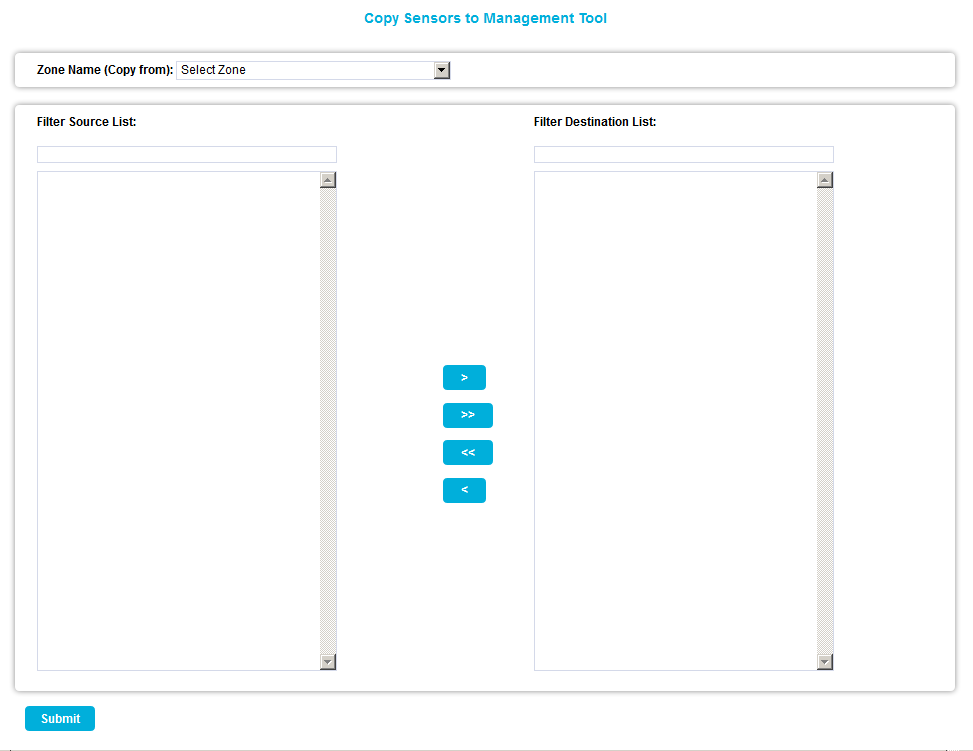
4.From the Zone Name (Copy from): drop-down list, select the Zone that you want to copy the Sensor(s) from.
•The names of the available Sensors in that Zone will appear in the left-hand Source List column.
5.Either:
•Highlight the Sensor(s) you wish to copy, then click on the right-pointing arrow.
•This will move the highlighted Sensor(s) to the right-hand Destination List column.
Or:
•Click on the double right-pointing arrow.
•This will move all of the selected Zone's Sensors to the right-hand Destination List column.
Sensors can be removed from the Destination List by clicking on the left-pointing arrow or double left-pointing arrow as above.
•Where a Zone contains a large number of Sensors, the Filter: fields can be used to search for the required Sensors.
Start to type the name of the required Sensor and the lists of Sensors displayed in the Filter Source List: or Filter Destination List: fields will reduce in length as the filter 'zooms in' on the required Sensor.
6.When happy with the details select Submit.
•The selected Sensor(s) are copied to the selected Zone and you are returned to the Zone's Edit Mode window.