Navigation:
System Configuration Admin > Sensor Groups > Managing Sensor Groups >> Editing a Sensor Group
Editing a Sensor Group

Contents
Editing a Sensor Group
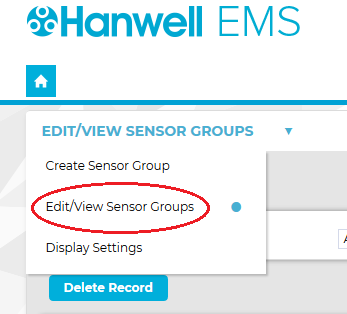
1.If the Edit/View Sensor Groups window is not already displayed, select Edit/View Sensor Groups from the EDIT/VIEW SENSOR GROUPS drop-down menu. See Figure 490 below:
Figure 490
•The Edit/View Sensor Groups window is displayed. See Figure 491 below:
Figure 491
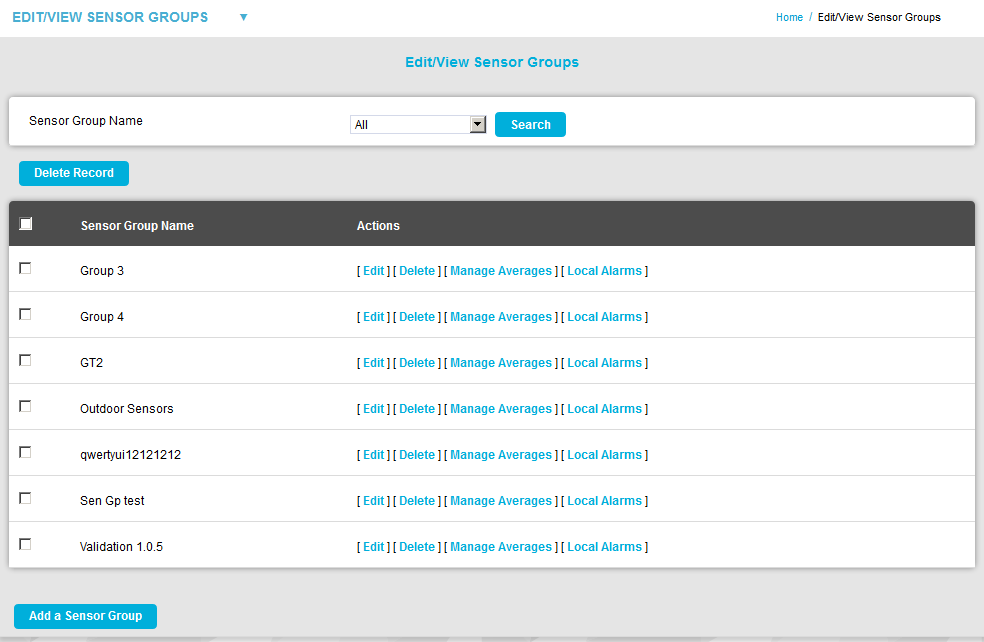
2.Click on [Edit] in the Actions column for the required Sensor Group.
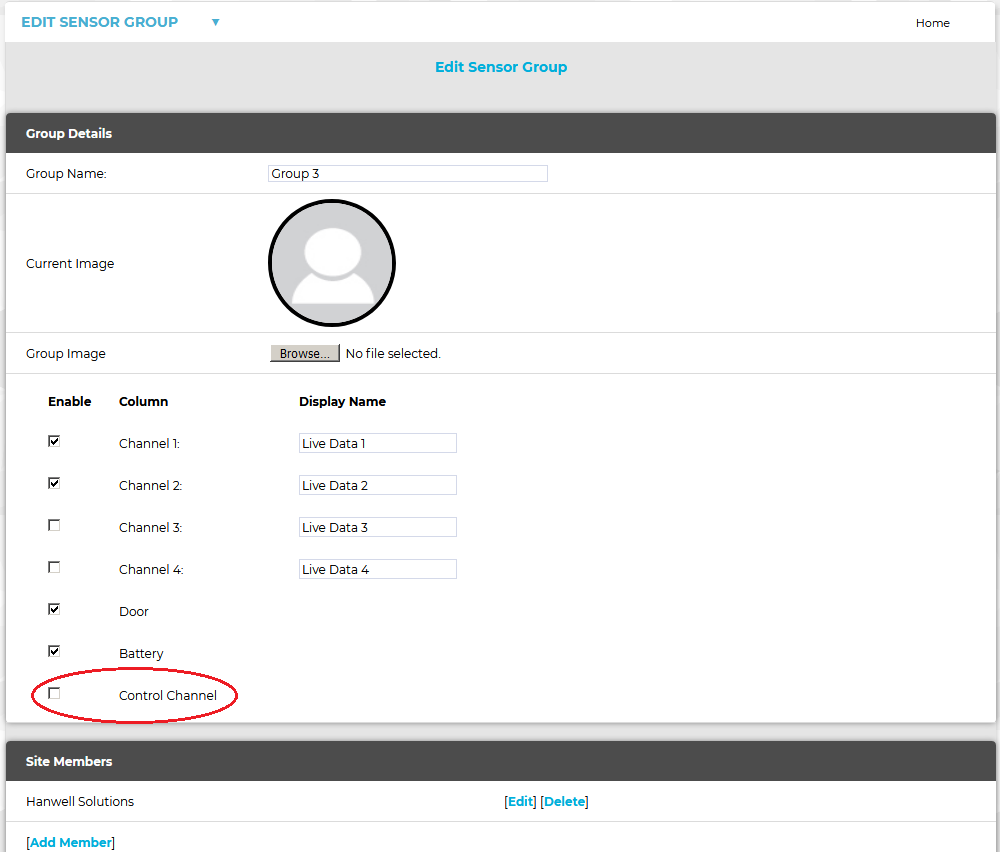
•The selected Sensor Group's Edit Sensor Group window is displayed. See Figure 492 below.
•The Site Members associated with the selected Sensor Group are shown in the Site Members pane. See Figure 492 below:
Figure 492
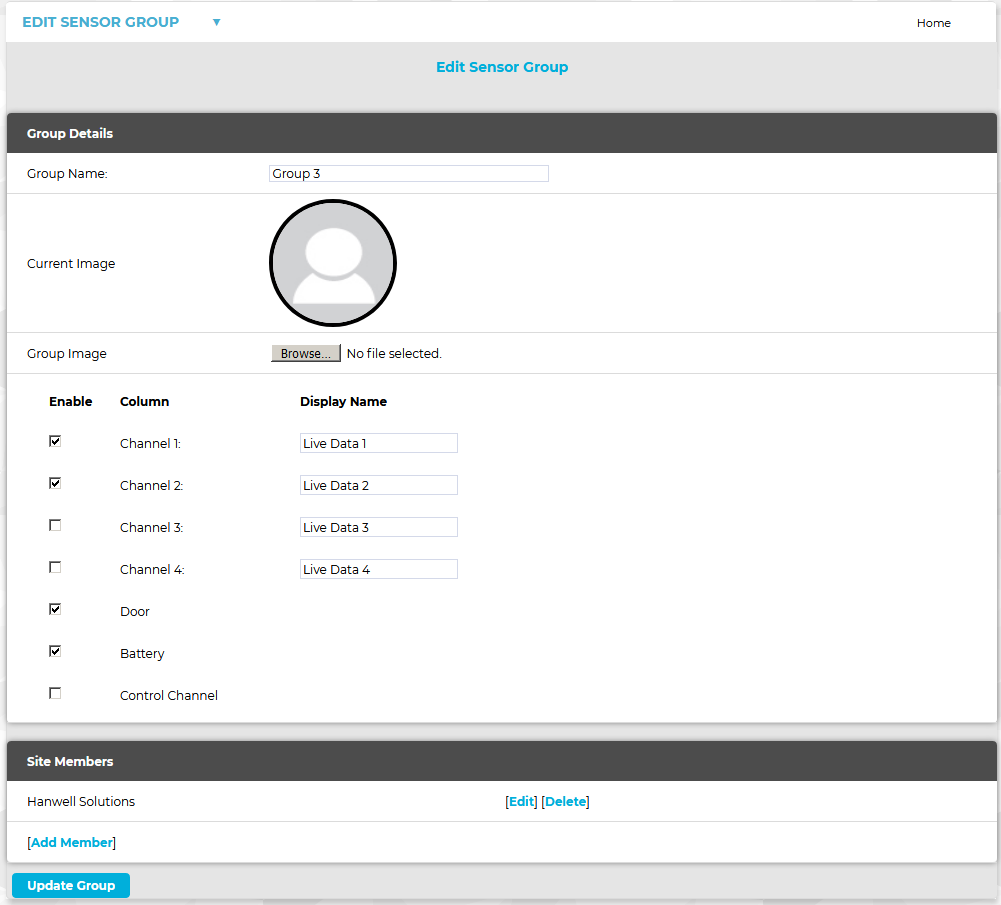
From this window, you can:
•Add or Remove Sensors from the Sensor Group
•Add Members to the Sensor Group
•Delete Members from the Sensor Group
•Select an additional Control Channel column for display in the Live View
Adding or Removing Sensors to/from the Sensor Group
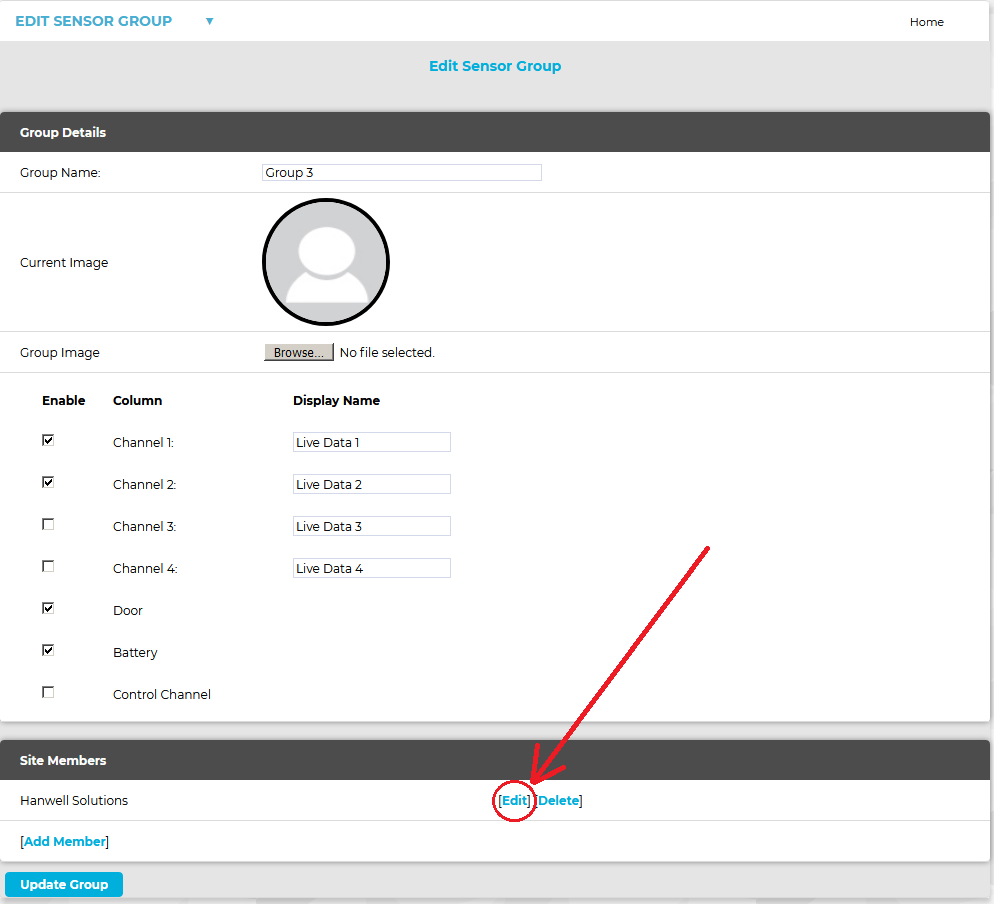
1.Click on [Edit] on the required Site Member's row. See Figure 493 below:
Figure 493
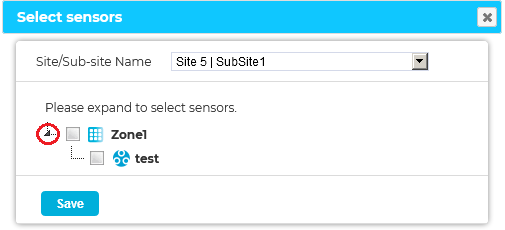
•The Select Sensors window is displayed. See Figure 494 below:
Figure 494
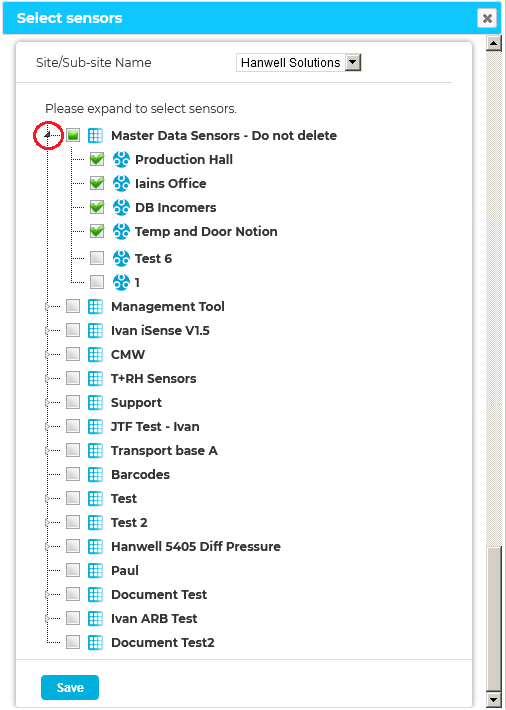
2.Select the required Site/Sub-Site from the Site/Sub-Site Name drop-down list.
•A list of Zones associated with the selected Site/Sub-Site is displayed.
Either:
Check or uncheck the tickbox to the left of the required Zone's name in the displayed list to select or deselect all of the Zone's Sensors.
Or:
i.Expand the Zone's Sensor list by clicking on the small arrow to the left of the tickbox to expand the Zone's Sensor list.
ii.Check or uncheck each required Sensor's tickbox to select or deselect individual Sensors. See Figure 494 above.
3.Click on the Save button.
| Note: | You may need to scroll down to the bottom of the Select Sensors window to uncover the Save button. |
•The Edit Sensor Group window is displayed.
4.Click on Update Group to add/remove the selected Sensors to/from the selected Site/Sub-Site which is a member of the chosen Sensor Group.
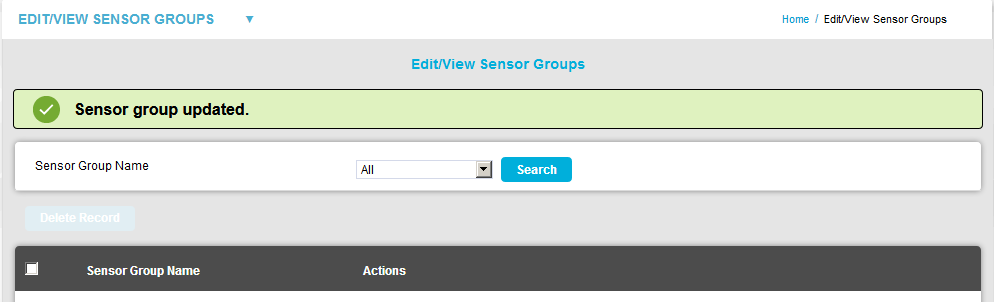
•The Edit/View Sensor Groups window is shown, with a green message dialog displayed. See Figure 495 below:
Figure 495
| Note: | The new Sensors are not actually added to the selected Site/Sub-Site in the database until the Update Group button is clicked. Prior to this changes only occur in the browser. |
Adding Members to the Sensor Group
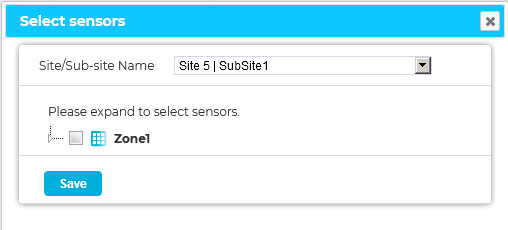
•The Select Sensors window is displayed. See Figure 496 below:
Figure 496

2.From the Site/Sub-Site Name drop-down-list (containing a list of Sites/Sub-Sites the User has access to), select Sites/Sub-Sites to add as Site Members to the Sensor Group.
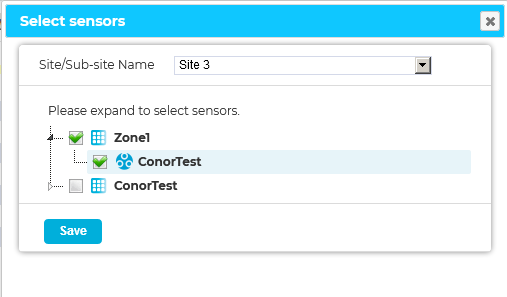
•Selecting a Site/Sub-Site from the Site/Sub-Site Name drop-down-list displays a list of the selected Site/Sub-Site's Zones. See Figure 497 below:
Figure 497
Either:
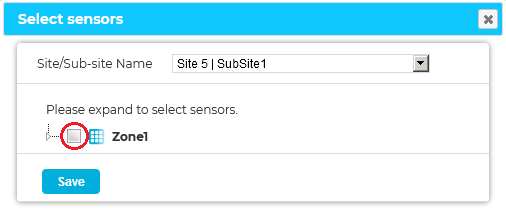
Check the tickbox to the left of the Zone's name in the displayed list to select all of the Zone's Sensors.
See Figure 498 below:
Figure 498
Or:
i.Expand the Zone's Sensor list by clicking on the small arrow to the left of the tickbox to expand the Zone's Sensor list. See Figure 499 below:
Figure 499
ii.Check each required Sensor's tickbox to select individual Sensors. See Figure 500 below:
Figure 500
3.Click on the Save button.
•The Edit Sensor Group window is displayed with the new Site/Sub-Site added to the Site Members pane.
4.Click on Update Group to add the selected Site/Sub-Site its Sensors to the selected Sensor Group.
•The Edit/View Sensor Groups window is displayed with a green message dialog displayed. See Figure 501 below:
Figure 501
| Note: | The new Site/Sub-Site is not actually added to the selected Sensor Group in the database until the Update Group button is clicked. Prior to this changes only occur in the browser. |
Deleting Members from the Sensor Group
In the Site Members pane of the Edit Sensor Group window, click [Delete] in the required Site Member's row.
•The following warning message is displayed. See Figure 502 below:
Figure 502

➢Clicking on Yes deletes the Member from the Sensor Group.
➢Clicking on No cancels the deletion.
If a valid Conset Licencelicensehas been applied, an additional Control Channel column can be selected for display in the Live View. See Figure 503 below:
•If the Control Channel box has been ticked, when a Sensor Group is shown in Live View, an additional, Control Channel, column will be shown on the right hand side of the table. See Figure 504 below:
Figure 504
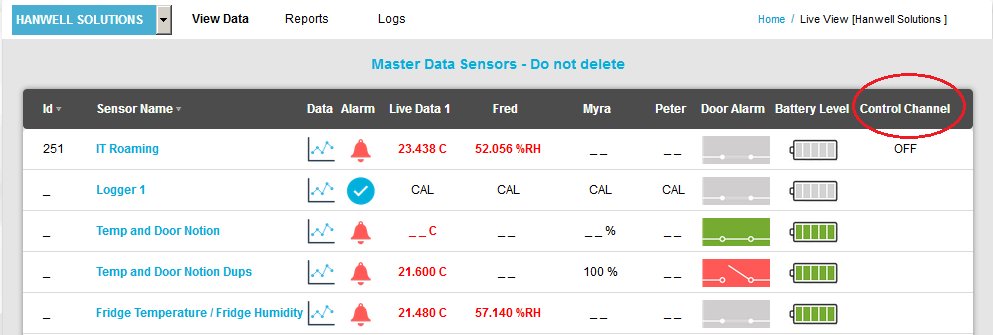
For each Sensor in a Group with an additional Control Channel Selected:
•If the Sensor has a Control Channel and a non-zero value is present on the Control Channel, the word 'ON' will be displayed in orange.
•If the Sensor has a Control Channel and a zero value is present on the Control Channel, the word 'OFF' will be displayed in black.
•If the Sensor has no Control Channel or there has been no value on the Control Channel within the configured elapsed time, the column will be blank.