
Contents
EMS Feature and User licenceslicensesare activated using the EMSConfiguration Utility's Licencelicensemenu options.
•Customers are strongly advised to keep copies of all LicencelicenseIDs and associated passwords, purchased for the EMS System.
| Note: | Activating the licencelicensefor the Validated variant of EMS requires a different procedure to be followed. See Online LicencelicenseActivation (EMS Validated) for details of this procedure. |
•Basic Online Activation Procedure
•Online LicenselicenceActivation (EMS Validated)
•Manual LicencelicenseActivation
•Online LicencelicenseDeactivation
•Counter Signatures (W901 Only)
Basic Online Activation Procedure
The easiest and safest way to activate licenceslicensesis Online. Hanwell recommends this method if possible.
| Note: | To activate a Licencelicenseonline, the EMS Server needs access to the internet. |
1.Open the EMSConfiguration tool as outlined here.
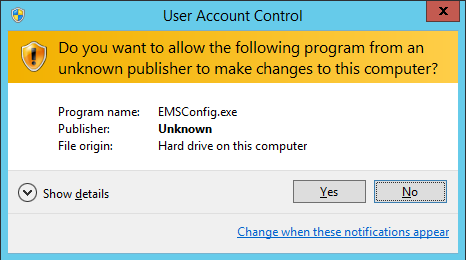
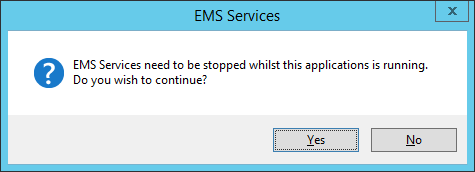
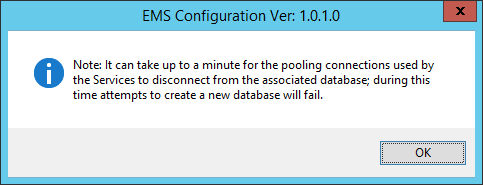
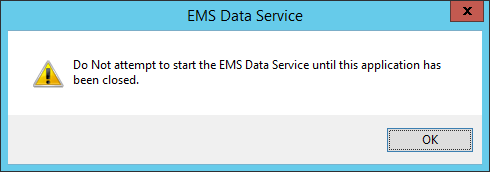
i.Start the EMSConfiguration tool by selecting it's entry in the Start menu. •A series of windows will be shown as the EMSConfiguration Tools load. •The exact windows shown will depend on the OS of the machine EMS is running on; examples are shown in Figures 95, 96, 97 and 98 below: Figure 95
Figure 96
Figure 97
Figure 98
ii.Click on Yes or OK on the displayed windows to accept each stage of the EMSConfiguration Tools start-up. iii.The EMSConfiguration Ver: X.X.x.x window is displayed. |
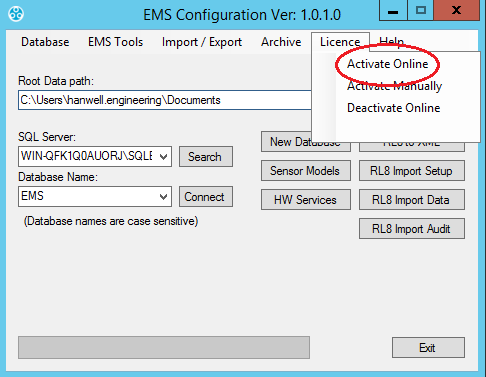
2.Select the Licencelicensetab in the EMSConfiguration Tools' main menu bar.
3.Select Activate Online from the displayed drop-down list. See Figure 99 below:
Figure 99
•After a few seconds, the Activate Online dialog box will be shown. See Figure 100 below:
Figure 100
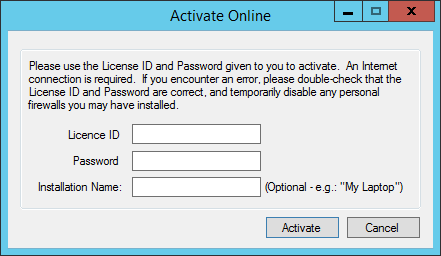
4.Enter the required LicencelicenseID and Password.
5.Click Activate.
•After a few seconds you will see a message stating that the Licencelicensehas been activated.
Online LicencelicenseActivation (EMS Validated)
Prior to activating the Validated Licence,licensea Counter Signature User account must be added to the System.
To Add a Counter Signature User Account to a System:
1.Login to EMS using:
User Name: Admin User
Password: Admin
2.Click Login.
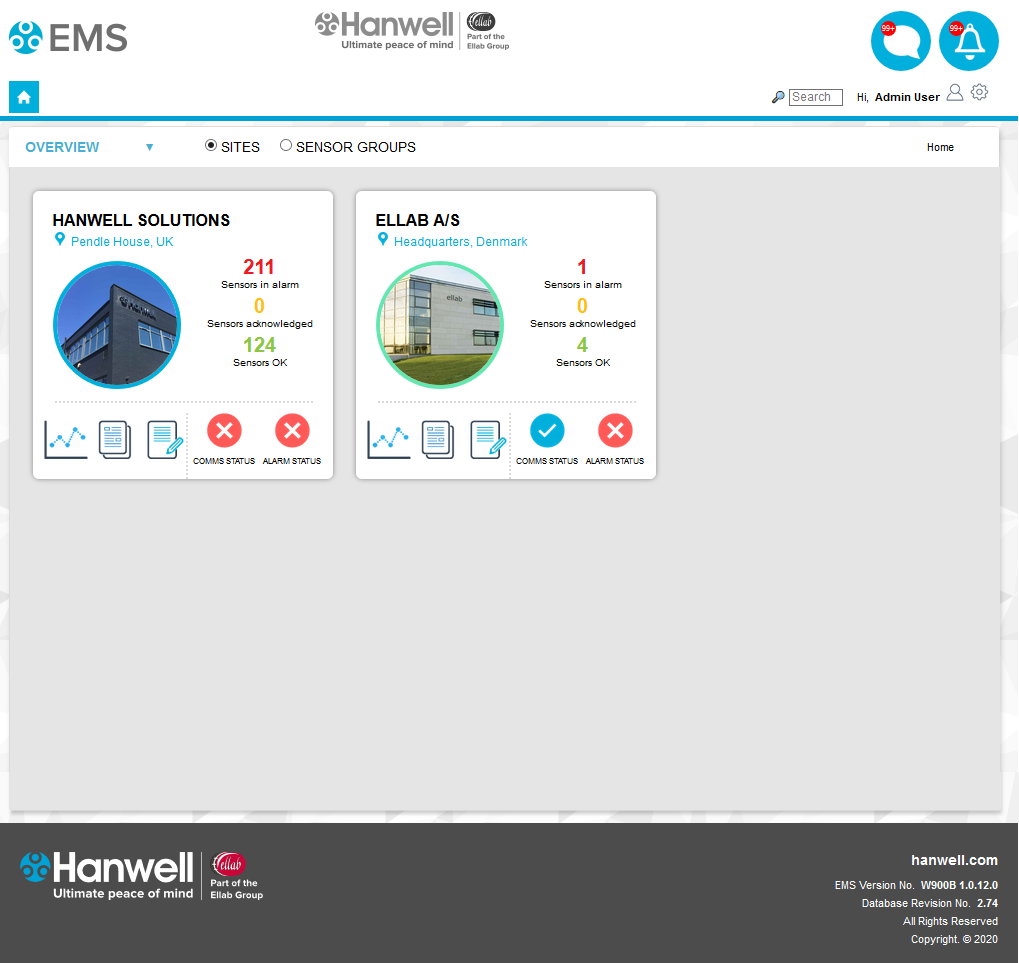
•The EMS Home screen is displayed. See Figure 101 below:
Figure 101
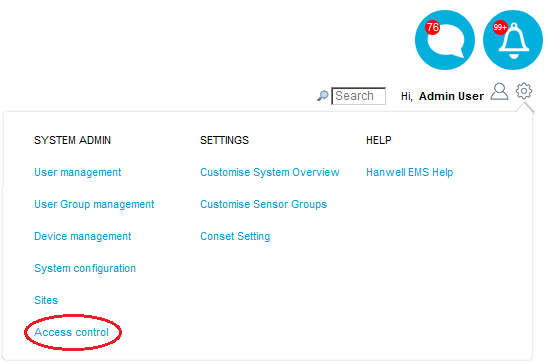
3.Click on the Cog icon on the right-hand side of the top menu bar. See Figure 102 below:
Figure 102

•The System drop-down menu is displayed. See Figure 103 below:
Figure 103
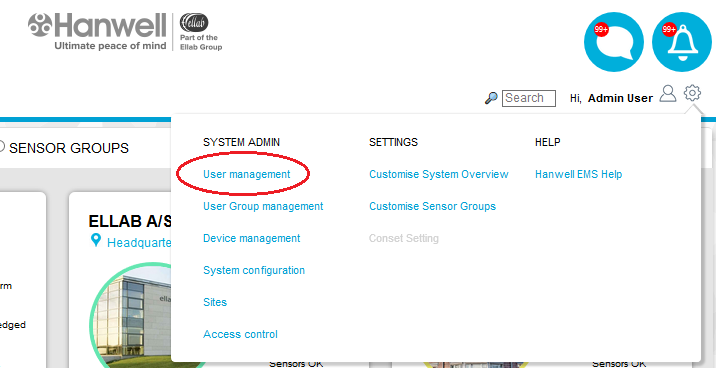
4.Select User management from the SYSTEM ADMIN list. See Figure 103 above.
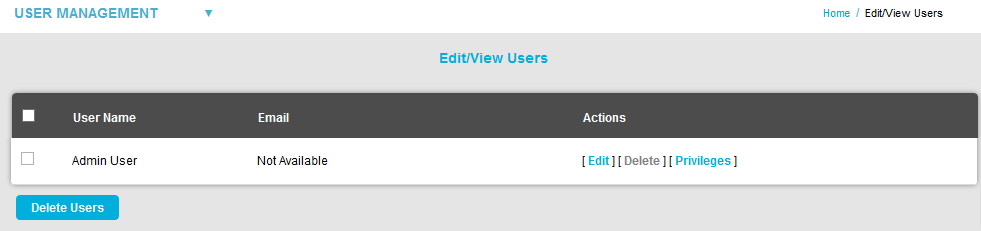
•The Edit/View Users window is displayed. See Figure 104 below:
Figure 104
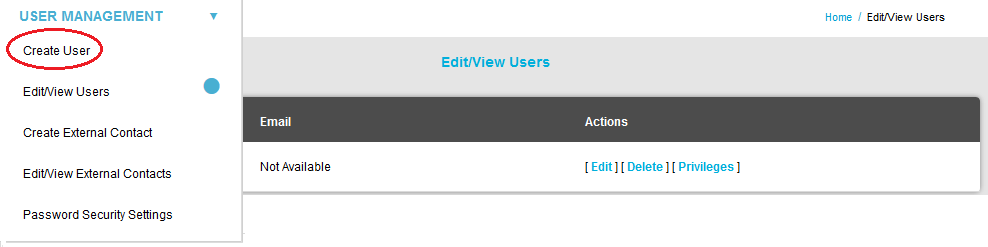
5.From the USER MANAGEMENT drop-down menu, select Create User. See Figure 105 below:
Figure 105
•The Create User window is displayed. See Figure 106 below:
Figure 106
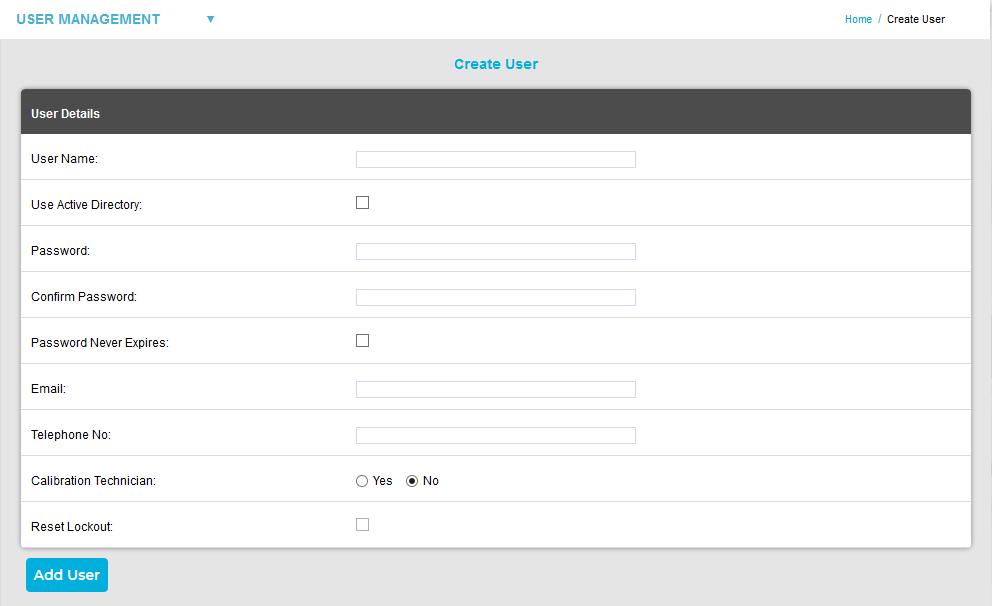
6.In the User Details window:
i.Enter a Username into the User Name: field; for the purposes of this Section, the manual uses User1 as the Username.
ii.Enter a password consisting of at least four letters (one of which must be uppercase) and four numbers into the Password: field.
•Make a note of the Username and Password for User1.
iii.Enter the same password into the Confirm Password: field.
iv.Click Add User.
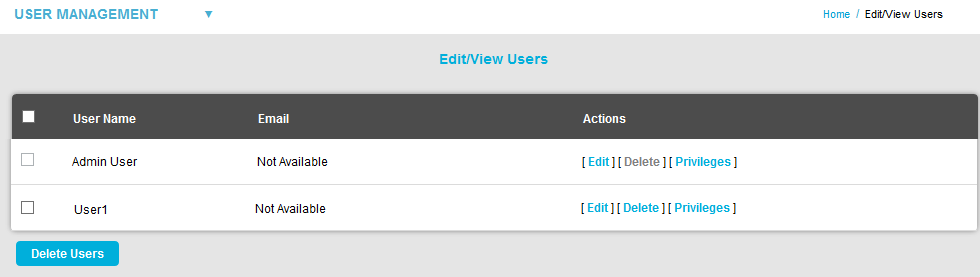
•The Edit/View Users window is displayed, showing Admin User and User1. See Figure 107 below:
Figure 107
7.From the System drop-down menu, select Access Control from the SYSTEM ADMIN list. See Figure 108 below:
Figure 108
•The Access Control window with buttons for Manage Roles and Manage Users is displayed. See Figure 109 below:
Figure 109

8.Either:
Click on the Manage Users button on the Access Control window. See Figure 109 above.
Or:
Select Manage Users from the ACCESS CONTROL drop-down menu. See Figure 110 below:
Figure 110

•The Manage Access Control window is displayed:
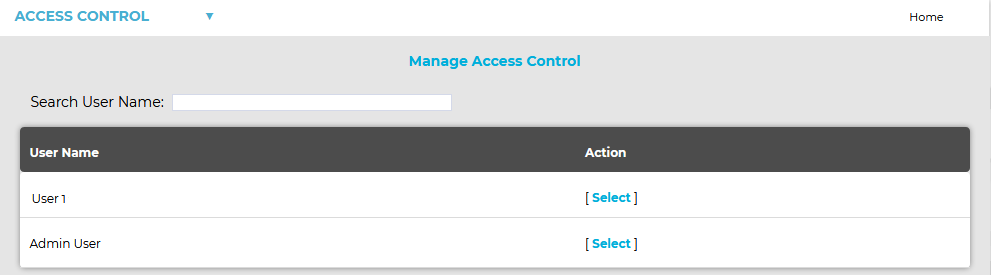
9.Click on [Select] under the Action column for User1.
•A Manage Access Control window is displayed for User 1 . See Figure 111 below:
Figure 111
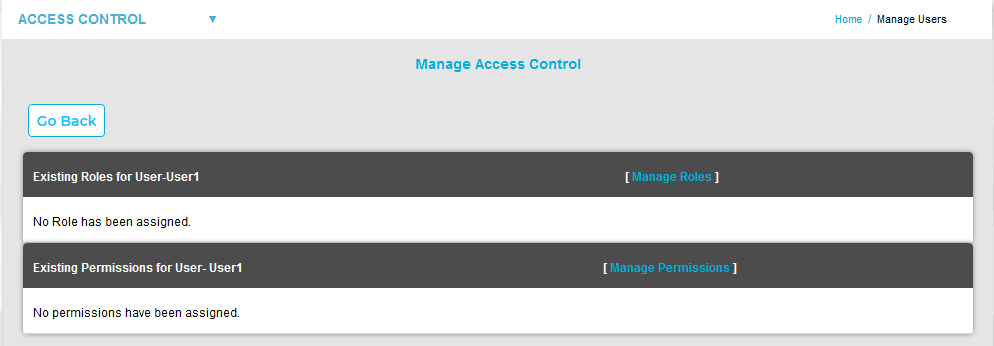
10.Click [Manage Permissions].
•A Manage Access Control window is displayed for User 1. See Figure 112 below:
Figure 112
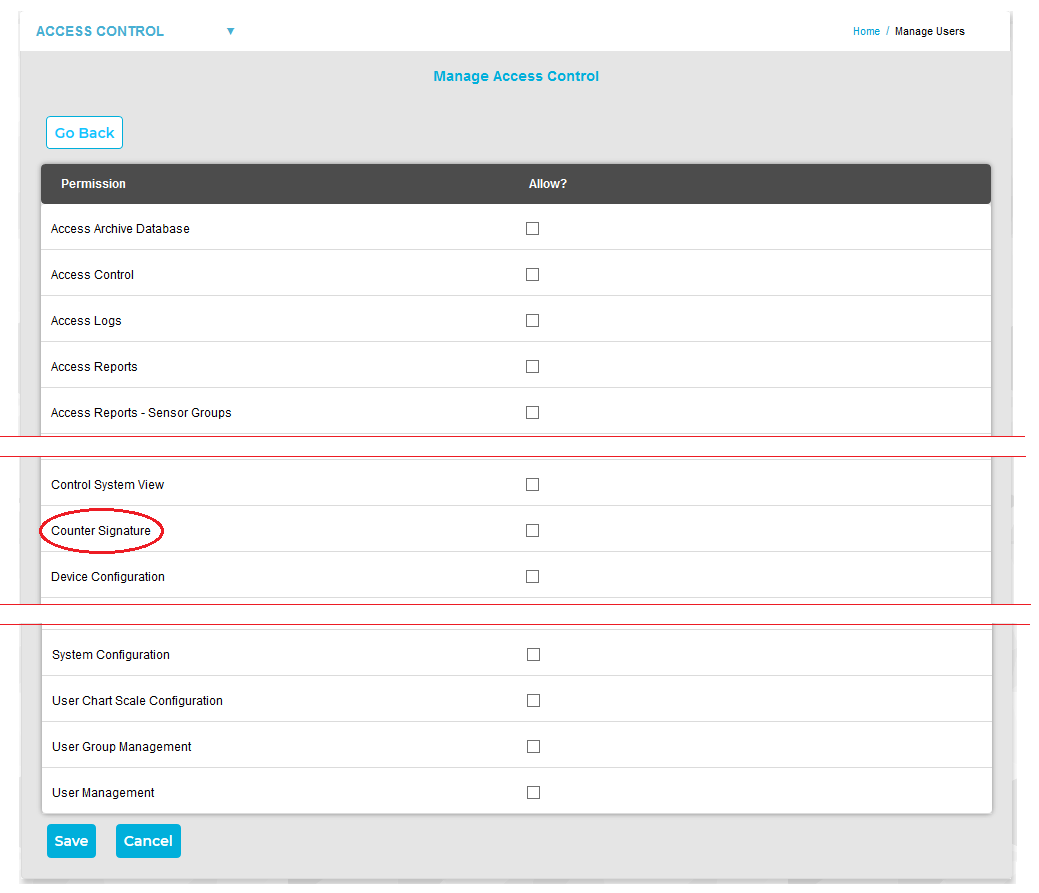
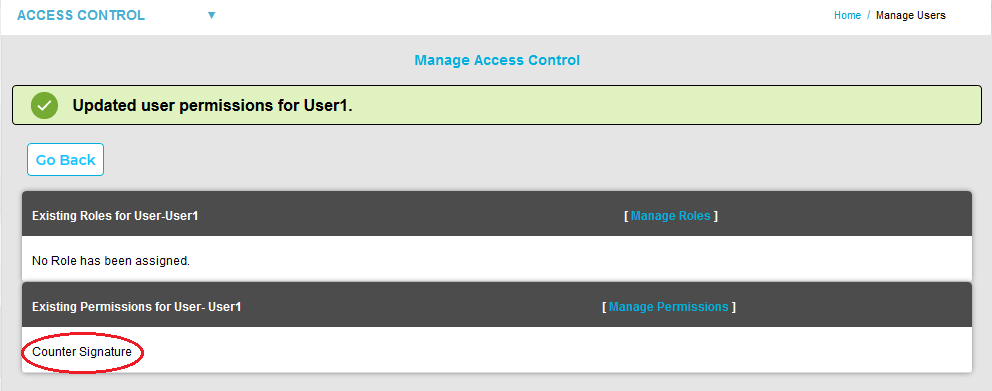
11.Tick the box on the Counter Signature row in the Allow? column to assign Counter Signature Permissions to User 1.
12.Click on the Save button to confirm any changes.
•You are returned to the Manage Access Control (Permissions) window for User 1, with the Counter Signature Permission added to the Existing Permissions for User - User 1 list.
•A green tick dialog message box is also displayed. See 113 below:
Figure 113
13.Click Log Out.
14.Follow the Basic Online Activation Procedure.
Manual LicencelicenseActivation
Where necessary, Manual LicencelicenseActivation is possible.
| Note: | Prior to activating the Validated Licence,licensea Counter Signature User Account must be added to the System. |
1.Open the EMSConfiguration tool as outlined in Pre-Configuration Operations.
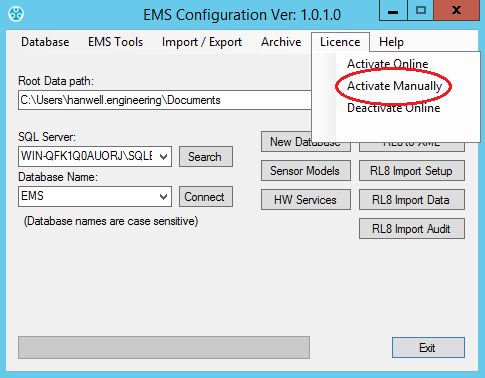
2.In the displayed window, select the Licencelicensetab then select Activate Manually. See Figure 114 below:
Figure 114
| Note: | If a Counter Signature User Account doesn't exist, the following window will be displayed: |
Figure 115
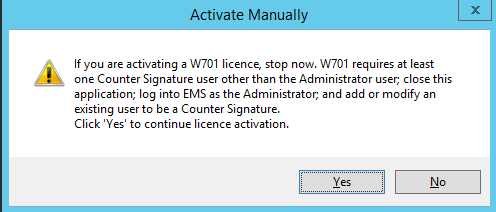
➢For details on how to add Counter Signature User Account, click here.
•After a few seconds, the Activate Manually dialog box will be shown. See Figure 116 below:
Figure 116
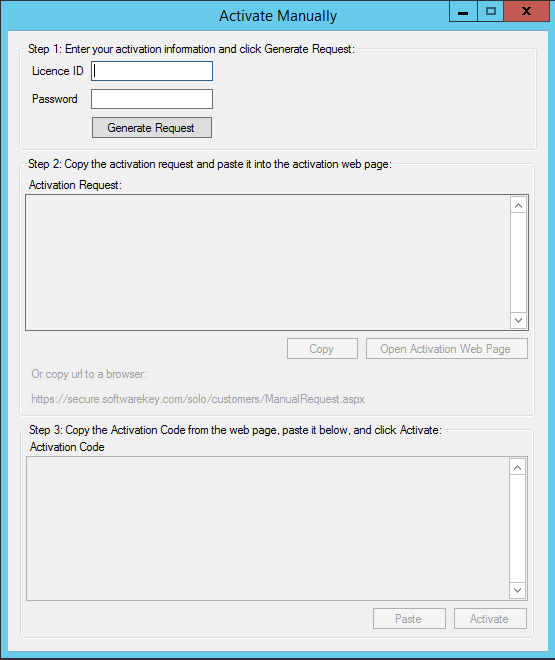
3.Enter the required LicenselicenceID and Password.
4.Click Generate Request.
•The Activation Request text will be displayed. See Figure 117 below:
Figure 117

5.Copy this text to a text file and transfer it to a machine with internet access.
6.Open a browser and navigate to:
https://secure.softwarekey.com/solo/customers/Manualrequest.aspx
and
Either:
Copy the request text into the textbox.
Or:
Upload it to the Server. See Figure 118 below:
Figure 118
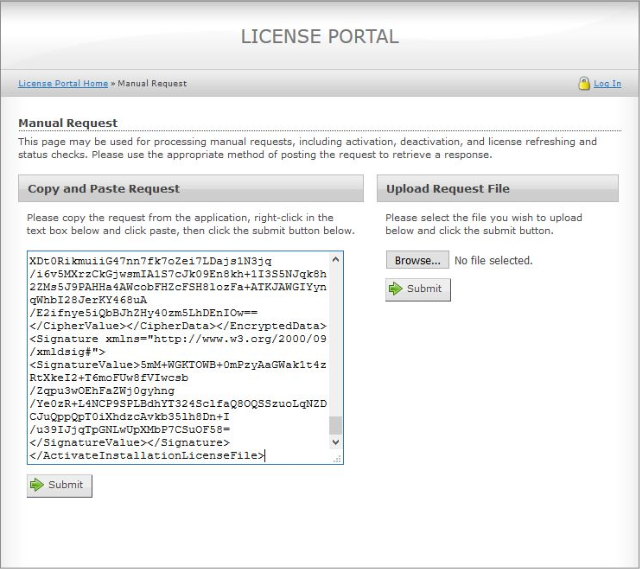
7.Click Submit.
•The Server will generate and present an XML licencelicensetext; copy this licencelicenseto a text file.
8.Return to the EMS Server and paste the licencelicensetext into the textbox provided at the bottom of the Activate Manually dialog box.
9.Click on the Activate button.
10.If the licencelicenseis activated successfully, an Activation Successful window will be displayed. See Figure 119 below:
Figure 119

Online LicencelicenseDeactivation
EMS licenceslicensescan be deactivated to assist in migrating EMS to a new Server.
| Note: | Most EMS licencelicensetypes are limited to five deactivations; some licencelicensetypes cannot be deactivated. |
1.Open the EMSConfiguration tool.
2.Select Licencelicensefrom the main menu and then select Deactivate Online from the displayed drop-down list.
•The Deactivate Licencelicensedialog is displayed. See Figure 120 below:
Figure 120
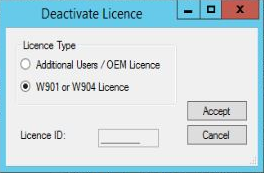
If you wish to deactivate an EMS Variant licencelicensee.g. W904:
i.Select the lower radio button. See Figure 120 above.
ii.Click Accept.
If you wish to deactivate an Additional Users or OEM licencelicensee.g. W902 or W915:
i.Select the Additional Users/OEM Licencelicenseradio button. See Figure 121 below:
Figure 121
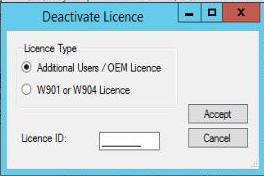
ii.Enter the LicencelicenseID in the text box.
iii.Click Accept.
➢A Warning dialog will be displayed:
❖Click Yes to deactivate EMS Variant Licence.license
❖Click No to cancel the operation.
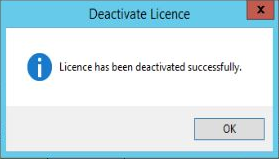
•Deactivation may take a few seconds.
•When complete, a Deactivate Licencelicensemessage will be displayed when the Licencelicensehas been deactivated successfully. See Figure 122 below:
Figure 122
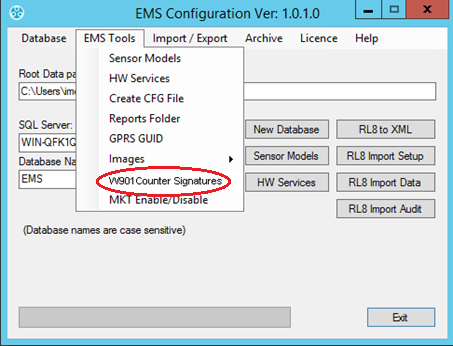
Counter Signatures (W901 Only)
With W906 Validated EMS installed, and a W901 Licencelicenseapplied to it, Counter Signature functionality is DISABLED by default on your System.
To ENABLE Counter Signatures, use the EMSConfig Utility as follows:
1.Open the EMSConfiguration Tool as outlined in Pre-Configuration Operations.
•The EMSConfiguration Ver: X.X.X.X window is displayed.
2.From the EMS Tools drop-down menu, select W901 Counter Signatures. See Figure 123 below:
Figure 123
•To DISABLE Counter Signatures again, follow the same steps.