Navigation:
System Configuration Sensors > Configuring Sensors >> Accessing Sensor Properties
Accessing Sensor Properties

Contents
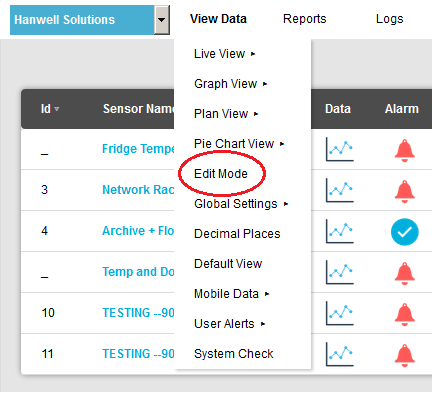
1.From the required Site's Live View window, select Edit Mode from the main View Data menu. See Figure 791 below:
Figure 791
2.In the left-hand menu of the displayed Editing and Configuration window, click on the + symbol next to the Zone containing the Sensors to be accessed. •The selected branch will expand showing all of the available sensors for the selected Zone. See Figure 792 below: Figure 792
3.Click on the + symbol next to the Sensor name to view the properties of the Sensor that is to be Edited. •This will expand the branch again to show the Properties folder for the Sensor. See Figure 793 below: Figure 793
4.Click on the + symbol next to Properties to access the individual Sensor properties. •This will expand the branch again to show the Sensor's configurable Properties. See Figure 794 below: Figure 794
|


•The Edit Mode window is displayed. See Figure 795 below:
Figure 795
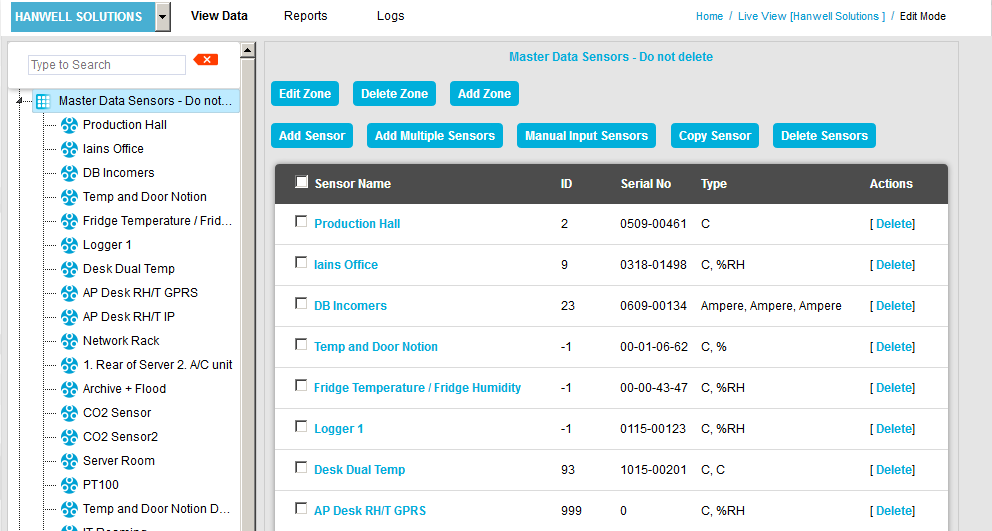
•By default, the Sensor and Zone editing/configuration window for the Zone at the top of the left-hand menu is displayed.
•To display another Zone's Edit Mode window, click on the entry for the required Zone in the left-hand menu. For an example, see Figure 796 below:
Figure 796

2.Either:
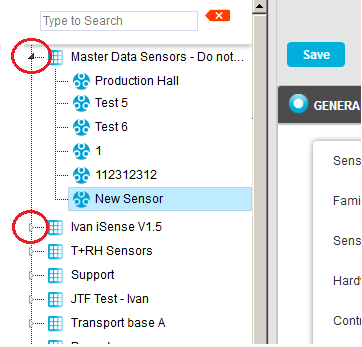
i.In the left-hand list of the Zone's Edit Mode window, click on the small 'arrow' symbol to display a list of the Sensors associated with the Zone. See Figure 797 below:
Figure 797
ii.In the left-hand list, click on the required Sensor's icon ![]() .
.
Or:
In the table in the Zone's Edit Mode window, click on the required Sensor's name in the Sensor Name column. See Figure 798 below:
Figure 798
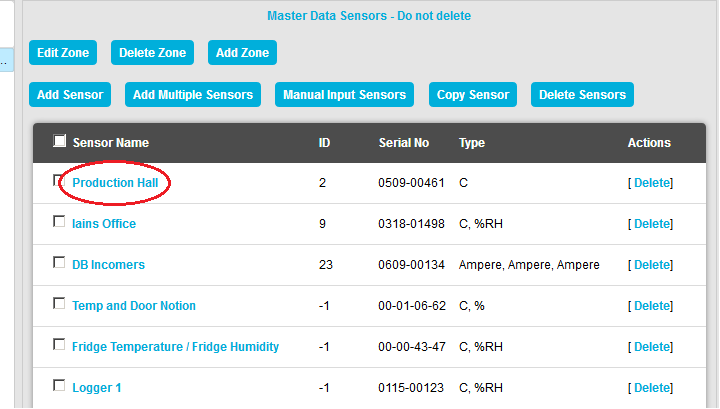
•The Edit Mode window for the selected Sensor is displayed. See Figure 799 below:
Figure 799
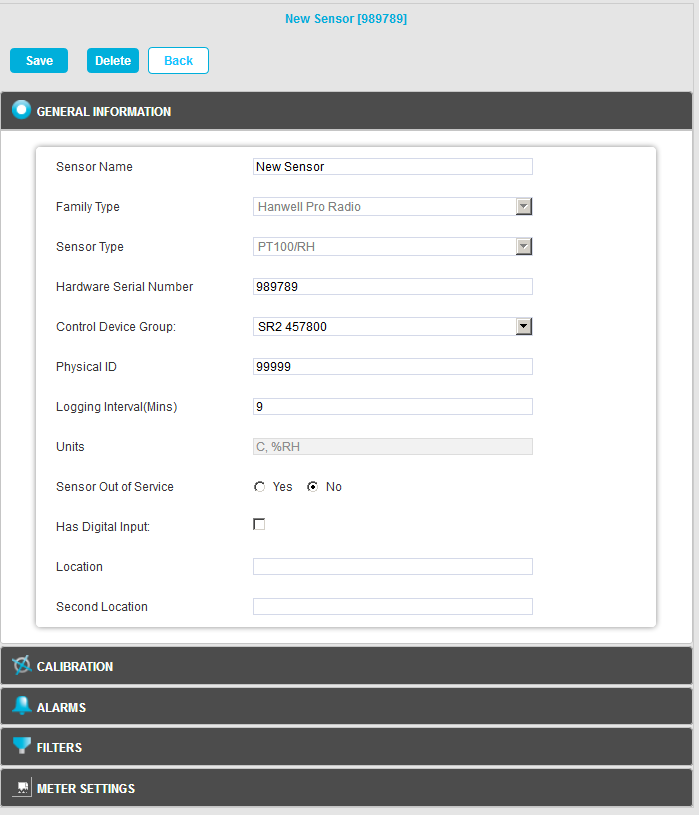
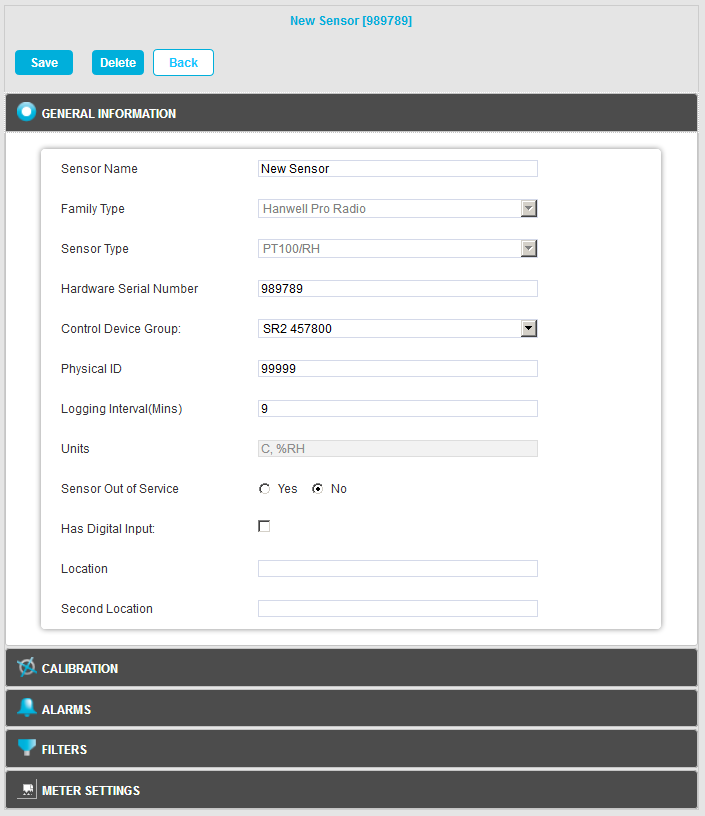
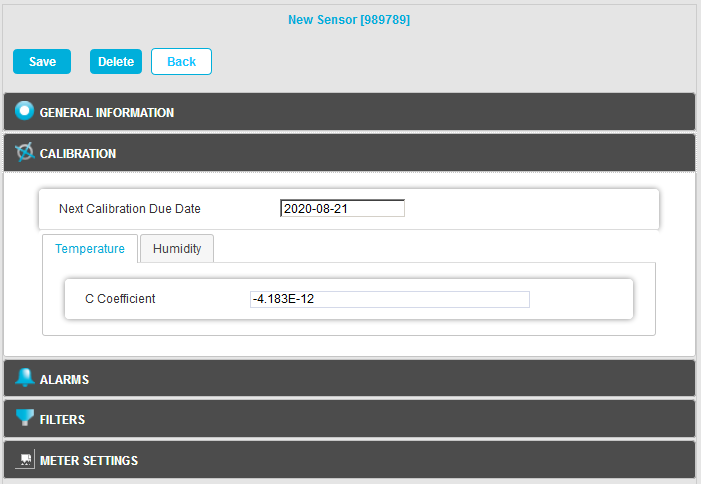
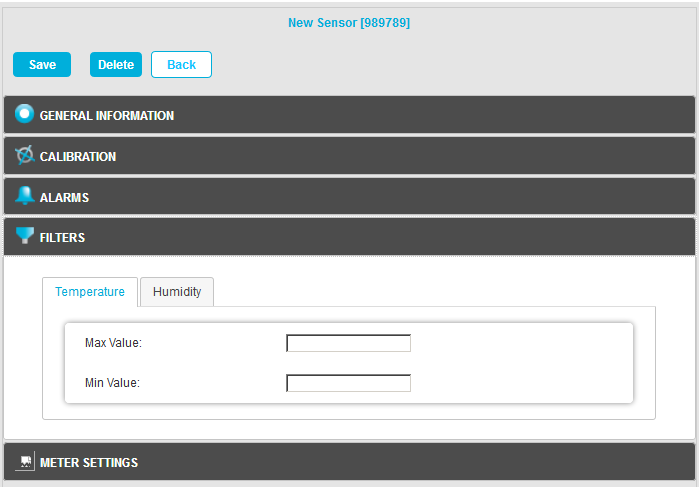
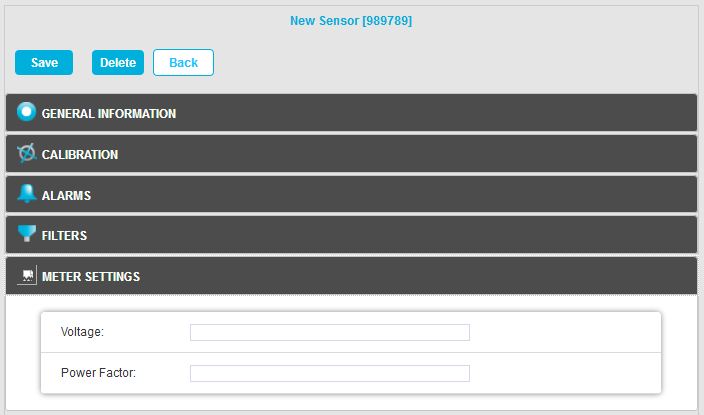
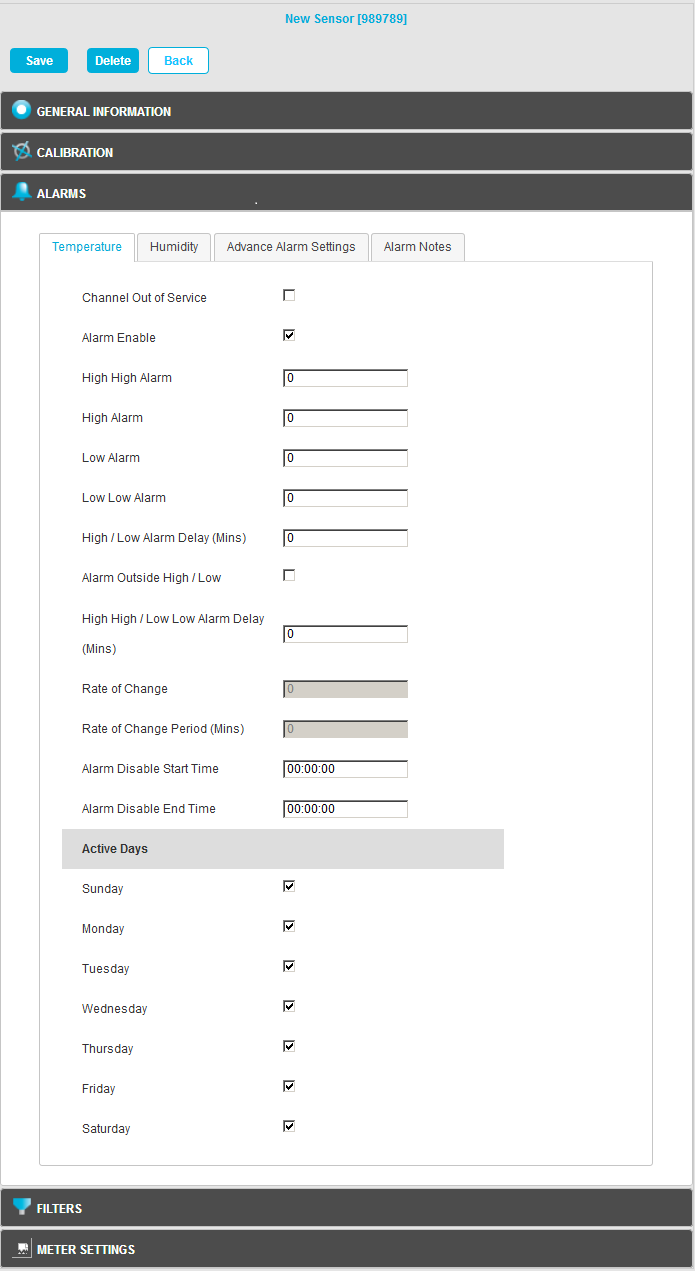
Sensor Property functionality is accessed by clicking on the relevant panes at the bottom of the Edit Mode window. See Figure 800 below.
•Click on the relevant image to navigate to information on the parameters for each Sensor Property:
Figure 800