
Contents
This feature allows you to enter Notes relating to a Sensor/Transmitter's Alarm.
•Alarm Notes are especially useful for inexperienced operators, giving them instructions on what to do when an Alarm occurs.
| For example: | In the middle of the night the temperature increases in a room or space containing high value objects and an Alarm is generated. The night shift operative or security guard will be presented with the Alarm Note which states: “On a high temperature alarm contact facilities on Ext 235 and report the alarm condition and the room location”. |
•The System can be set up so that low level Users can monitor the System and respond to alarms, but can’t make changes.
This feature means that someone not familiar with an area or its contents can still effectively and efficiently deal with an alarm condition.
Accessing and Editing Alarm Notes
To Access the Alarm Notes for a Sensor/Transmitter's Alarm:
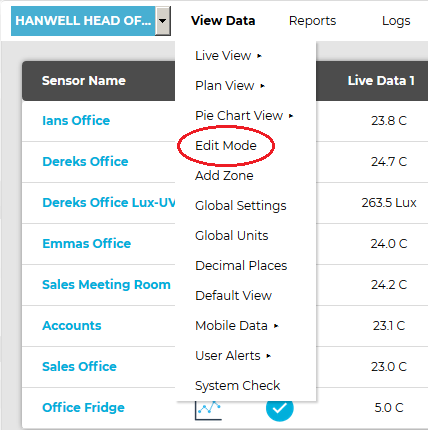
1.From the required Site's Live View window, select Edit Mode from the main View Data menu. See Figure 916 below:
Figure 916
2.In the left-hand menu of the displayed Editing and Configuration window, click on the + symbol next to the Zone containing the Sensors to be accessed. •The selected branch will expand showing all of the available sensors for the selected Zone. See Figure 917 below: Figure 917
3.Click on the + symbol next to the Sensor name to view the properties of the Sensor that is to be Edited. •This will expand the branch again to show the Properties folder for the Sensor. See Figure 918 below: Figure 918
4.Click on the + symbol next to Properties to access the individual Sensor properties. •This will expand the branch again to show the Sensor's configurable Properties. See Figure 919 below: Figure 919
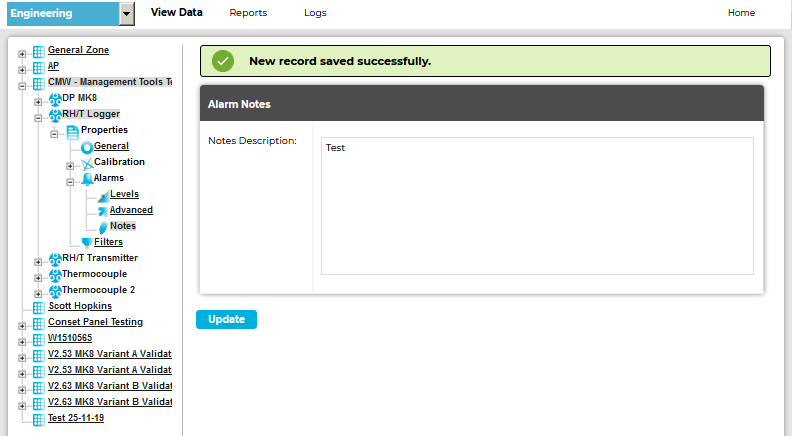
5.Click on the + sign next to the Alarms icon to expand the Alarm property entries for the selected Sensor. 6.Click on the Notes icon to display the Alarm Notes window for the selected Sensor/Transmitter. See Figure 920 below: Figure 920
7.Type your Sensor/Transmitter's Alarm Note into the Alarm Notes dialog box or edit an existing Alarm Note. 8.When happy, click Update. See Figure 920 above. •This will save the Alarm Note and either associate the Note with, or update the existing Note of, the currently selected Sensor/Transmitter. •If the Update has been successful, you will be returned to the Zone's Edit Mode window and the following message will be displayed. See 921 below: Figure 921
|


•The Site's Edit Mode window is displayed. See Figure 922 below:
Figure 922
•By default, the Sensor and Zone editing/configuration window for the Zone at the top of the left-hand menu is displayed.
•To display another Zone's Edit Mode window, click on the entry for the required Zone in the left-hand menu. For an example, see Figure 923 below:
Figure 923

2.Either:
i.In the left-hand list of the Zone's Edit Mode window, click on the small 'arrow' symbol to display a list of the Sensors associated with the Zone. See Figure 924 below:
Figure 924
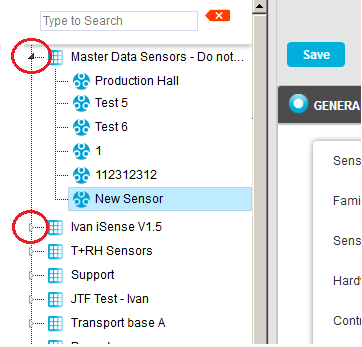
ii.In the left-hand list, click on the required Sensor's icon ![]() .
.
Or:
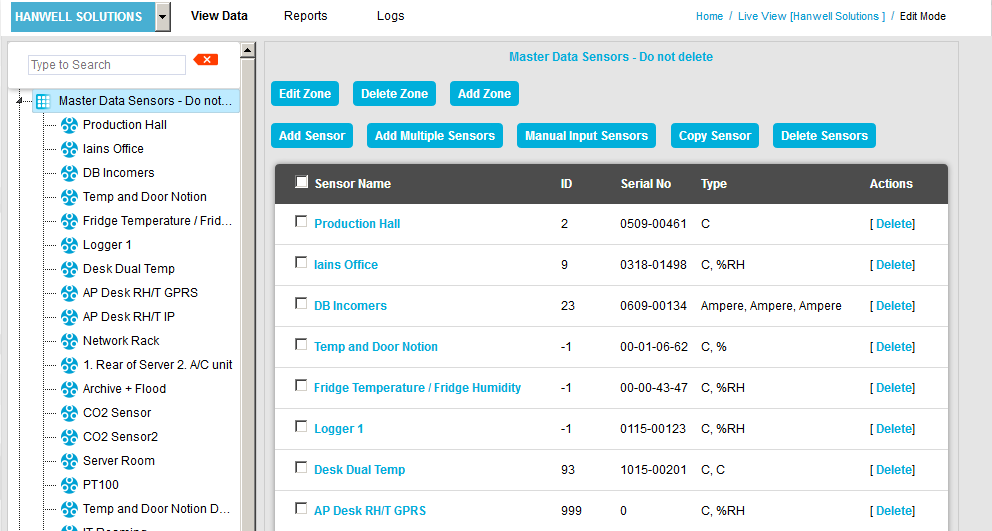
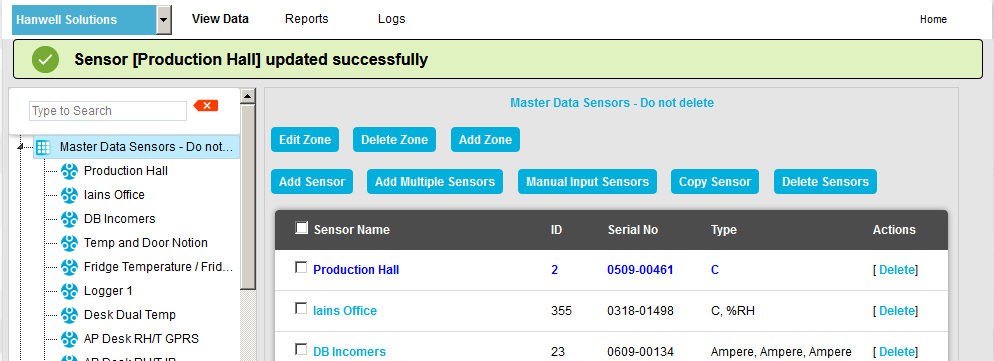
In table in the Zone's Edit Mode window, click on the required Sensor's name in the Sensor Name column. See Figure 925 below:
Figure 925
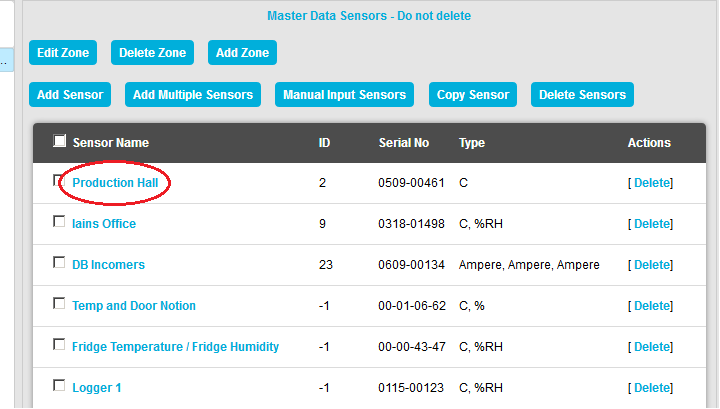
•The Edit Mode window for the selected Sensor is displayed. See Figure 926 below:
Figure 926
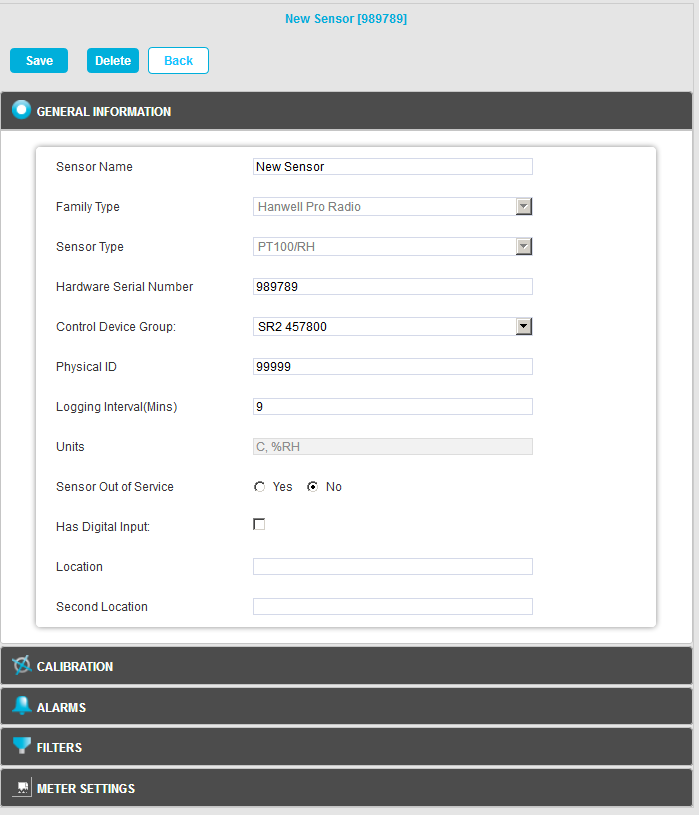
3.Click on the ALARMS pane at the bottom of the Edit Mode window to access the Alarm Parameter/Level functionality. See Figure 926 above.
•The ALARMS pane is displayed. See Figure 927 below:
Figure 927
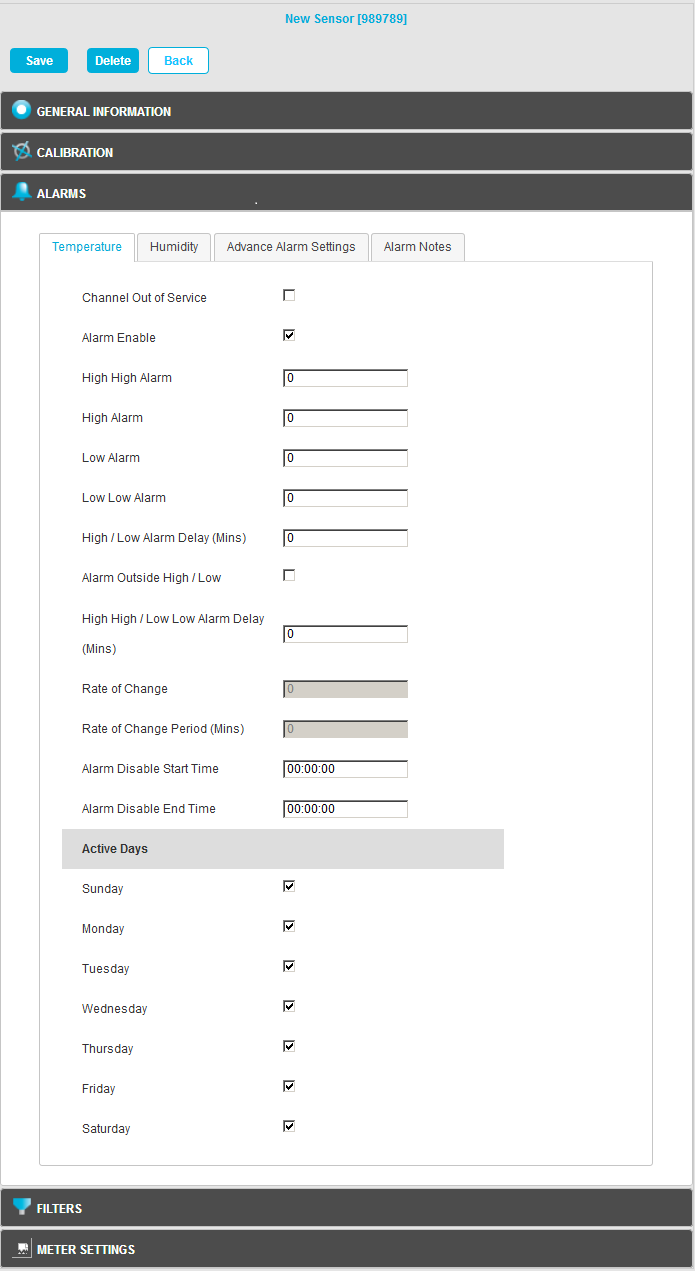
4.Click on the Alarm Notes tab to display the Alarm Notes pane for the selected Sensor/Transmitter. See Figure 928 below:
Figure 928
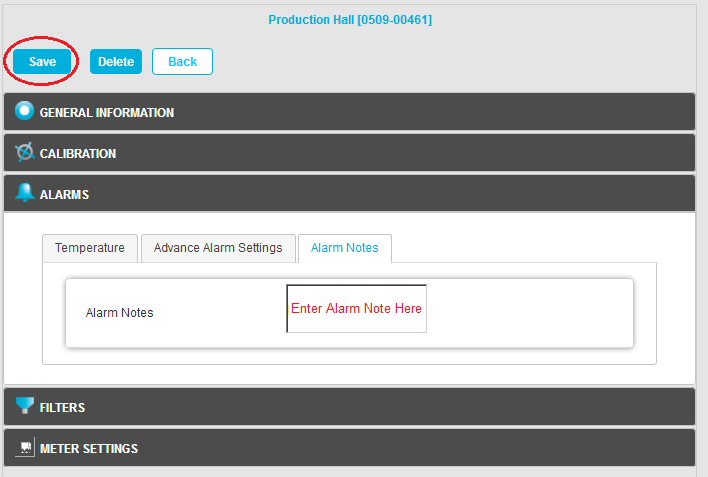
5.Type your Sensor/Transmitter's Alarm Note into the Alarm Notes dialog box or edit an existing Alarm Note.
6.When happy, click Save. See Figure 928 above.
•This will save the Alarm Note and either associate the Note with, or update the existing Note of, the currently selected Sensor/Transmitter.
•If the Update has been successful, you will be returned to the Zone's Edit Mode window and the following message will be displayed. See 929 below:
Figure 929
•Individual Alarm Notes can be assigned for every Sensor/Transmitter on the System.