
Contents
EMS is able to generate User Configurable Reports of information generated from, and related to, the System's Sensor/Transmitters.
•The Reports can be tailored to the Customer’s individual specifications and generated at the click of an on-screen button in PDF format, with the option to have a .CSV data file attached.
•Reports can be generated of data collected by a selected Sensor or Sensors for a specified date range (the past week by default).
•Additionally, the Reports can be scheduled to be auto-generated on a daily, weekly or monthly basis and sent to the User by email.
•Your Company Logo can be automatically added to any standard (PDF or RTF) report.
•Accessing Report Functionality
Accessing Report Functionality
To generate and/or access Reports in EMS:
Either:
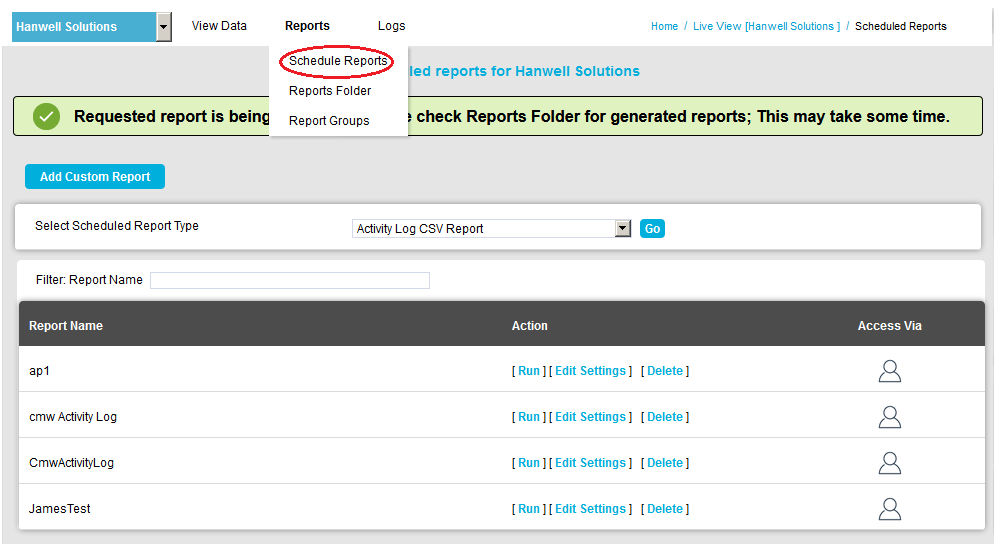
Select Schedule Reports from the Reports drop-down menu on a selected Site's main menu bar. See Figure 1297 below:
Figure 1297

Or:
Clicking on the View reports button on the required Site's icon on the Home page. See Figure 1298 below:
Figure 1298
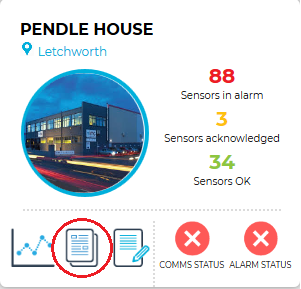
•Using either option displays the Scheduled Reports for [Site Name] window for the chosen Site, allowing the User to schedule a selected Report for the Site. See Figure 1299 below:
Figure 1299
Running a Report
1.From the displayed Scheduled Reports window, select the required Report Type from the Select Scheduled Report Type drop-down. See Figure 1300 below:
Figure 1300
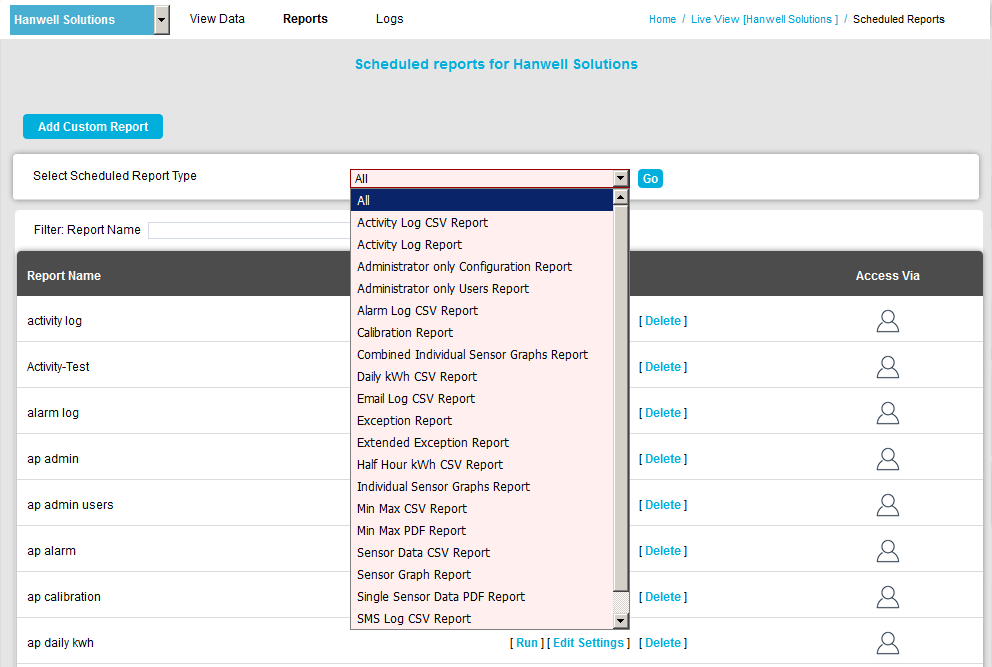
2.Click on the Go button.
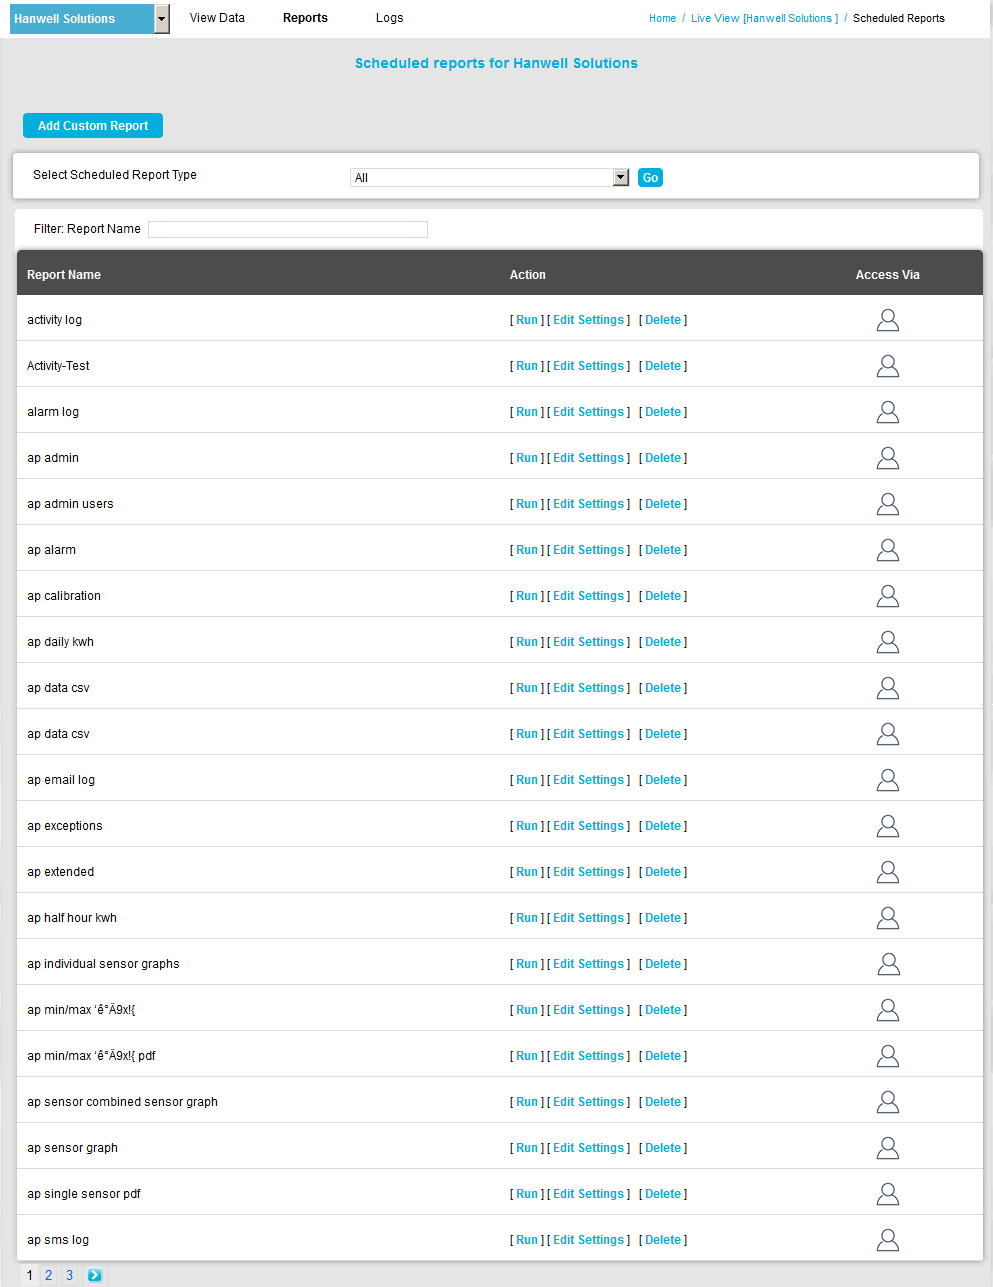
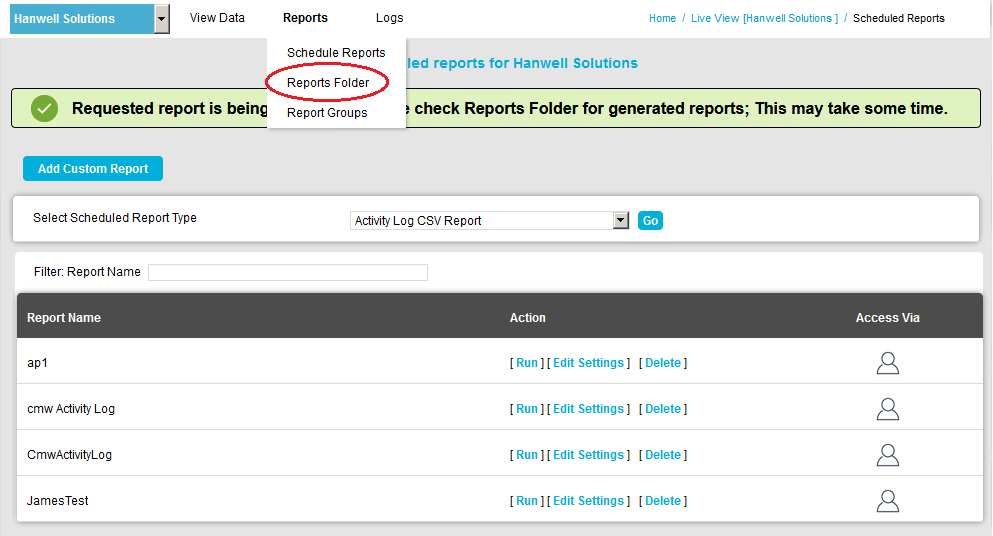
•All Reports of the selected type for the chosen Site are displayed in the Scheduled Reports window's table. See Figure 1301 below:
Figure 1301
3.Click on [Run] for the particular report you wish to run.
| Note: | To help locate a particular individual Report in a long list, type in the name of the required Report into the Filter: Report Name field. As you type, a list of names containing the characters typed so far will be displayed, allowing easier selection of the required Report. |
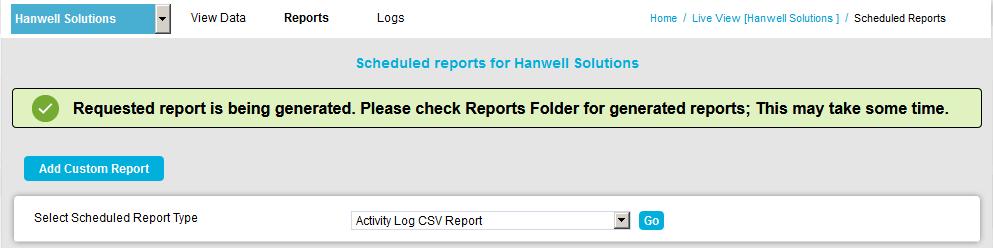
•The following window is displayed as the Report is being generated. See Figure 1302 below:
Figure 1302
1.From the displayed Scheduled Reports window, select the required Report Type from the Select Scheduled Report Type drop-down. See Figure 1303 below:
Figure 1303
2.Click on the Go button.
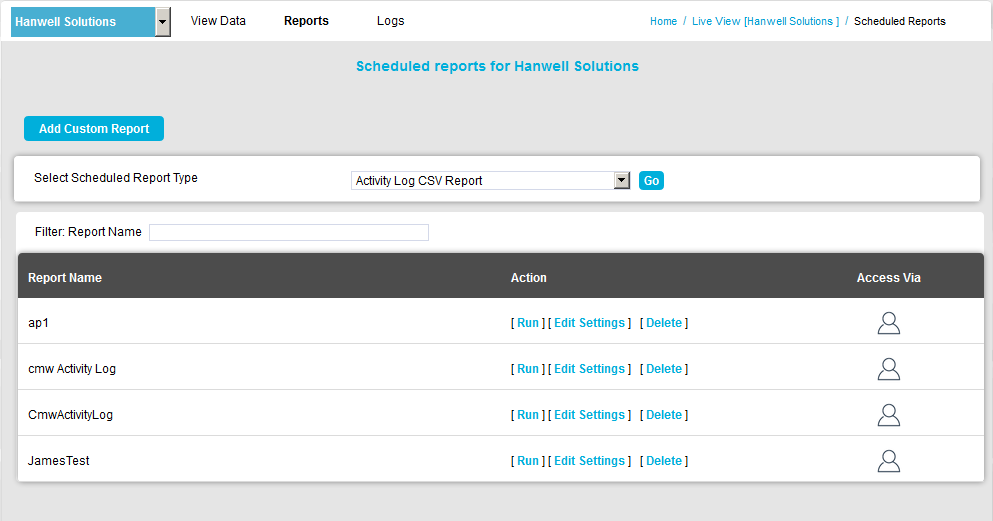
•All Reports of the selected type for the chosen Site are displayed in the Scheduled Reports window's table. See Figure 1304 below:
Figure 1304
3.Click on [Edit Settings] for the particular report you wish to schedule to run or view over a particular date range.
| Note: | To help locate a particular individual Report in a long list, type in the name of the required Report into the Filter: Report Name field. As you type, a list of names containing the characters typed so far will be displayed, allowing easier selection of the required Report. |
•The Edit Custom Report window is displayed for the selected Report with the Report Setting tab window displayed by default and the selected Report Type and individual Report displayed in the Report Type: and Report User Title: fields. See Figure 1305 below:
Figure 1305
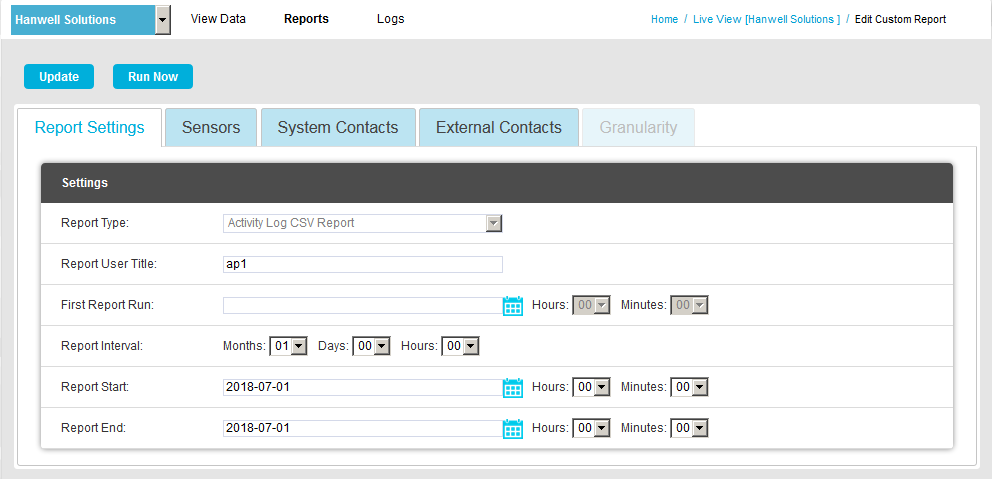
Note: The Report User Title: field is editable, allowing the selected Report's title to be changed.
4.Define the Scheduling for the Report using the First Report Run:, Report Interval:, Report Start:, Report Start: and Report End: fields, associated Hours and Minutes drop-downs and Calendar popups.
➢First Report Run
Select a date and time for the first Report run using the First Report Run: controls.
This should be later today or any time in the future.
➢Report Interval
Report Interval defines the length of time between repeated runs of the Report. For example, an interval of one day would give daily Reports.
You don’t have to specify a Report Interval; if you don't, this would give a ‘one off’ Report.
➢Report Start/Report End
Use the Report Start: and Report End: controls to specify the time span for the Report.
This would typically be dates in the past, but could be dates in the future; although if, for example, you specified a start date one week in the future and end date two weeks in the future you would have to wait 2 weeks before you saw a Report.
You should
Either:
Set an Interval, with no Report Start or Report End time to give daily, weekly etc. Reports.
Or:
Set Report Start and Report End times with no Interval to report on a specific time span.
| Note: | When changing the System's Time Zone, be aware that the schedule date of already scheduled reports may be affected, potentially leading to the schedule being shifted and the Report being generated on another day of the month. Therefore, when changing the Time Zone, remember to adjust the settings for already scheduled reports once the Time Zone change has been made. |
5.Either:
Click on Update to update the individual Report's details.
Or:
Click on Run Now to update the individual Report's details and run the Report.
•The following window is displayed as the Report is being generated. See Figure 1306 below:
Figure 1306
Viewing a Generated Report
1.Select Reports Folder from the Reports drop-down menu on the Site's main menu bar. See Figure 1307 below:
Figure 1307
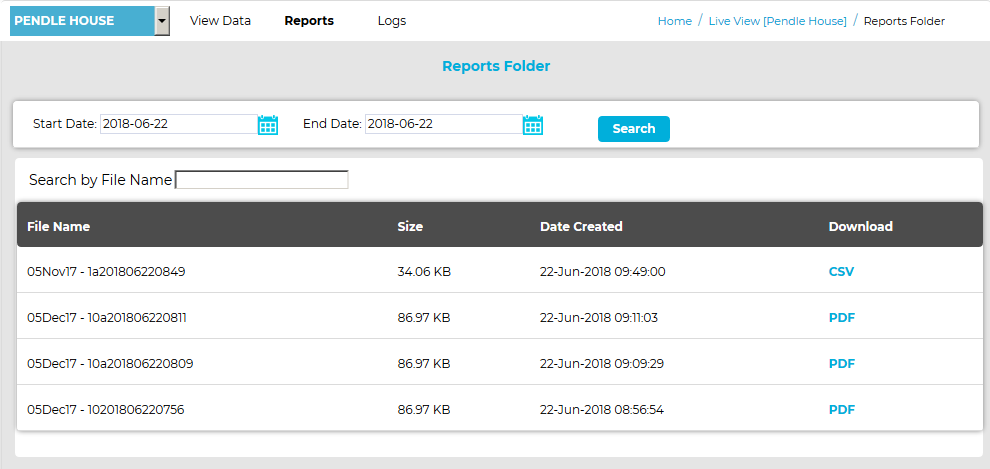
•The Reports Folder window is displayed. See Figure 1308 below:
Figure 1308
From the displayed window, you can:
•Click on the link listed in the Download column for the required report.
•Search for Reports for specified date ranges, by using the Start Date: and End Date: fields (entering the required dates in the format yyyy-mm-dd) and popup calendars and then clicking on the Search button.
•Search for Reports by File Name by typing the required Report's name into the Search by File Name field.
As you type a list of names containing the characters typed so far will be displayed, allowing easier selection of the required Report.
2.To view the required Report, click on the CSV or PDF entry (depending on the Report Type of the required report), in the Download column of the displayed window, to download the data as either a .CSV or PDF file.
•.CSV files will be downloaded to your PC's default location, typically: C:\Users\<User Name>\Downloads
•For PDF files, a window is displayed. See Figure 1309 below:
Figure 1309
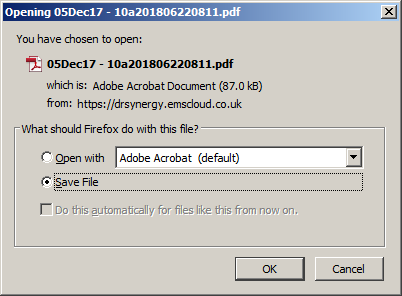
•Either:
Select Open with, after selecting an application to open the PDF with from the drop-down list.
•Or:
Select Save File in the displayed window and click on OK to save the file to your PC's default location, typically: C:\Users\<User Name>\Downloads
1.Select Scheduled Reports from the Reports drop-down menu on the Site's main menu bar. See Figure 1310 below:
Figure 1310
2.In the displayed Scheduled Reports for [Site Name], click on Add Custom Report button.
•The Add Custom Report window is displayed. See Figure 1311 below:
Figure 1311
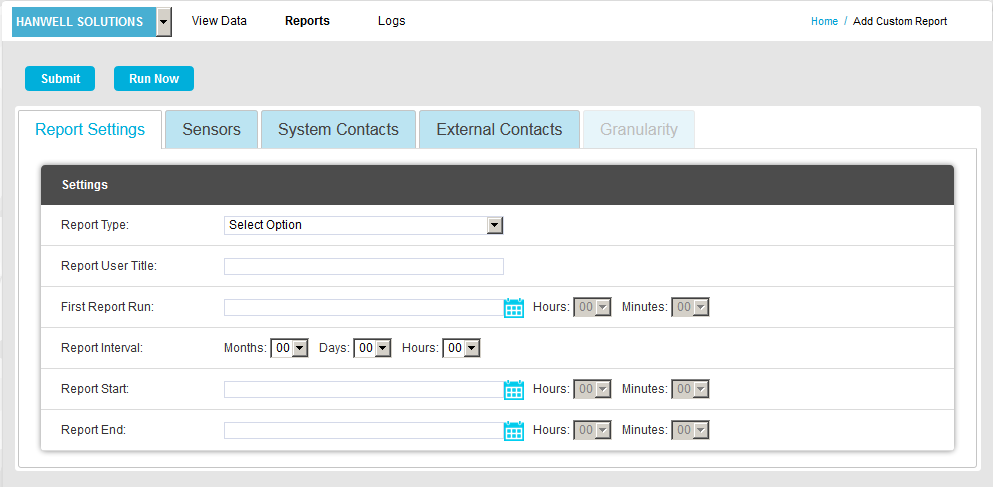
3.Define the Report by editing the settings accessed via the Report Settings, Sensors, System Contacts, External Contacts and Granularity tabs in the displayed Add Custom Report window:
i.From the Report Type: drop-down menu, select the required Scheduled Report Type. See Figure 1312 below:
Figure 1312
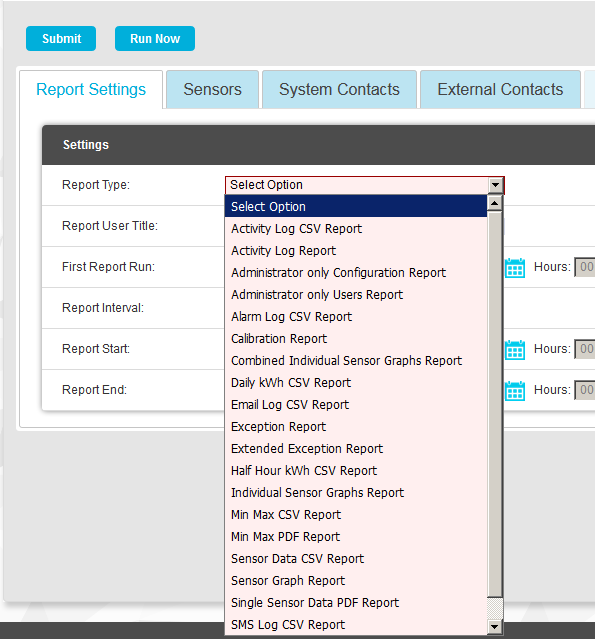
ii.Enter a title for the new report into the Report User Title: field.
Note: At this point the Sensor tab in the Add Custom Report window will become active, if it is not already.
iii.Define the Scheduling for the Report using the First Report Run:, Report Interval:, Report Start:, Report Start: and Report End: fields, associated Hours and Minutes drop-downs and Calendar popups. See Figure 1311 above.
➢First Report Run
Select a date and time for the first Report run using the First Report Run: controls.
This should be later today or any time in the future.
➢Report Interval
Report Interval defines the length of time between repeated runs of the Report. For example, an interval of one day would give daily Reports.
You don’t have to specify a Report Interval; if you don't, this would give a ‘one off’ Report.
➢Report Start/Report End
Use the Report Start: and Report End: controls to specify the time span for the Report.
This would typically be dates in the past, but could be dates in the future; although if, for example, you specified a start date one week in the future and end date two weeks in the future you would have to wait 2 weeks before you saw a Report.
| Note: | You should Either: Set an Interval, with no Report Start or Report End time. Or: Set Report Start and Report End times with no Interval. |
Select the Sensors to be reported on from the Sensors tab window.
| Note: | Not all Reports need to have Sensors defined. See Report Types for details of which Reports need Sensors selecting. |
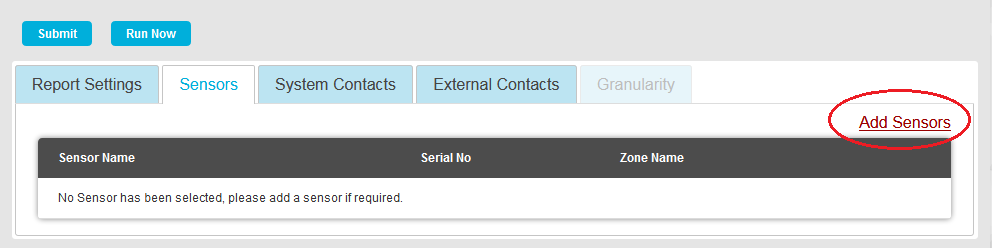
To add or remove Sensors from the displayed table:
i.Click on the Add Sensors link. See Figure 1313 below:
Figure 1313
➢The Add Sensors window is displayed. See Figure 1314 below:
Figure 1314
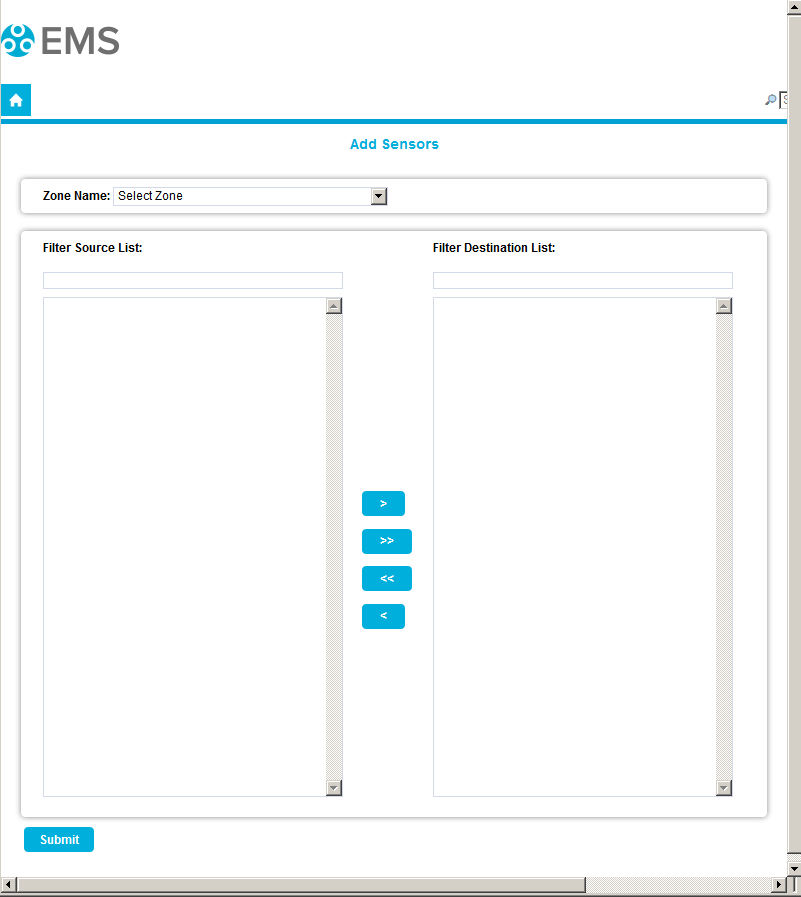
ii.Select the Zone containing the Sensors you wish to to be included in the Report from the Zone Name: drop-down list.
➢When the Zone is selected, the Sensors associated with the selected Zone will populate the left-hand column (Source List).
iii.Select the Sensors you wish to be included in the Report from the left-hand column (Source List).
➢If there are a large number of Sensors, the required Sensor can be found by using the Filter Source List: and Filter Destination List: fields.
iv.Click on the right-pointing arrow to move the selected Sensors to the right-hand column (Destination List). These Sensors' data will be added to the selected Report.
➢To move/select all Sensors from the Source List to the Destination List, click on the double right-pointing arrow.
➢To deselect individual Sensors, highlight them individually in the Destination List and click the left-pointing arrow.
➢To deselect all Sensors from the Destination List, click on the double left-pointing arrow.
➢See Figure 1315 below:
Figure 1315
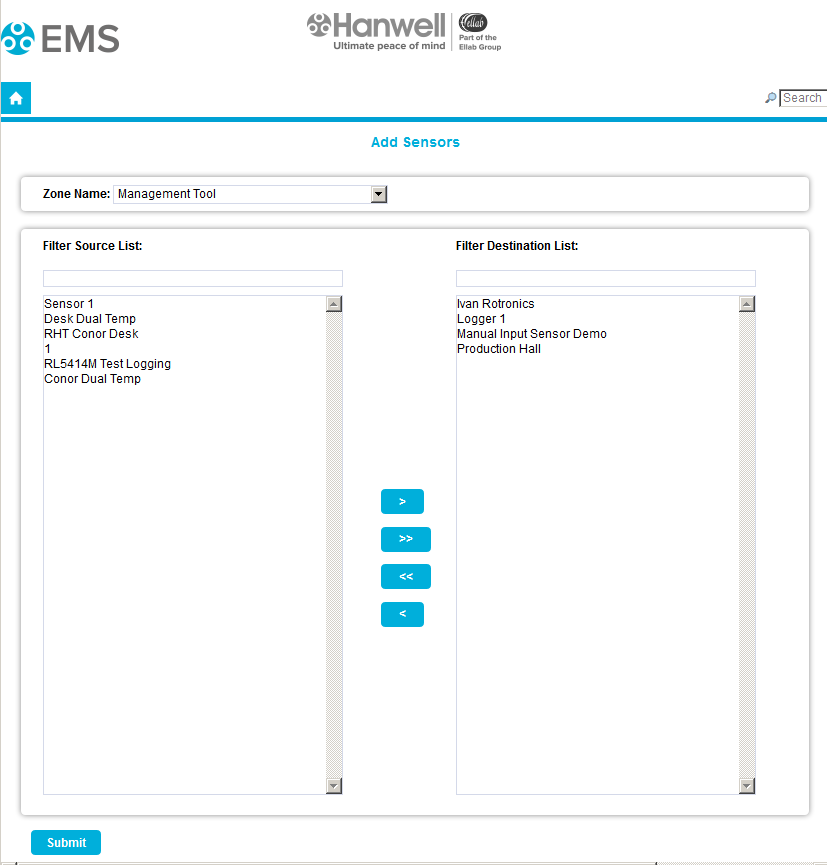
v.Once you are happy with your selection of Sensors, select the Submit button at the bottom left of the Add Sensors tab window. ee Figure 1315 above.
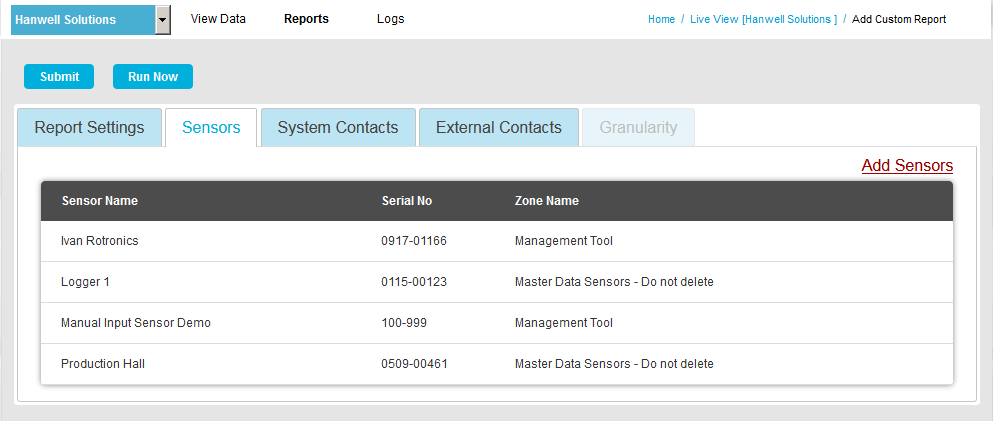
•The Add Custom Report window's Sensors tab table is populated with the selected Sensors. See Figure 1316 below:
Figure 1316
Select the System Contacts to receive the selected Report from the System Contacts window.
➢To add Contacts to the System see Adding New Users.
To add or remove System Contacts from the displayed table:
i.Click on the Add Contacts link.
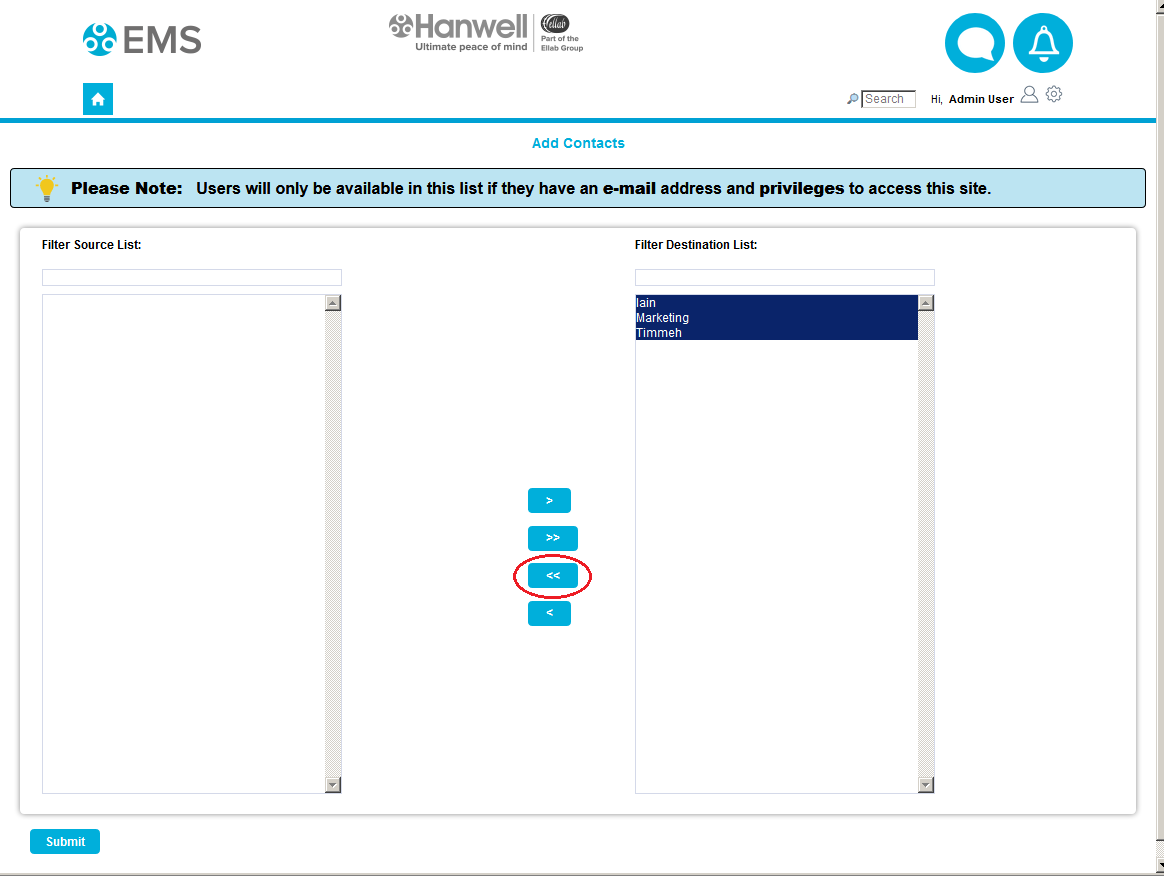
➢The Add Contacts window is displayed. See Figure 1317 below:
Figure 1317
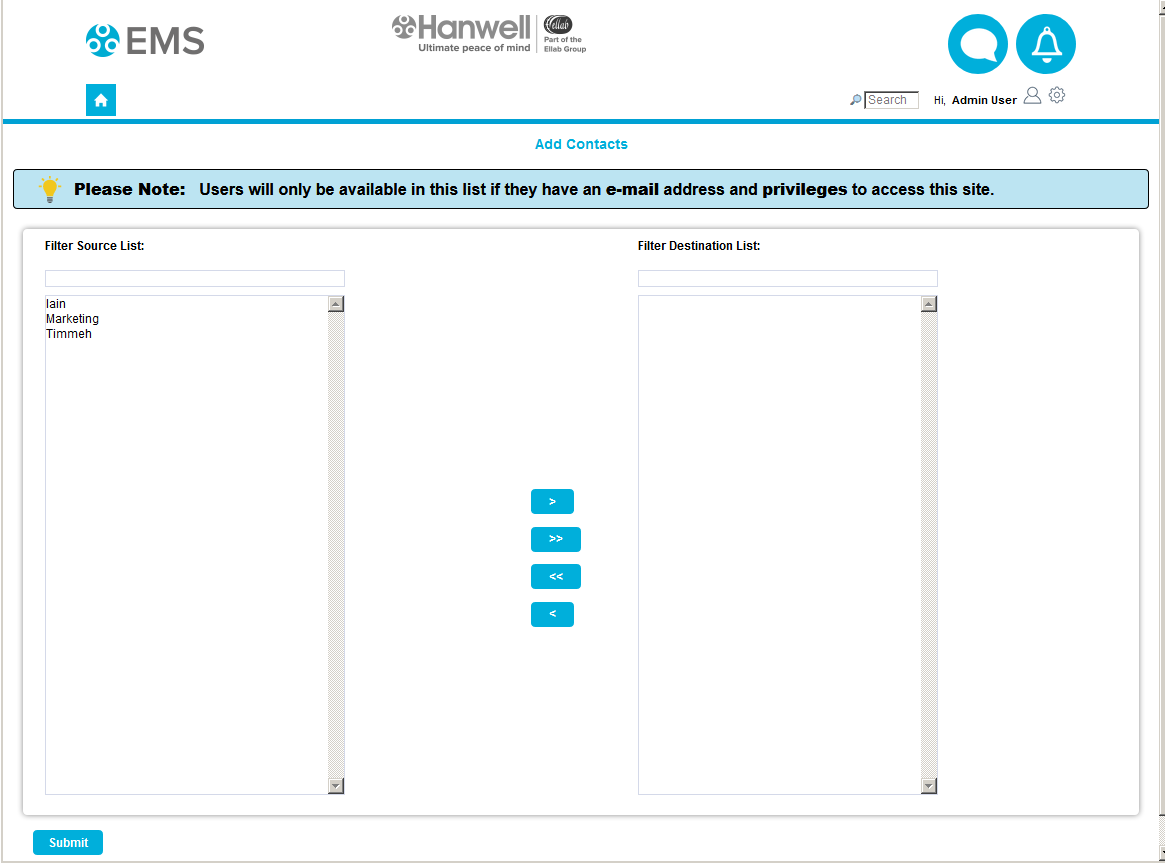
| Note: | As mentioned in the note displayed in the Add Contacts window (see Figure 1317 above), Users will only be available for addition as System Contacts if they have a valid email address and Access Privileges to the selected Site. |
➢System Contacts associated with the selected Site will appear in the left hand Source List panel.
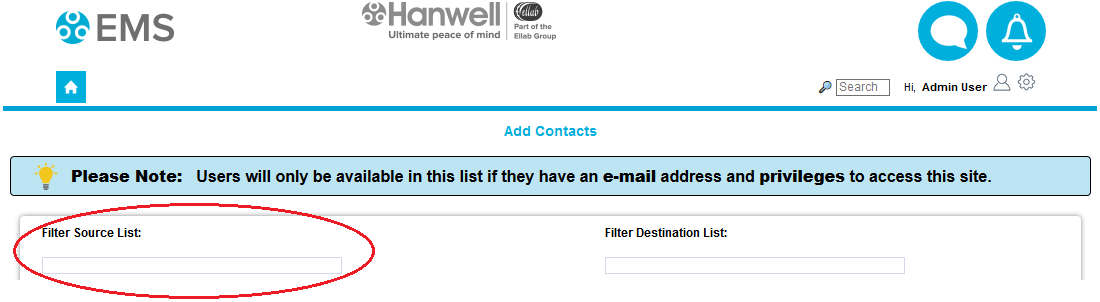
➢If there are a large number of System Contacts, the required System Contact can be found by using the Filter Source List: field. See Figure 1318 below:
Figure 1318
ii.Adding System Contacts to the List of those Receiving Reports:
➢To add a single Contact to the list of those receiving Reports, select a single Contact in the Source List panel and click on the single the right-facing arrow to move the selected Site Contact to the right-hand Destination List panel.
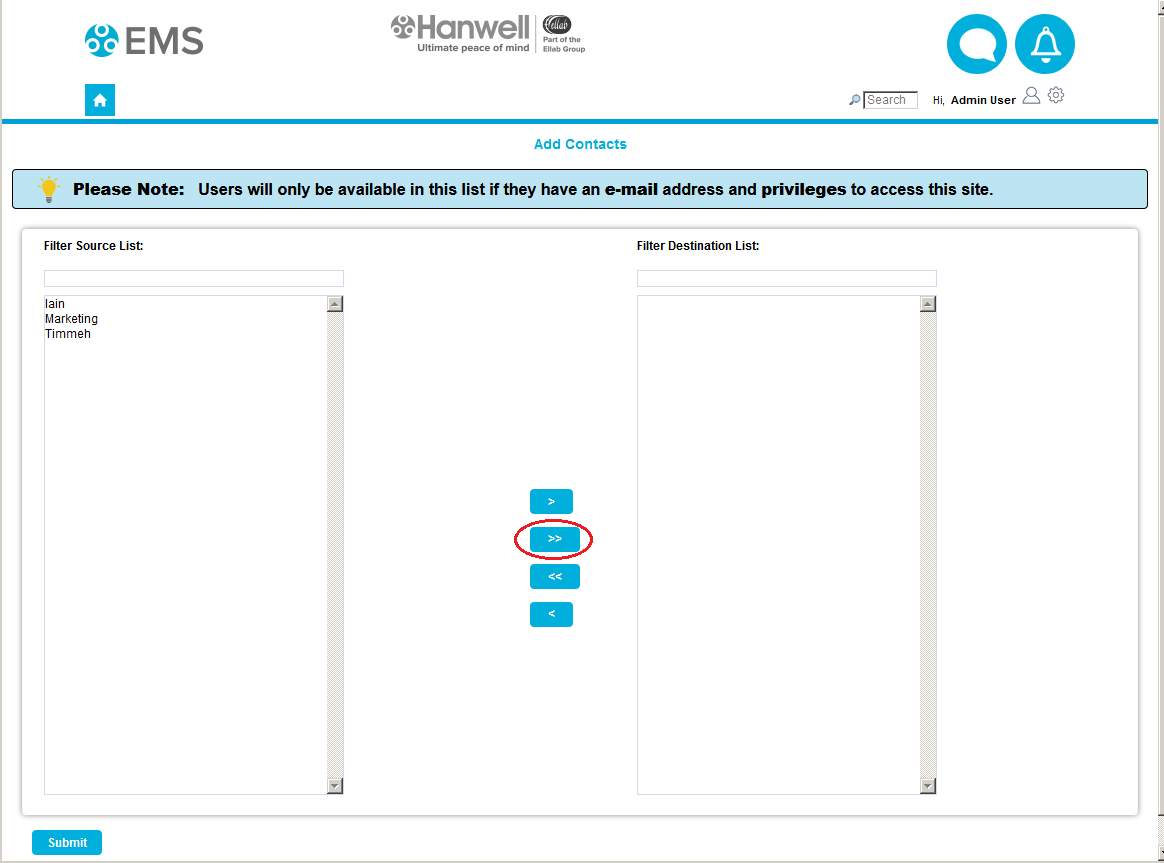
➢To add all of a Site's Contacts to the list of those receiving Reports, click on the double right-facing arrow to move all of the selected Site's Contacts to the right-hand Destination List panel. See Figure 1319 below:
Figure 1319
To Remove Contacts from the List of those Receiving Reports:
•To remove a single Contact from the list of those receiving Reports, select a single Contact in the Destination List panel and click on the single left-facing arrow to move the selected Site Contact to the Source List.
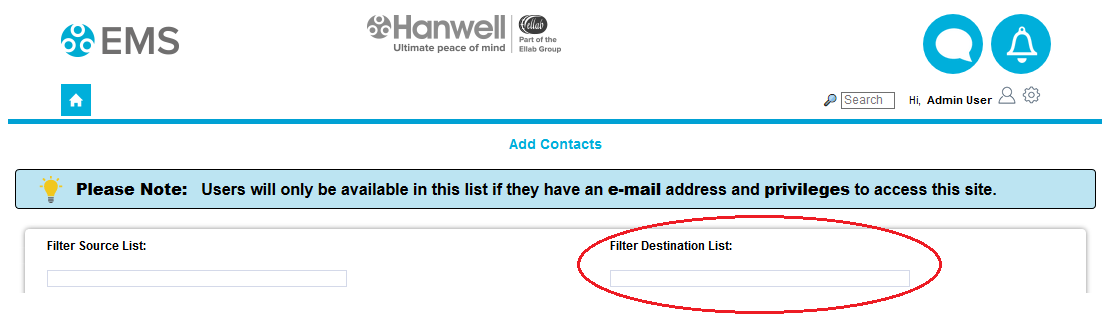
➢If there are a large number of System Contacts receiving reports, the required System Contact can be found by using the Filter Destination List: field. See Figure 1320 below:
Figure 1320
•To remove all Contacts from the list of those receiving Reports, click on the double left-facing arrow to move all of the group's Contacts to the Source: list. See Figure 1321 below:
Figure 1321
iii.Once you are happy with your selection of System Contacts, select the Submit button at the bottom-left of the Add Contacts window.
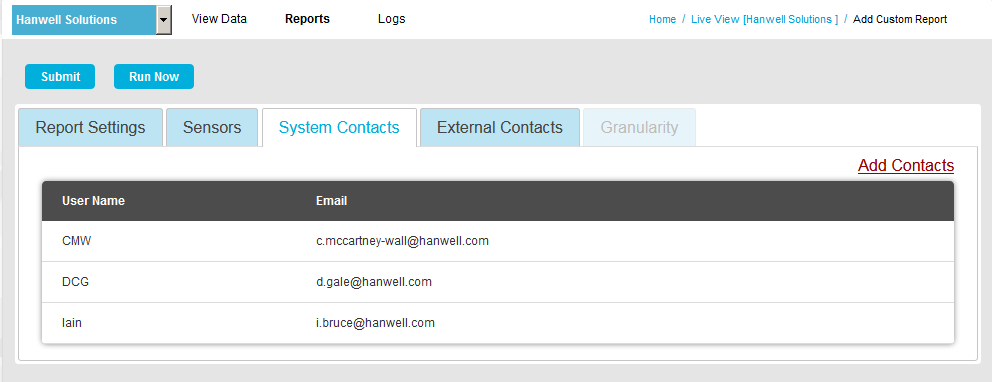
•The Add Custom Report window's System Contacts tab window is populated with the selected System Contacts. See Figure 1322 below:
Figure 1322
•External Contacts Tab (Optional)
Using the External Contacts tab window, (optionally) select External Contacts to receive the selected Report.
To add or remove External Contacts from the displayed table:
i.Click on the Add Contacts link.
➢The Add Contacts window is displayed. See Figure 1323 below:
Figure 1323
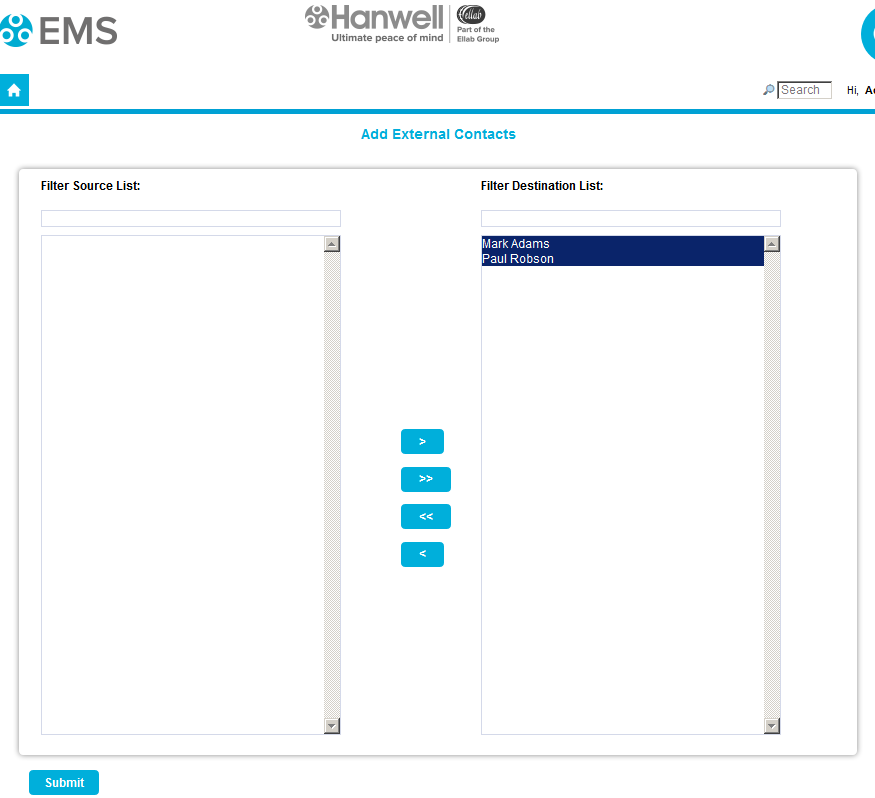
➢External Contacts associated with the selected Site will appear in the left hand Source List panel.
➢If there are a large number of External Contacts, the required External Contact can be found by using the Filter: fields.
ii.Adding External Contacts to the List of those Receiving Reports:
➢To add a single Contact to the list of those receiving Reports, select a single Contact in the Source List panel and click on the single the right-facing arrow to move the selected Site Contact to the right-hand Destination List panel.
➢If there are a large number of External Contacts, the required External Contact can be found by using the Filter Source List: field. See Figure 1324 below:
Figure 1324
➢To add all of a Site's Contacts to the list of those receiving Reports, click on the double arrow to move all of the selected Site's Contacts to the right-hand Destination List panel.
Removing External Contacts from the List of those Receiving Reports:
➢To remove a single External Contact from the list of those receiving Reports, select a single Contact in the Destination List panel and click on the single left-facing arrow to move the selected Site Contact to the Source: list.
➢If there are a large number of External Contacts receiving reports, the required External Contact can be found by using the Filter Destination List: field. See Figure 1325 below:
Figure 1325
➢To remove all of a Site's Contacts from the list of those receiving Reports, click on the double left-facing arrow to move all of the group's Contacts to the Source: list. See Figure 1326 below:
Figure 1326
iii.Once you are happy with your selection of External Contacts, select the Submit button at the bottom-left of the Add Contacts window.
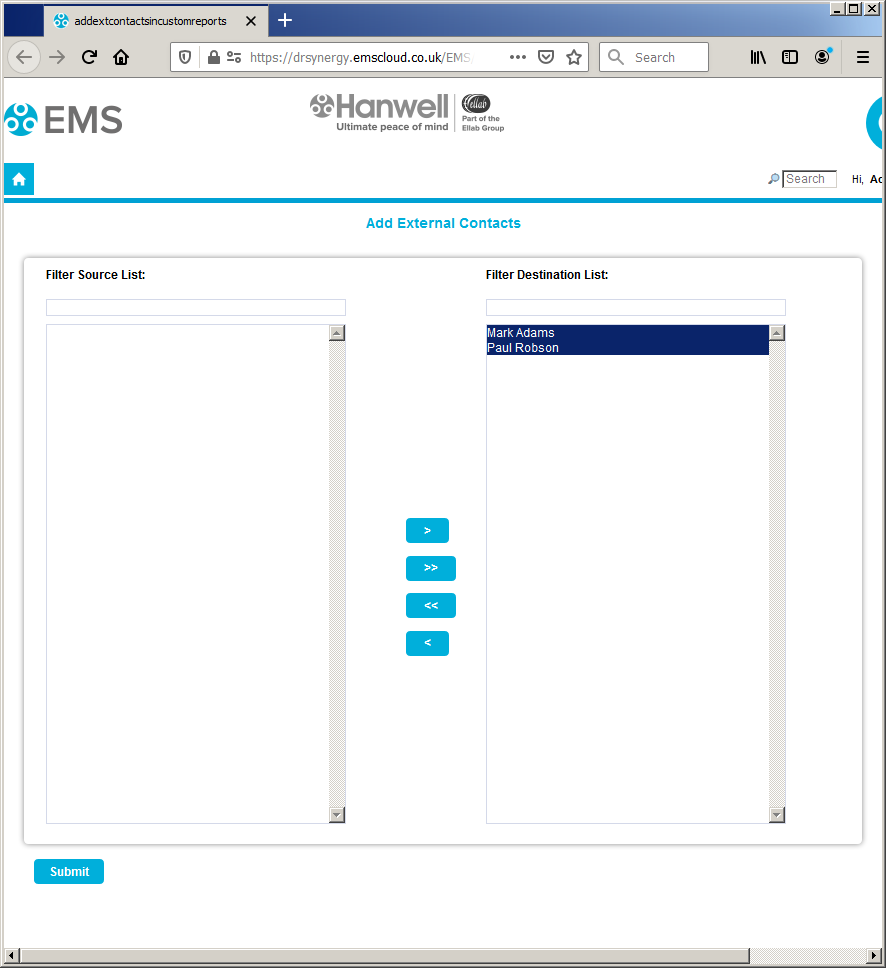
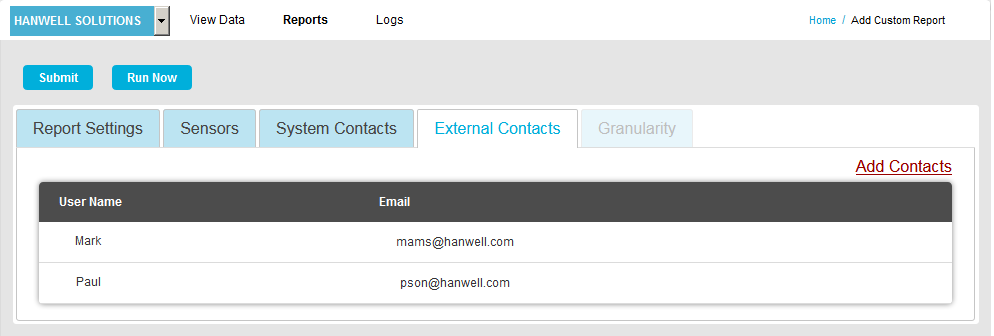
➢The Add Custom Report window's External Contacts tab window is populated with the selected External Contacts. See Figure 1327 below:
Figure 1327
➢For information on adding External Contacts, navigate to: Create External Contacts.
Granularity, in this instance, refers to the size of the components a data field is sub-divided into i.e how much detail is shown in a specified Report.
| Note: | This property is only applicable to Min Max Reports; for all other selected Report types, this tab is greyed out. |
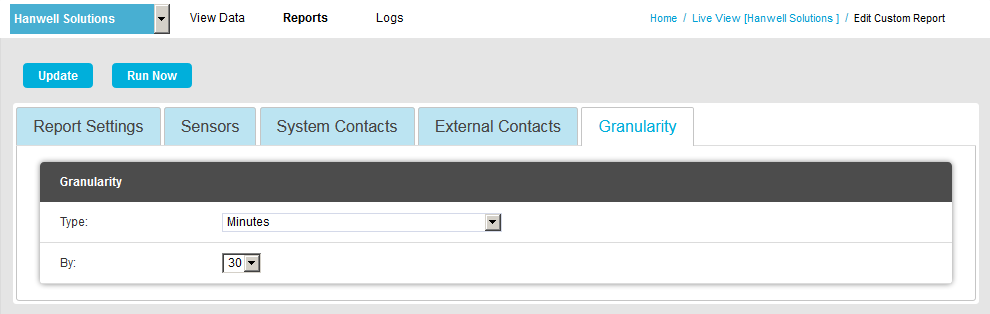
The Type: and By: drop-down lists in the Add Custom Report window's Granularity tab window, allow you to define the degree of granularity/detail shown in the selected report.
➢From the Type: drop-down list, select Minutes, Hours, Days or Weeks.
➢From the By: drop-down list, select the number of Minutes, Hours, Days or Weeks the Report's dataset is to be divided into. See Figure 1328 below:
Figure 1328
3.Once all of the new Scheduled Report's parameters have been defined via the tabs on the Add Custom Report window:
Either: Click on the Submit button to create the Schedule and run it from the defined date/time and at the defined interval.
Or: Click the Run Now button to run the new Scheduled Report straight away.
•Scheduled Reports are saved to the Reports Folder.
| Note 1: | Some delay can be expected if a large report is submitted. |
| Note 2: | If your Email Server has been set up to limit the maximum allowed email/attachment size, then Scheduled Reports in excess of the size limit will be blocked by your Email Server. Please note that because there is no standard mechanism for feeding this eventuality back to the email client, Synergy cannot know that these emails have been blocked by the server. Most Email Servers inform the sender of this situation by placing a message in the sender account's Inbox. If Scheduled email Reports are not being sent, please check the Inbox for the sender account you setup in Synergy |
Report Groups can be created which contain a selection of Reports; to be run for either a selected Site or Sensor Group.
To Create a Report Group:
1.From the Table View in the OVERVIEW window, check either the SITES or SENSOR GROUPS radio button, depending on whether you want the Report Group to be assigned to a Site or Sensor Group.
2.In the Reports column of the displayed window, click on the Reports icon corresponding to the Site or Sensor Group the Report Group is to be allocated to.
See Figure 1329 below:
Figure 1329

3.In the displayed Scheduled reports for [Site or Sensor Group] window, select Report Groups from the Reports drop-down menu. See Figure 1330 below:
Figure 1330

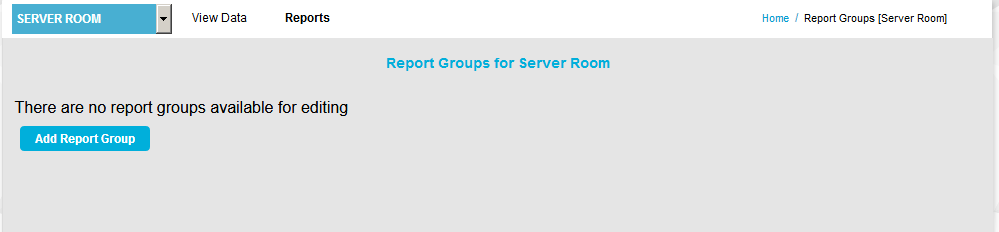
4.The Report Groups for [Site or Sensor Group] window is displayed. See Figure 1331 below:
Figure 1331
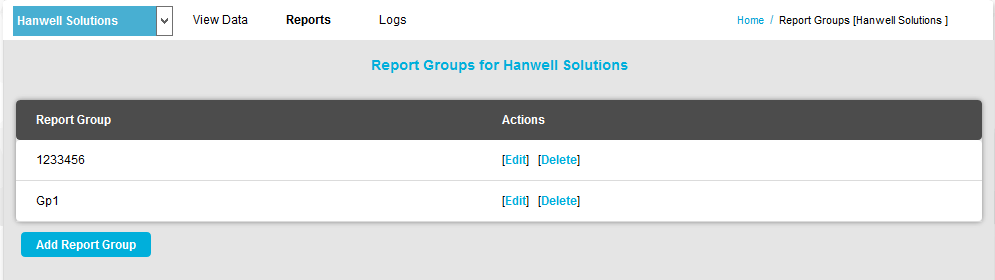
| Note: | Existing Report Groups may be displayed in this window in a table. See Figure 1332 below: |
Figure 1332
5.Click on the Add Report Group button.
•The Add Report Group window is displayed. See Figure 1333 below:
Figure 1333
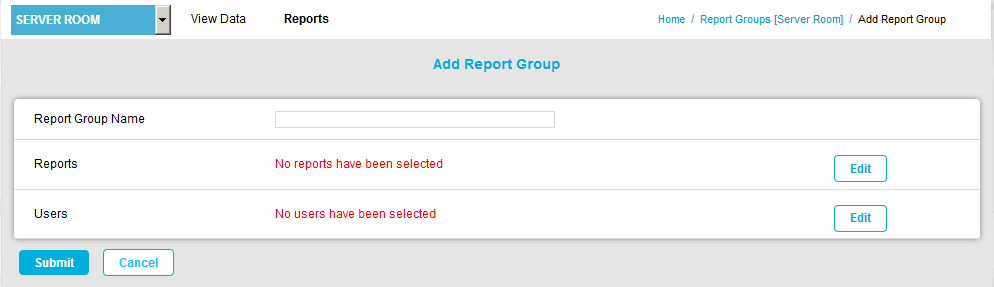
6.Enter a name for the new Report Group into the Report Group Name field.
7.Click on Edit in the Reports field to display the Select Reports window. See Figure 1334 below:
Figure 1334

8.Select the Report or Reports to be included in the Reports Group in the left-hand Available Reports list:
•To select a single Report, click on its entry to highlight it, then click on the single right-pointing arrow button to move it to the Selected Reports list.
➢To deselect a single highlighted Report in the Selected Reports list, click on its entry to highlight it, then click on the single left-pointing to move it back to the Available Reports list.
•To select multiple Reports, hold down the Shift key and click on the required Report's entries to highlight them, then click on the single right-pointing arrow button to move them to the Selected Reports list.
➢To deselect multiple highlighted Reports in the Selected Reports list, hold down the Shift key and click on the required Report's entries to highlight them, then click on the single left-pointing to move them back to the Available Reports list.
•To select all Reports in the Available Reports list, click on the double right-pointing arrow button.
➢To deselect all Reports in the Selected Reports list, click on the double left-pointing arrow buttons to move them back to the Available Reports list.
9.Click on OK.
•You are returned to the Add Report Group window.
•Selected Reports are shown in the Reports pane.
10.Click on Edit in the Users field to display the Select Users window. See Figure 1335 below:
Figure 1335
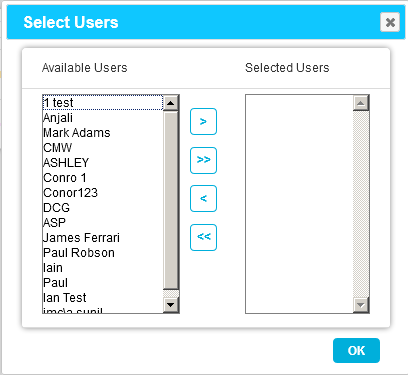
11.Select the User or Users to be included in the Reports Group in the left-hand Available Users list:
•To select a single User, click on their entry to highlight it, then click on the single right-pointing arrow button to move them to the Selected Users list.
➢To deselect a single highlighted User in the Selected Users list, click on their entry to highlight it, then click on the single left-pointing to move them back to the Available Users list.
•To select multiple Users, hold down the Shift key and click on the required User's entries to highlight them, then click on the single right-pointing arrow button to move them to the Selected Users list.
➢To deselect multiple highlighted Users in the Selected Users list, hold down the Shift key and click on the required User's entries to highlight them, then click on the single left-pointing to move them back to the Available Users list.
•To select all Users in the Available Users list, click on the double right-pointing arrow button.
➢To deselect all Users in the Selected Users list, click on the double left-pointing arrow buttons to move them back to the Available Users list.
12.Click on OK.
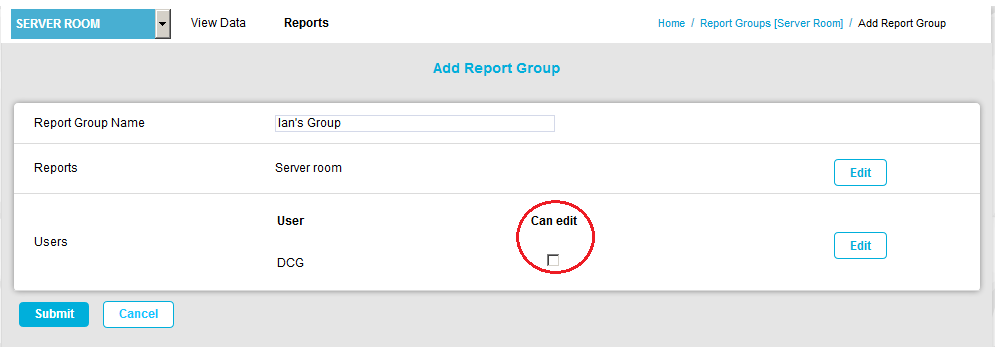
•You are returned to the Add Report Group window.
➢Selected Users are shown in the Users pane.
•If you wish selected Users to be able to edit the Reports Group, check their respective Can edit boxes. See Figure 1336 below:
Figure 1336
13.Click Submit.
•The Report Groups for [Site or Sensor Group] window is displayed, showing the new Reports Group, along with a green message dialog box. See Figure 1337 below:
Figure 1337
![]()
Reports can be generated in one of four languages:
•English
•German
•Spanish
•French
Assuming the required language has been selected in the Browser, Reports are generated in the chosen language as follows:
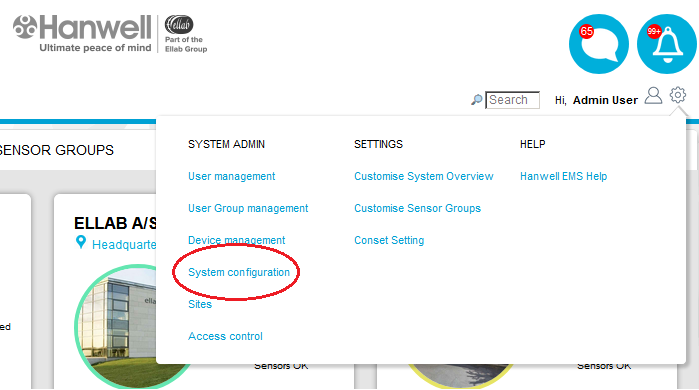
1.From the System menu, select System Configuration. See Figure 1338 below:
Figure 1338
2.In the displayed window, select Report Settings from the SYSTEM CONFIGURATION window. See Figure 1339 below:
Figure 1339

3.In the displayed Report Settings window, select the required language from the Report Language: drop down list. See Figure 1340 below:
Figure 1340
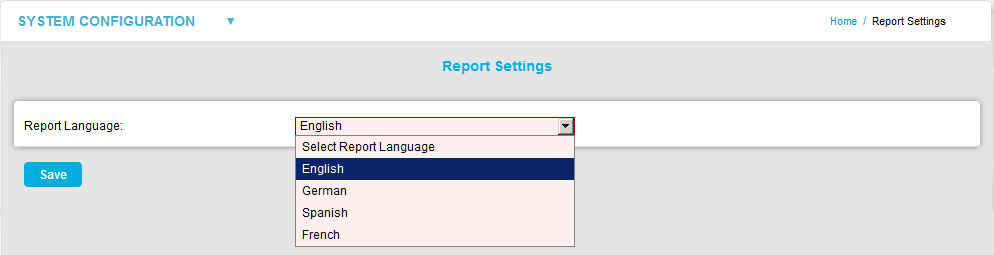
4.Click on Save.
•Reports are generated in the chosen language.